1-4
Correct
Hole With Cone Drill
Indoor Side
Outdoor Side
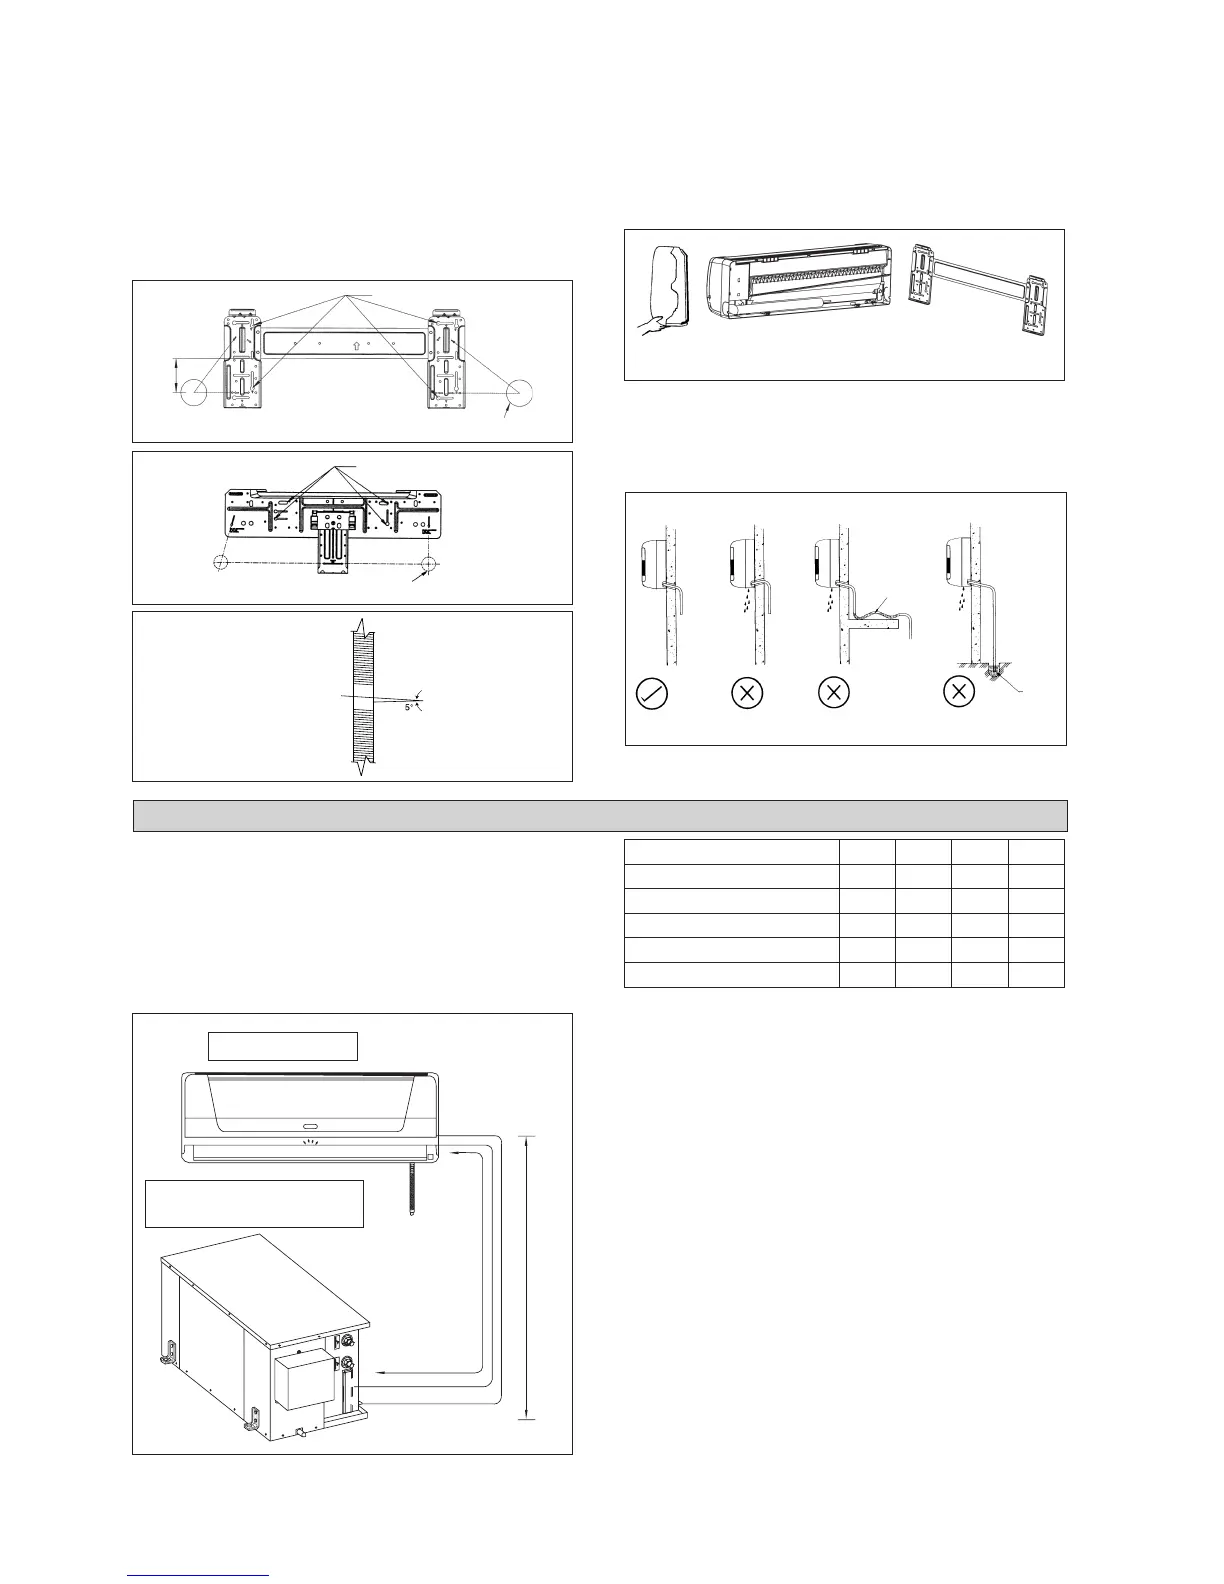
Mounting Installation Plate
Ensure that the wall is strong enough to withstand the weight
of the unit. Otherwise, it is necessary to reinforce the wall
with plates, beams or pillars.
Use the level gauge for horizontal mounting, and fix it with
4 suitable screws.
In case the rear piping draws out, drill a hole 65mm in di-
ameter with a cone drill, slightly lower on the outside wall
(see figure).
Mount The Unit Onto The Installation Plate
Hook the indoor unit onto the upper portion of the
installation plate (Engage the two hooks at the rear top of
the indoor unit with the upper edge of the installation plate).
Ensure that the hooks are properly seated on the
installation plate by moving it to the left and right.
Water Drainage Piping
The indoor drain pipe must be in a downward gradient for
smooth drainage. Avoid situations that are likely to cause
water to leak.
End
Dipped
Into
Water
Water
Leaking
Water
Leaking
Water
Leaking
Wrong
Wrong
Wrong
Drain
Water Drainage
Screw position in the wall
Ø 65.0 mm Hole in the wall
1. Hook the unit onto the installation plate.
Screw position in the wall
72.0
Centre Line
Ø 65.0 mm Hole in the wall
REFRIGERANT PIPING
LH
WATER SOURCE HEAT
PUMP UNIT
5WMWS-GR
Piping Works
• Do not use contaminated or damaged copper tubing. Do
not remove plastic, rubber plugs and brass nuts from the
valves, fittings, tubings and coils until you are ready to
connect suction or liquid line into valves or fittings.
• If any brazing work is required, ensure that the nitrogen
gas is passed through coil and joints while the brazing
work is being done. This will eliminate soot formation on
the inside walls of the copper tubings.
• Cut the connection pipe with a pipe cutter.
• Remove burrs from cut edges of the pipes with remover.
Hold the end of the pipe downwards to prevent metal chips
from entering the pipe.
• Insert the flare nuts, mounted on the connection parts of
both the indoor unit and outdoor unit onto the copper pipes.
• Flare the pipe with extra length above the flaring tool as
shown in the table.
• The flared edge must be even and not cracked or scratched.
The pre-charged of R410A in the outdoor unit is suitable
for standard pipe length up to:-
a) 2 meter for 5WSS07/10/15/16/20/25/30/40/50AR
b) 5 meter for 5WSS60AR
Model (5WMWS-GR) 10 15 20 25
Maximum Length, m (ft), L 12 (39) 12 (39) 15 (49) 15 (49)
Max. Elevation, m (ft), H 5 (16.4) 5 (16.4) 8 (26.2) 8 (26.2)
Max. number of (90°) bends 10 10 10 10
Liquid Pipe Size 1/4" 1/4" 1/4" 1/4"
Gas Pipe Size 3/8" 1/2" 1/2" 5/8"
Piping Length & Elevation
If the pipe is too long, both the capacity and reliability of
the unit will drop. As the number of bends increases,
resistance to the flow of refrigerant system increases, thus
lowering cooling capacity. As a result, the compressor may
become defective. Always choose the shortest path and
follow the recommendations as tabulated below:
Water
Retention