Installation Overview Installing the System
Wall Mounting
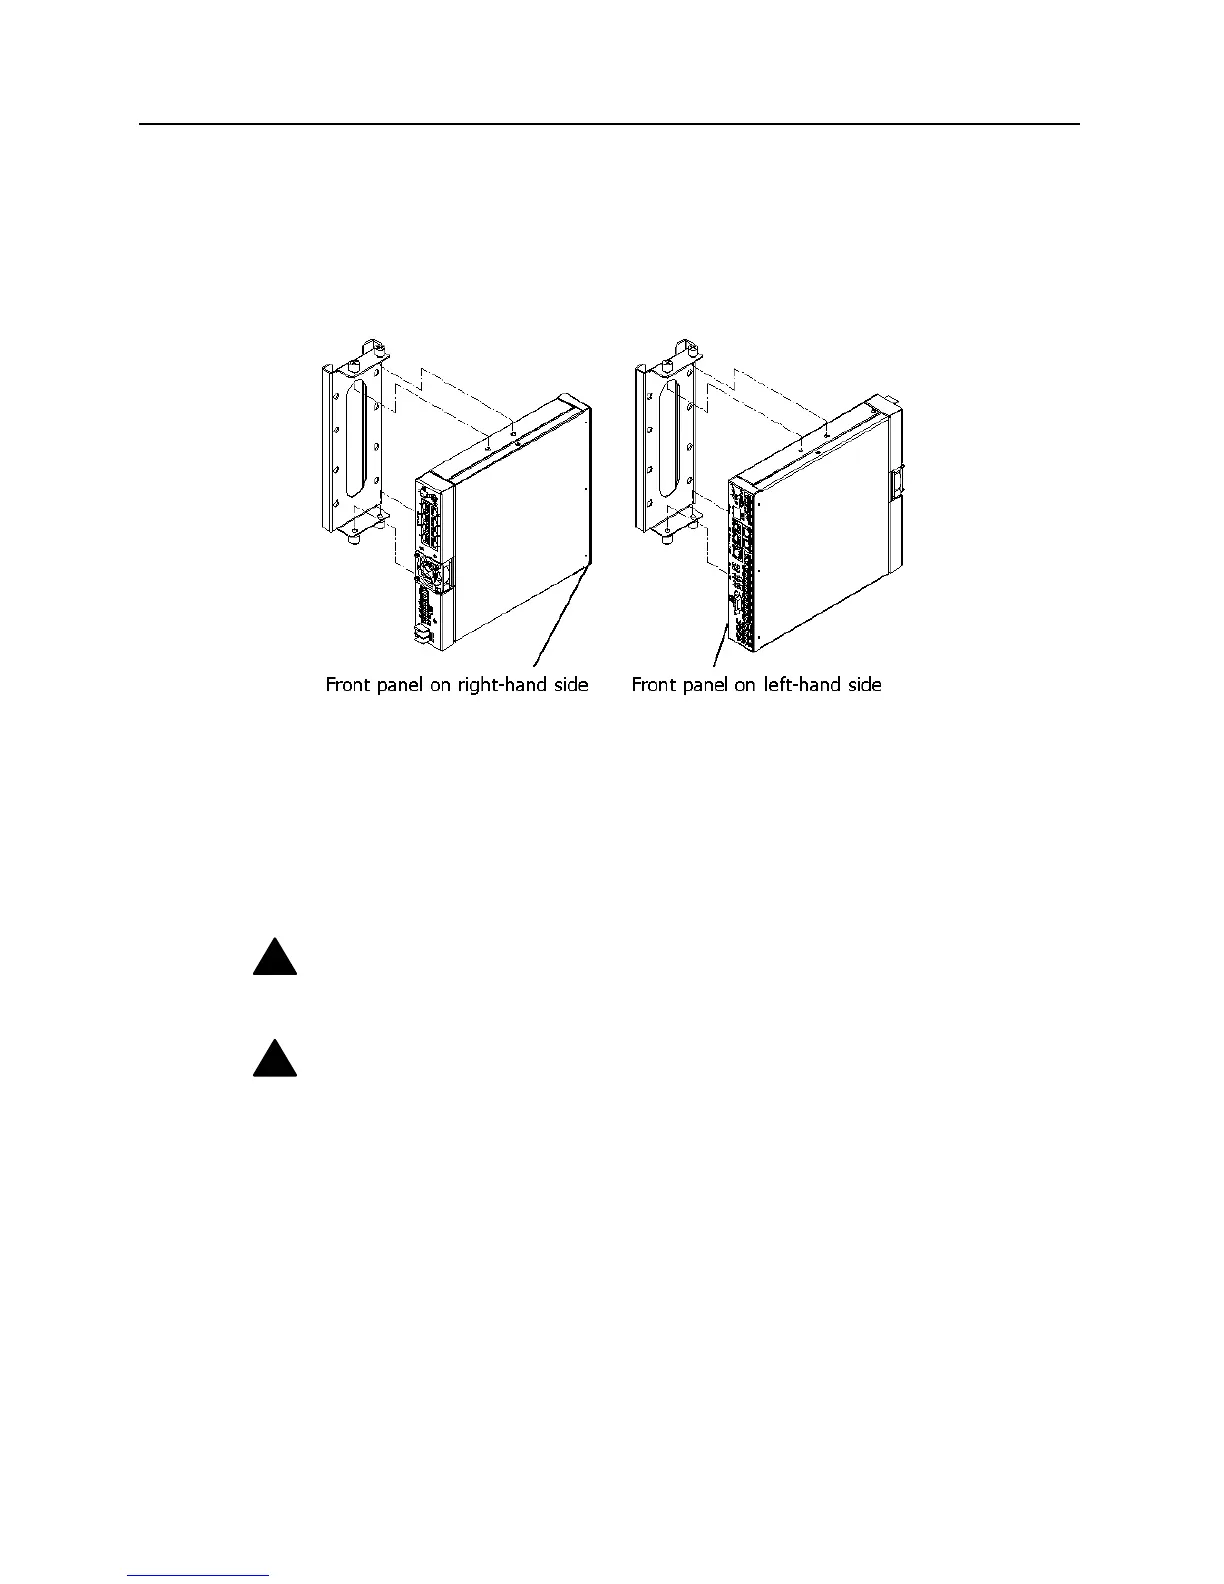
You can mount the ML600 on a wall using the wall mount bracket, see “Appendix B - Parts
List” in the ML600 User Manual, as shown in the following figure.
Figure 5: Securing the ML600 to the wall bracket
Attaching the ML600 to a wall.
Attach the wall mount bracket to the wall or wood surface with four 5/8-inch number 12
wood screws (not included) and make sure wall mount is leveled. Attach the ML600 to the
wall mount bracket and secure the 4 captive screws. Unit can be mounted with front panel on
right or left hand side. Keep LEDs close to wall.
!
Caution: The ML600 should be mounted only to a wall or wood surface that is at least
1/2-inch plywood or its equivalent. For corner mounting keep clearance for cables.
!
Caution: Make sure the air flow is not restricted around the front and rear of the
ML600.
ML600 Release 5.0a Quick Installation Guide 11