Encoder Hardware Manual
21
Connecting Audio Devices (Optional)
Audio input / output devices, such as an active microphone or speaker can be connected to the
encoder using the supplied terminal block.
Connecting an Audio Input Device
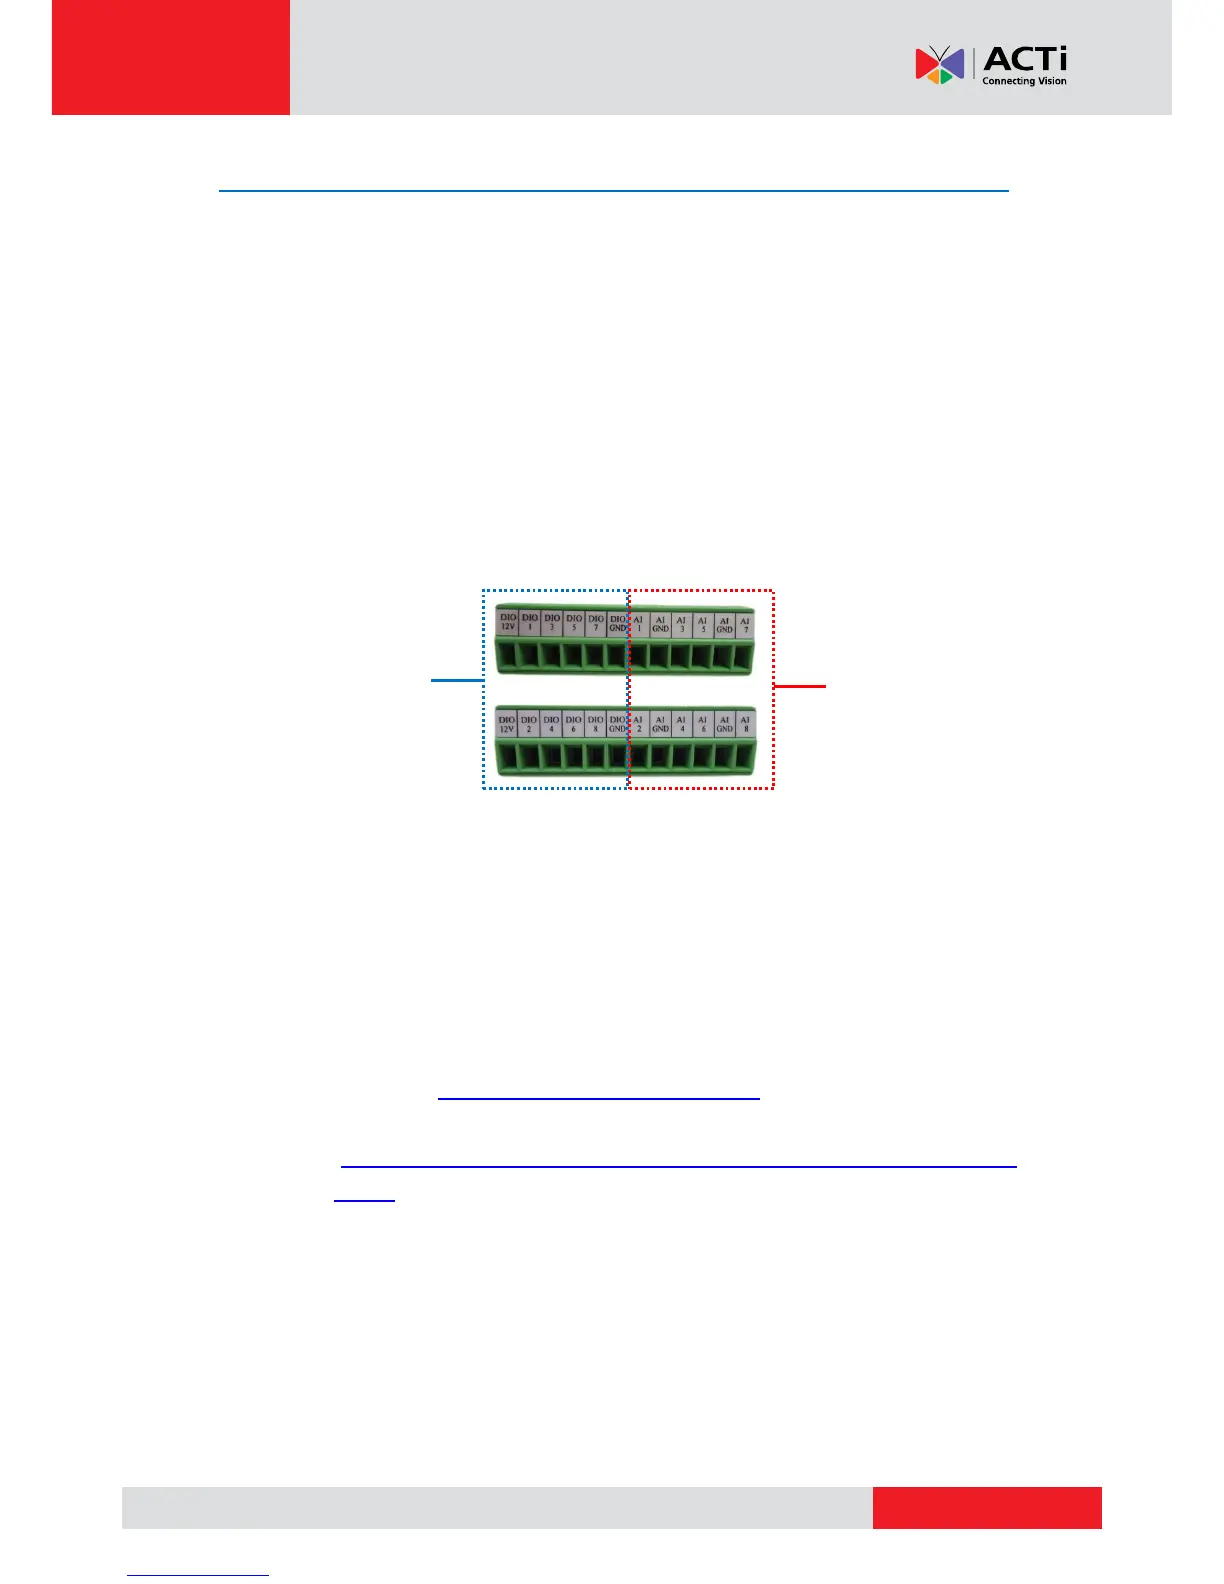
Each video channel has one corresponding audio input channel. The ports are labelled as AI
followed with a number. This number also corresponds to the video channel. For example, the
port labelled as AI1 is the audio input for video channel 1.
Four (4) audio input ports share the same terminal block with four (4) DIO ports. For example,
Audio port 1, 3, 5, and 7 are on the same terminal block with DIO ports1, 3, 5, and 7. See
samples below:
To connect an audio input device, do the following:
1. Loosen the screw of the pin and insert the wire through the pin slot.
2. Connect the wires of the audio input devce to AI and AI GND. The number after AI is the
video channel corresponding the audio input device.
NOTE:
The AI GND pin may be mapped with more than one audio device.
For more information about audio input connections, please refer to the Knowledge
Base article How to Use Audio-in of ACTi Encoders, downloadable from the link
below
(http://www.acti.com/support/KnowledgeBase/outside/detail.asp?KB_ID=KB20100
114003).
3. Tighten the screws to secure the wires within the pin slot.