Do you have a question about the Actron CP7527 Inductive and is the answer not in the manual?
Lists essential safety gear like fire extinguisher, goggles, and gloves.
Advises operating in ventilated areas, avoiding moving parts, and general cautions.
Cautions regarding hot surfaces, battery handling, and high voltage components.
Overview of the digital timing light model, its display, and controls.
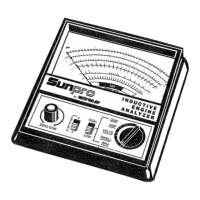
Overview of the advance timing light model, its dial, and controls.
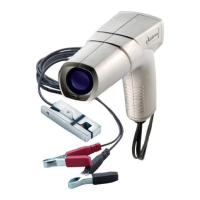
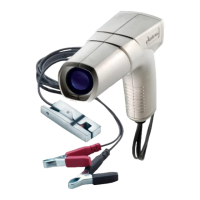
Overview of the inductive timing light model and its controls.
Turning off the vehicle and preparing the distributor vacuum line.
How to connect the inductive pickup clamp to the #1 spark plug wire.
Connecting the RED and BLACK clips to battery terminals and engine ground.
Finding timing marks and setting the 2/4 cycle operation for digital models.
Pressing the RPM/Adv button until the RPM indicator lights up.
Follow service manual lists and warm engine to operating temperature.
Direct the timing light at the crankshaft damper or transmission bell housing.
For inductive lights, press ON and note initial timing marks.
Use advance knob or buttons to align marks for measuring initial timing.
Adjusting the distributor to align marks using an inductive timing light.
Using the advance knob on the advance timing light to set initial timing.
Using buttons on the digital light to set initial timing by adjusting the distributor.
Steps for checking centrifugal advance using the inductive timing light.
Steps for checking centrifugal advance using the advance timing light.
Steps for checking centrifugal advance using the digital timing light.
Steps for measuring vacuum advance with inductive light and vacuum pump.
Steps for measuring vacuum advance with advance light and vacuum pump.
Steps for measuring vacuum advance with digital light and vacuum pump.
Turning off the vehicle and safely disconnecting the timing light.
Reconnecting vacuum lines and removing the pickup clamp and battery clips.
Troubleshooting a randomly flashing timing light by cleaning the pickup clamp.
Adjusting pickup clamp position and advice on spark plug wires.
| Brand | Actron |
|---|---|
| Model | CP7527 Inductive |
| Category | Measuring Instruments |
| Language | English |