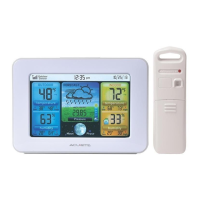
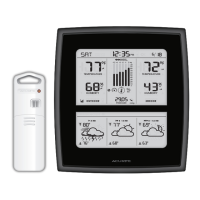
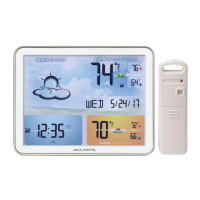
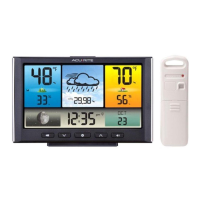
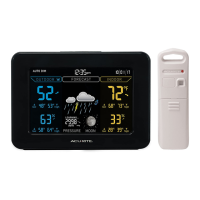
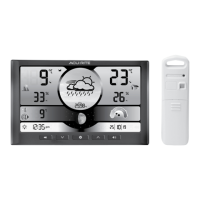
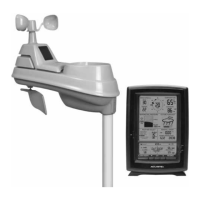
This document describes the AcuRite Weather Station, models 02038 and 02041, a device designed to provide accurate weather information and forecasts. The system consists of a display unit and an outdoor sensor, working together to deliver comprehensive environmental data.
Function Description
The AcuRite Weather Station functions as a personal weather monitoring system, providing real-time indoor and outdoor temperature and humidity readings, barometric pressure, and a 12 to 24-hour weather forecast. It utilizes AcuRite's patented Self-Calibrating Forecasting technology, which gathers data from the outdoor sensor to generate a personalized forecast for your specific location. This self-calibration process, known as "Learning Mode," takes 14 days to complete, during which the unit analyzes pressure changes to determine your altitude and fine-tune its predictions. Once calibrated, the "Learning Mode" icon disappears from the display, indicating the unit is ready for superior weather prediction.
The display unit features an Intelli-Time® Clock, which is pre-programmed with the correct time and date and automatically updates itself for Daylight Saving Time. Users only need to select their time zone and DST preferences during setup. The system also tracks moon phases, displaying them with simple lunar icons. Daily high and low records for indoor and outdoor temperature and humidity are automatically cleared at midnight, but can also be manually cleared. The barometric pressure is displayed with an arrow icon indicating whether it is trending (falling, steady, or rising), providing insight into impending weather changes.
Usage Features
The weather station offers a user-friendly interface with several customizable settings.
Setup:
- A-B-C Switch: Both the outdoor sensor and the display unit have an A-B-C switch located in their battery compartments. It is crucial to set both switches to the same letter (A, B, or C) to ensure proper synchronization between the units.
- Battery Installation:
- Outdoor Sensor: Requires 2 x AA batteries. AcuRite recommends high-quality alkaline or lithium batteries for optimal performance. Lithium batteries are specifically recommended for temperatures below -4°F / -20°C, as alkaline batteries may malfunction in extreme cold.
- Display Unit: Requires 3 x AA alkaline batteries as a backup power source. The primary power source for the display unit is the included power adapter, which is recommended for full functionality.
- Power Adapter: Plug in the power adapter to the display unit for continuous operation and to enable full backlight features.
- Intelli-Time® Clock Setup: After power-up, press the "SET" button on the back of the display unit to enter SET MODE. Here, you can adjust the Time Zone, DST (ON or OFF), Clock Hour, Clock Minute, Calendar Month, Calendar Date, Calendar Year, Temperature Units (°F or °C), and Pressure Units (inHg or hPa). Use the "UP" and "DOWN" buttons to adjust values and the "SET" button to confirm and move to the next preference. The unit will automatically exit SET MODE after 10 seconds of inactivity.
Display Backlight Settings:
The color display offers three brightness settings when powered by the adapter:
- High (100%) brightness.
- Medium (60%) brightness (press "BACKLIGHT" once).
- Low (30%) brightness (press "BACKLIGHT" twice).
- AUTO DIM Mode: Pressing "BACKLIGHT" a third time activates AUTO DIM mode, which automatically adjusts display brightness based on the time of day and year. For example, from March 11 to November 4, it's 100% brightness from 6:00 a.m. to 9:00 p.m. and 30% brightness from 9:01 p.m. to 5:59 a.m.
When operating on battery power alone, the backlight is available momentarily for 10 seconds by pressing the "BACKLIGHT" button.
Records Management:
- Today's High/Low Records: These records clear automatically at midnight. To manually clear all of today's LOW recorded values, press and hold the "DOWN" button for 2 seconds. To manually clear all of today's HIGH recorded values, press and hold the "UP" button for 2 seconds. Dashes will display to confirm clearance.
- All-Time High/Low Records: Press the "ALL-TIME RECORDS" button to cycle through all-time high and low records for outdoor and indoor temperature and humidity. A date and time stamp indicates when each value was recorded. To clear an all-time LOW record, press and hold the "DOWN" button for 2 seconds while viewing it. To clear an all-time HIGH record, press and hold the "UP" button for 2 seconds while viewing it.
Placement Guidelines:
- Display Unit: Place in a dry area, free of dirt and dust. It can stand upright on a tabletop or be wall-mounted using the integrated hang hole.
- Outdoor Sensor: Place outside to observe outdoor conditions. While water-resistant, protect it from direct weather elements to extend its life. Hang the sensor 4 to 8 feet above the ground in a location with permanent shade and plenty of fresh air circulation, such as a well-covered tree branch.
- Wireless Communication: Ensure the display unit and outdoor sensor are within 330 ft (100 m) of each other. Avoid large metallic items, thick walls, metal surfaces, or other objects that may limit wireless communication. Keep both units at least 3 ft (.9 m) away from electronic devices (TV, computer, microwave, radio, etc.) to prevent interference.
Maintenance Features
Care & Cleaning:
- Display Unit: Clean with a soft, damp cloth. Avoid caustic cleaners or abrasives. Keep it free of dust, dirt, and moisture. Regularly clean ventilation ports with a gentle puff of air.
- Outdoor Sensor: Clean with a soft damp cloth. Avoid caustic cleaners or abrasives.
Calibration:
The indoor/outdoor temperature and humidity readings, as well as barometric pressure, can be calibrated to improve accuracy, especially if sensor placement or environmental factors affect data.
- Enter Calibration Mode: Press and HOLD the "UP", "SET", and "DOWN" buttons simultaneously for at least 5 seconds.
- Adjust Values: Use the "UP" or "DOWN" buttons to adjust the currently selected (flashing) item higher or lower from the actual reading.
- Save Adjustments: Press the "SET" button to save adjustments and move to the next preference. A "CALIBRATED" icon will remain illuminated next to calibrated values.
The calibration order is: Outdoor Temperature, Outdoor Humidity, Indoor Temperature, Indoor Humidity, Barometric Pressure.
- Barometric Pressure: Must be set to MANUAL mode to calibrate. To switch between AUTO and MANUAL pressure modes, press and HOLD the "SET" button for at least 10 seconds.
The display will exit calibration mode after 20 seconds of inactivity, saving all adjustments. Note that calibrations will be erased if the display is reset or if batteries are removed and the power adapter is unplugged.
Intelli-Time® Battery Replacement:
The Intelli-Time® clock is powered by a pre-installed CR2032 coin-cell battery, which stores time and date settings. This battery has a shelf life of several years.
- Locate the coin cell battery compartment door on the back of the display unit.
- Unscrew and remove the compartment cover.
- Insert 1 x CR2032 coin cell battery with the "+" positive terminal facing OUT.
- Screw in the battery cover.
Important Safety Warning: This product contains a button-cell battery. If swallowed, it can cause severe injury or death in just 2 hours. Seek medical attention immediately if ingested.
Troubleshooting:
The manual provides a troubleshooting guide for common issues such as:
- No outdoor sensor reception (relocate units, check A-B-C switch, ensure proper battery installation).
- Display screen not working (check batteries, reset display).
- Outdoor temperature flashing or showing dashes (wireless interference, bring units indoors, remove/reinstall batteries, ensure A-B-C switch matches, allow 20 minutes for strong connection).
- Inaccurate forecast (wait for Learning Mode to complete, allow 33 days for full calibration, ensure units are not reset).
- Inaccurate temperature or humidity (ensure units are out of direct sunlight, away from heat/moisture sources).
- Unit lost power or time is incorrect (Intelli-Time battery needs replacement, set time/date manually after replacement).
For further assistance, users can contact AcuRite Customer Support or visit their website.