7
A 2 0 0 0 - S E R I E S A M P L I F I E R U S E R G U I D E
©2012 Indy Audio Labs, LLC all rights reserved / Revision20120420
Document No. 1000571
4 - Ethernet Jack The Ethernet jack enables connection
to either an external system controller or to a standard
home Ethernet 10/100 network switch or router port.
Control and status monitoring of the amplier using any
device with a web browser is supported via the web
server embedded in the Acurus amplier.
Feet: Heavy-duty thermoplastic rubber feet ensure good
underside airow, isolate your amplier from external
vibration and protect the surface nish of AV furniture
underneath.
For rack-mount installations where other equipment is in-
stalled directly adjacent, these feet are easily removed.
placement
and setup
An enjoyable home entertainment experience always
begins with carefully planned placement and setup of
system components. This section will provide guidance
on how to best install your new Acurus amplier.
Shelf Mounting
When planning to mount on a shelf, be aware of the
physical dimensions of your Acurus amplier as outlined
in the section entitled Technical Specifications, p16.
It is ALWAYS advisable to:
1. Provide ample space above the unit (1-2 inches is
the minimum preferred)
2. Provide plenty of room (at least 1-2 inches) between
the sides of the unit at nearby surfaces or other
components
3. Locate the unit near an AC outlet or power condition-
er and avoid using extension cords or power strips
4. Locate the amplier as close as possible to the pre-
amp or pre-processor
5. Use as short length wire leads as practical, espe-
cially on the amplier inputs
6. Connect the amplier to the same mains circuit as
the pre-amplier
It is NEVER advisable to:
1. Enclose the unit in a cabinet without air ow or ad-
equate ventilation, particularly across the heat ns
along the side and back of the unit.
2. Place the unit near a source of moisture such as a
window or a live plant
3. Place other components in a stack on top of the
amplier
4. Place the amplier on a carpeted surface
5. Remove the safety ground connector from the AC
mains cord
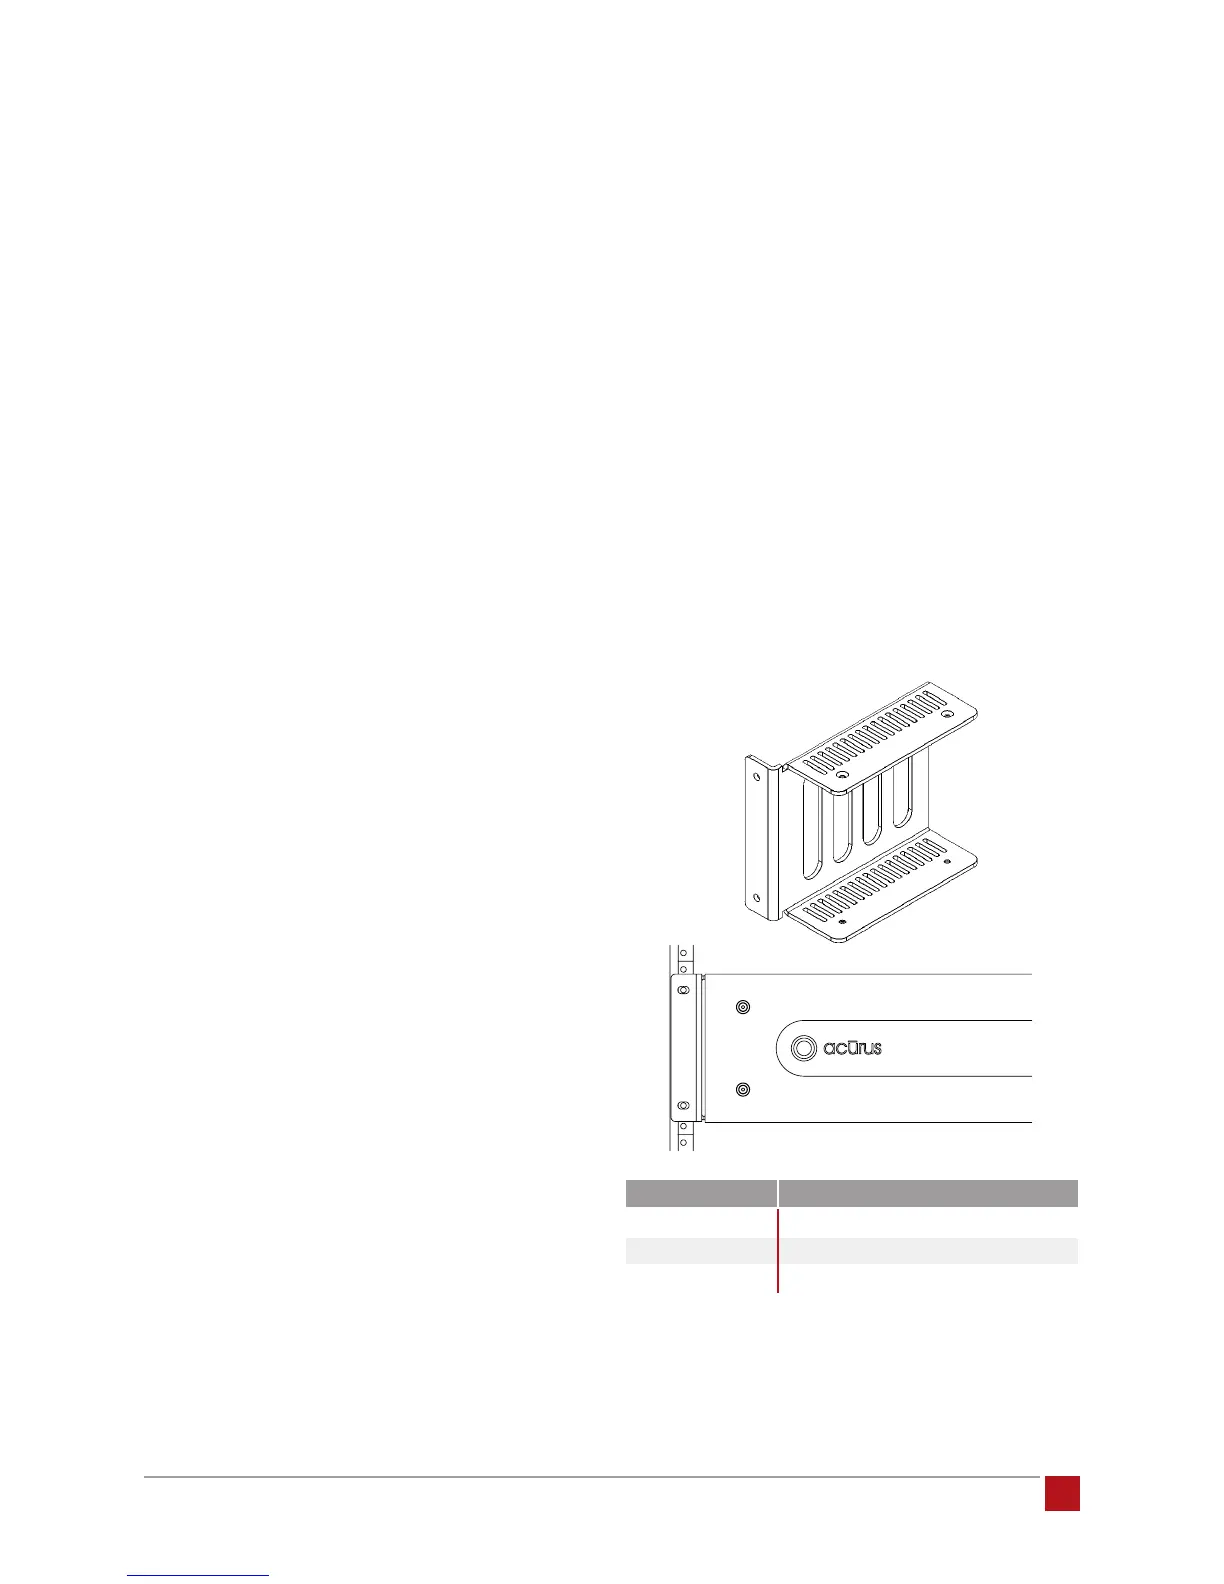
Rack Mounting
Your Acurus amplier can easily be congured to mount
in a standard 19-inch rack cabinet with an optional
Acurus rack mount accessory kit. Hardware and
detailed installation instructions are included.
Contact your dealer or Acurus Customer Service with questions or
to request the rack mount kit designed specifically for your amplifier
model.
model acurus rack-mount kit part number
A2002
1000548
A2005
1000549
A2007
1000549