Guided Tour
Let me take you on a tour of your Trinket! Each trinket is assembled here at Adafruit and
comes chock-full of good design to make it a joy to use.
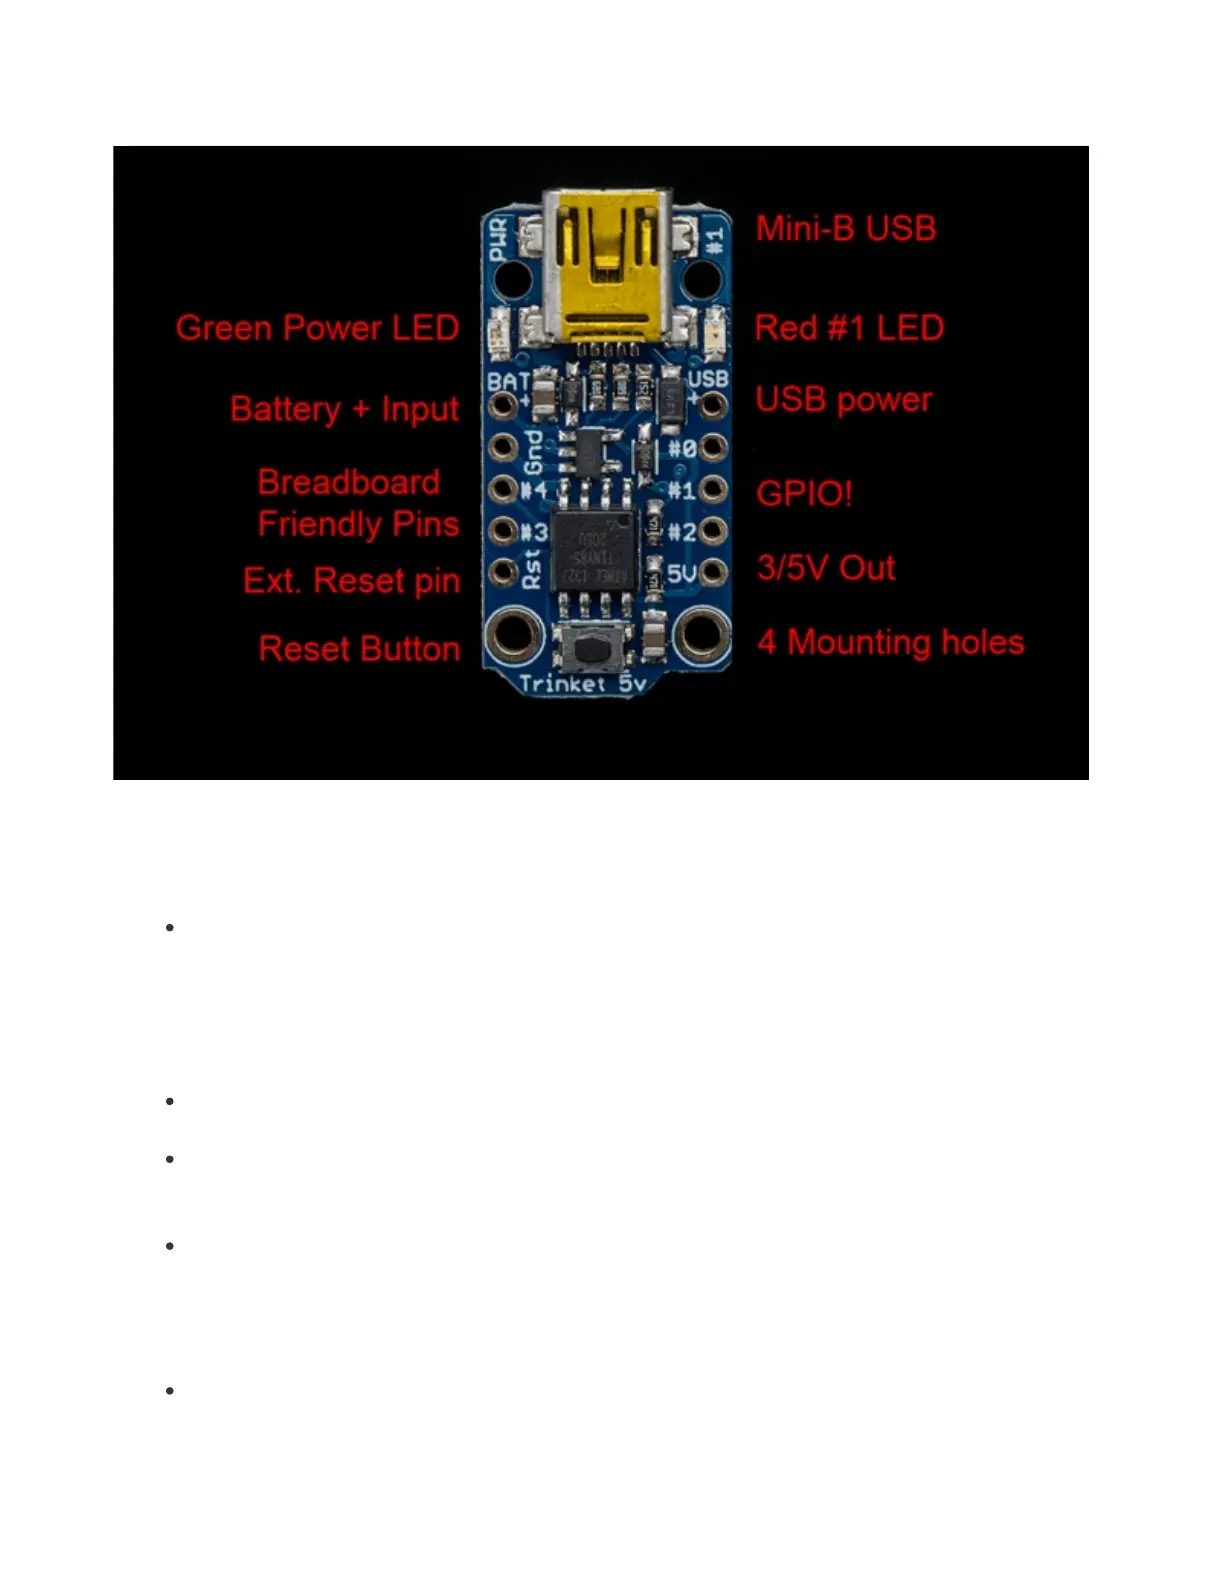
Mini-B USB co nnector - We went with the tried and true mini-B USB connector for
power and/or USB bootloading. In our experience, Micro-B connectors can rip off the
PCB easily, but we have not had that problem with mini B, its much more rugged for DIY
electronics. It's also a proper USB connector, so you can use any length cable. Some
Attiny85 boards use a PCB that slides into a USB port to cut costs, but that makes it
hard to re-program and annoying to power with an external battery pack
Green Po wer LED - you'll know that the board is powered up when this bright LED is
lit
Red #1 LED - this LED does double duty. Its connected with a series resistor to the
digital #1 GPIO pin. It pulses nicely when the Trinket is in bootloader mode, and its also
handy for when you want an indicator LED.
Battery + Input - take your Trinket anywhere and power it from an external battery.
This pin can take up 16V DC input, and has reverse-polarity, over-curent and thermal
protections. The circuitry inside will use either the battery or USB power, safely
switching from one to the other. If both are connected, it will use whichever has the
higher voltage
USB Power Output - You can also snag the 5V power from the USB jack in case you
need 500mA+ current from your computer or portable USB power pack.