ADJ Products, LLC - www.adj.com - UV COB Cannon - User Manual Page 10
ADJ Products, LLC - www.adj.com - UV COB Cannon - User Manual Page 11
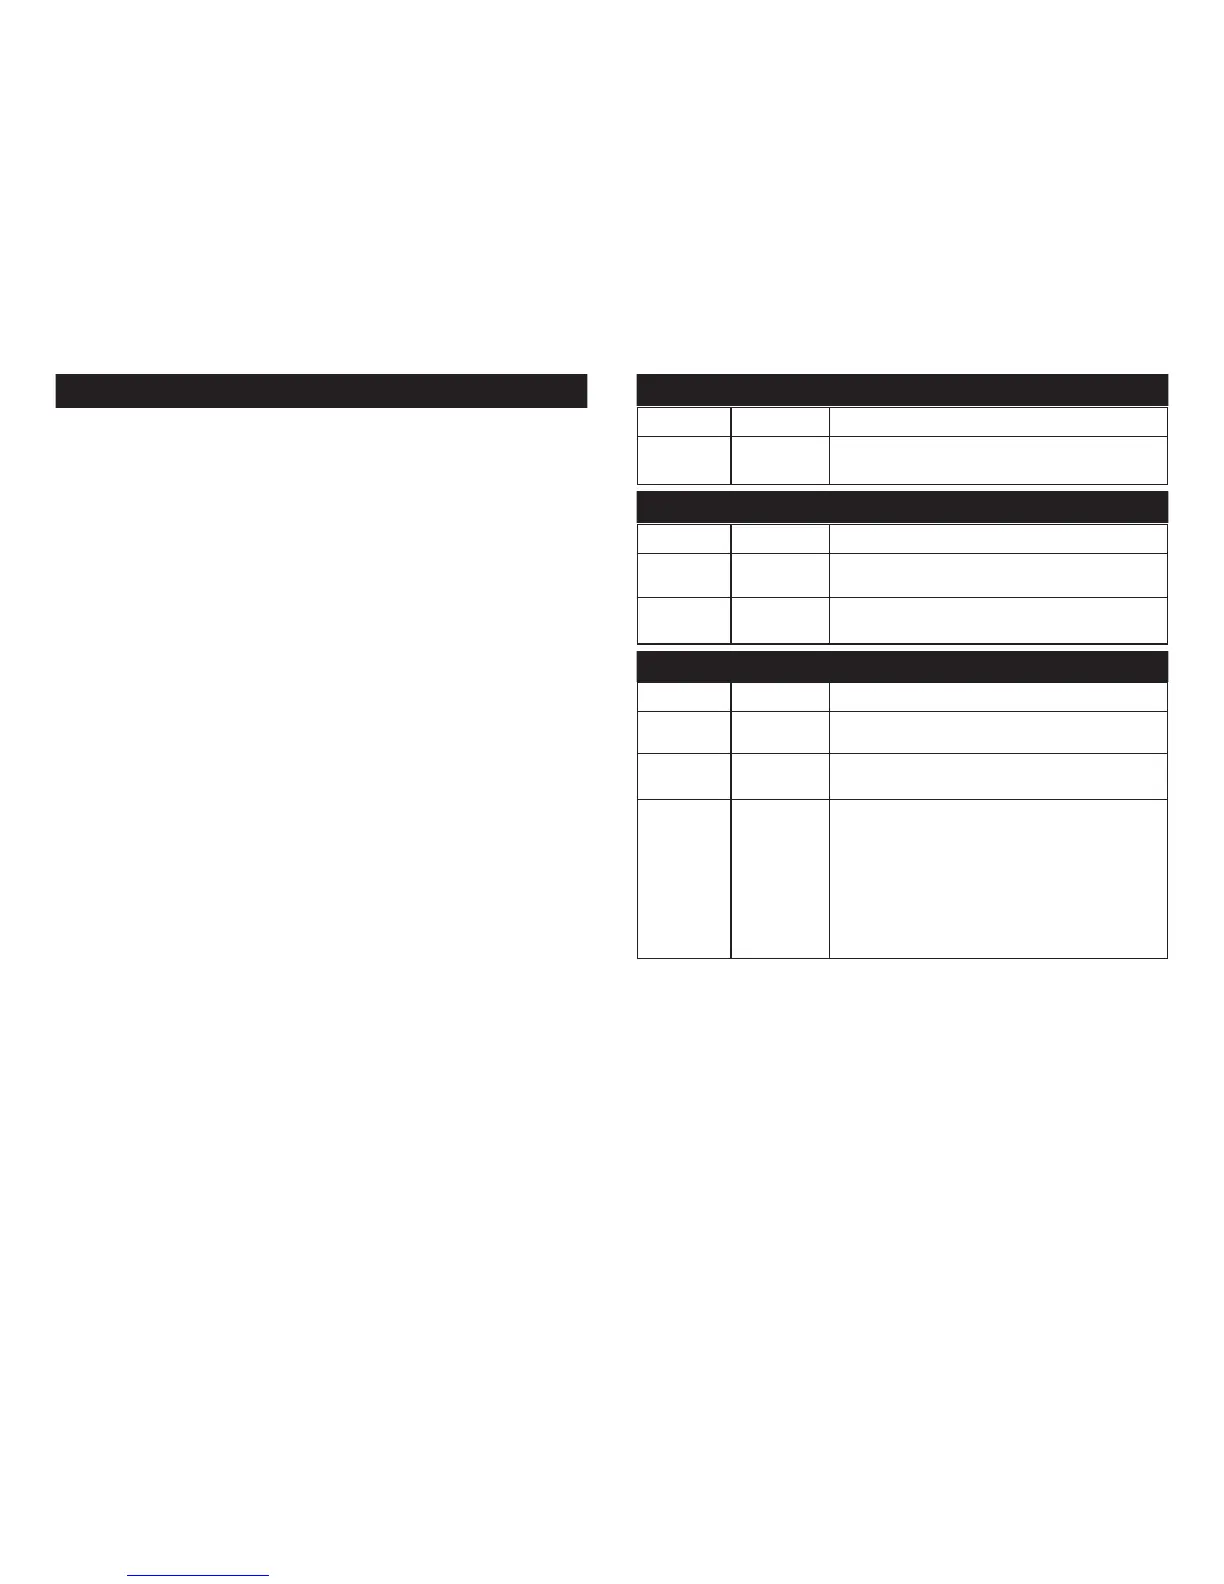
UV COB Cannon 1 Channel Mode
Channel Value Function
1 DIMMING
1 - 255 0% - 100%
UV COB Cannon 2 Channel Mode
Channel Value Function
1 DIMMING
1 - 255 0% - 100%
2 STROBING
1 - 255 SLOW - FAST
Channel Value Function
1 DIMMING
1 - 255 0% - 100%
2 STROBING
1 - 255 SLOW - FAST
3 DIMMER CURVES
0 - 20 STANDARD
21 - 40 STAGE
41 - 60 TV
61 - 80 ARCHITECTURAL
81 - 100 THEATRE
101 - 255 DELAY MODE CONTROL
UV COB Cannon 3 Channel Mode
Master-Slave Configuration:
This function will allows you to link units together to run in a Master-Slave
mode. In Master-Slave operation one unit will act as the controlling unit
and the others will react to the controlling units built-in programs. Any
unit can act as a Master or as a Slave however, only one unit can be pro-
grammed to act as the “Master.”
Master-Slave Connections and Settings:
1. Daisy chain your units via the XLR connector on the rear of the unit.
Use standard XLR data cables to link your units together. Remember
that the Male XLR connector is the input and the Female XLR con-
nector is the ouput. The first unit in the chain (master) will use the
female XLR connector only. The last unit in the chain will use the
male XLR connector only.
2. On the “Master” unit, press the MODE button until “0018” is dis-
played. This is the “Master” setting, press the SAVE button. After you
have set it to the “Master” setting, set your desired operating mode.
3. For the “Slave” unit, press the UP or DOWN button so that “0028” is
displayed. This is the “Slave” setting, press the SAVE button.
4. Now connect the “Slave” unit to the “Master” unit using the XLR con-
nections.
UV COB Cannon Master-Slave Configuration