5
LCD Monitor Installation
1. Remove the factory rear view mirror. (Use caution, some mirrors
require specific tools to remove, seek additional help if you do not
know how to remove a mirror).
2. Check and determine if the factory metal mounting lug is compatible
with the mounting arm on the LCDM40 or with the Toyota/Honda
adaptor supplied (see Arm Adaptor subsection).
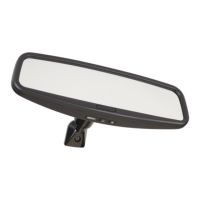
a) If possible, attach the LCDM40 to the factory metal mounting lug
and secure with the locking screw. Use caution to insure you do
not pinch or damage the wiring coming through the mounting
arm.
b) In some vehicles the factory metal mounting arm will not be
compatible, if you find this situation then attach the supplied
metal mounting lug to the window using Permatex Rearview
Mirror Adhesive (Permatex Part # 11067-2) following the
Permatex instructions closely. (Not included, Available from
most auto parts stores). After dry mount the mirror to the
mounting foot.
3. Examine the vehicle to determine the best way to run the power wires
to: accessory power, the reverse lights and to the camera at the rear of
the vehicle. DO NOT CONNECT THE MIRROR UNTIL ALL
CONNECTIONS HAVE BEEN MADE TO THE HARNESS.
4. Run the wiring harness from the mirror under the headliner and down
to the drivers side kick panel and under the dash.
5. Locate your vehicles reverse wire or run directly to the rear of the
vehicle to the reverse lamp. Connect the orange (TRG1) wire to a
wire that supplies +12 volts when in reverse. Connect the RED wire
to +12 volts when the ignition is on. Connect your Camera to the
extension cable directly or use the RCA adapter included. Use CAM1
connection for the primary camera. Connect the Black wire to a metal
grounding location.
6. Connect to the CAM1 input for a secondary video source if desired.
Order Audiovox Part# 30262410 if a second RCA adapter is required.
Note: When using an Advent Camera with your Advent Monitor the signal and power for
the camera will be supplied through the monitor extension cable. Please also note that

 Loading...