Accessories delivered with the
appliance may vary depending on the
model.
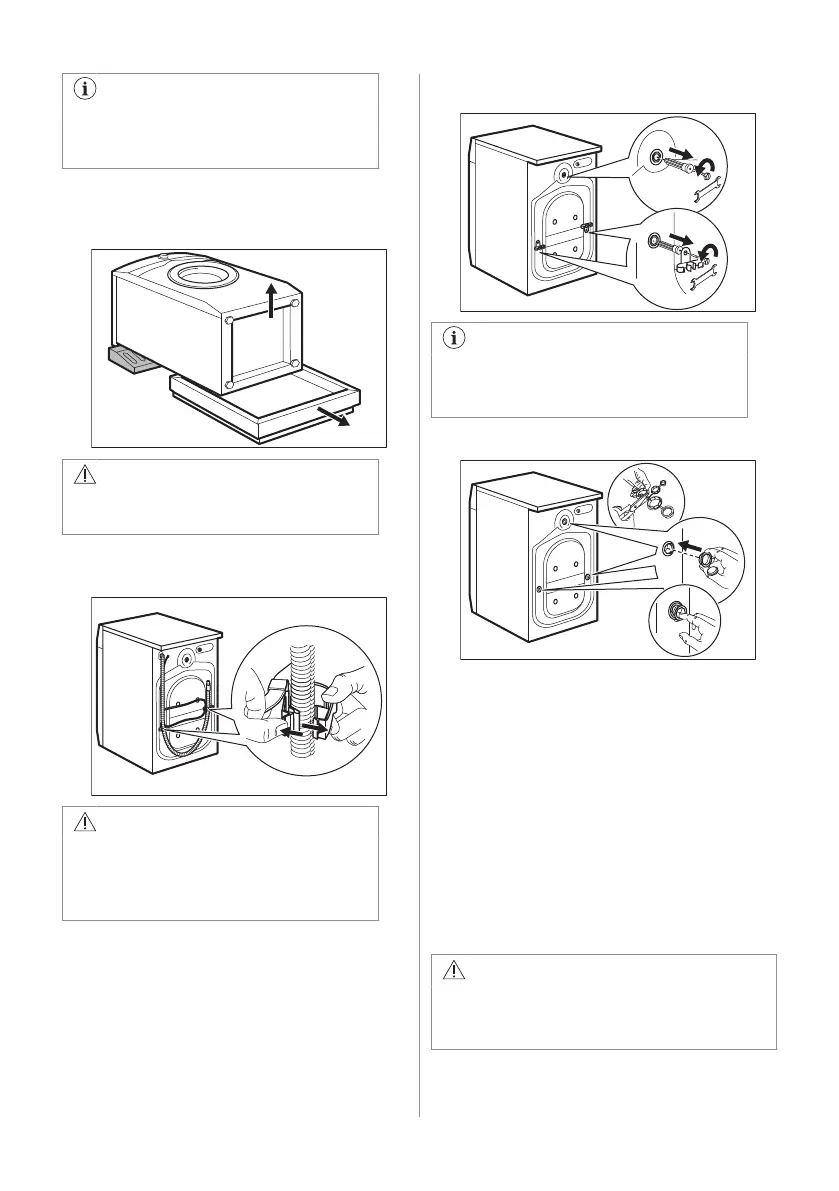
2. Put the packaging element on the floor
behind the appliance and carefully put it
down onto its rear side. Remove the
polystyrene protection from the bottom.
CAUTION!
Do not lay washing machine on its
front.
3. Put the appliance back into an upright
position. Remove the power supply cable
and the drain hose from the hose holders.
WARNING!
It is possible to see water flowing
from the drain hose. This is because
the washing machine has been
tested at the factory.
4. Remove the three transit bolts and pull
out the plastic spacers.
We recommend that you keep the
packaging and the transit bolts for
any transport of the appliance.
5. Put the plastic caps, that you find in the
user manual bag, in the holes.
5.2 Information for installation
Positioning and levelling
Adjust the appliance correctly to prevent
vibration, noise and movement of the
appliance when it operates.
1. Install the appliance on a flat hard floor.
The appliance must be levelled and stable.
Make sure that the appliance does not touch
the wall or other units and there is air
circulation below the appliance.
2. Loosen or tighten the feet to adjust the
level. All feet must rest firmly on the floor.
WARNING!
Do not put cardboard, wood or equivalent
materials below the appliance feet to
adjust the level.
The inlet hose
8 ENGLISH