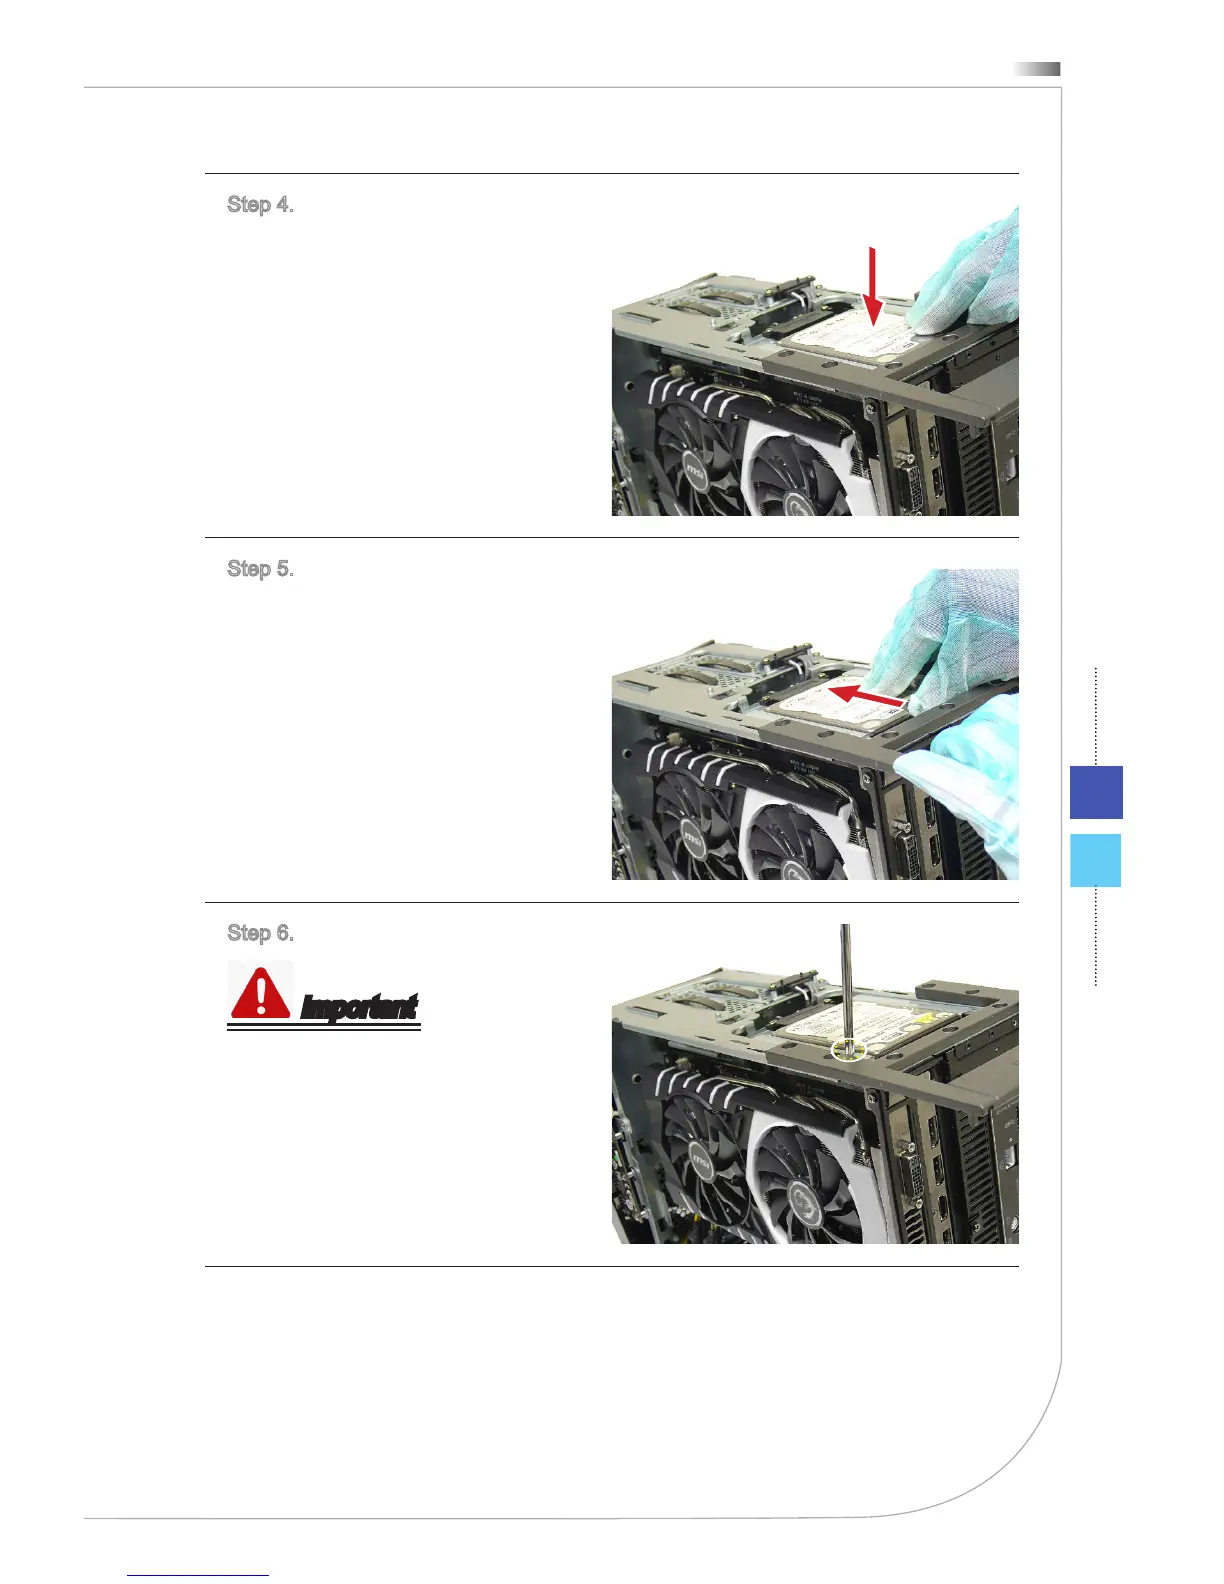
Step 4. Put and slide the HDD bay
back.
Step 5. Push the 2.5” HDD bay till
it can not go further. Make sure the
SATA connectors are connected.
Step 6. Lock all screws for both sides.
Important
M3X4 screw * 1.
Follow the above procedures in re-
versed order to remove the 2.5” HDD.
Also refer to...
Installing Memory Module ����������������������������������������������������������������� 15
Installing 3�5” HDD �������������������������������������������������������������������������� 31
Upgrading Memory Module ���������������������������������������������������������������� 36