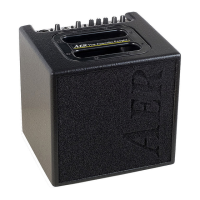
5
4. Operation Summary
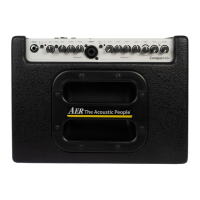
• Cabling and startup
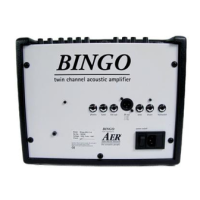
Check if your local mains voltage (e.g. 120 V in the USA, 230 V in Euro-
pe) complies with the required operating voltage for your amplier.
The proper mains voltage is printed on the rating plate on the rear
panel of the unit, e.g. AC 230V (AC means alternating current).
Please take care that the master, return and all gain controls are
set to zero (left stop) and all other controls to their center positions.
The pushbuttons should be switched o (not pressed).
Then make all the necessary cable connections
(mains, instrument etc.).
Now you may turn on your amplier with the power on switch loca-
ted on the rear. The green power control LED will indicate operational
readiness.
• Level adjustment
Using the gain controls, high/low and line/mic switches you can ad-
apt the amplier to your signal sources (guitar pickups, microphone
etc.) to achieve the best possible signal-to-noise ratio (SNR).
First adjust the line/mic switch according to your signal source: mic is
suitable for microphones, line for pickups and other signal sources.
Turn the gain control clockwise until the red clip indicator ashes
momentarily when playing with a strong attack. Now lower the gain
control (and also the instrument‘s volume control) again slightly to
get some headroom for an undistorted reproduction. The clip control
LED should now only rarely ash. In case you nd the level setting
dicult because the input signal is too strong, press the high/low
switch as well. If the input signal is too weak, the gain control must be
increased accordingly. With signal sources with a sucient input si-
gnal strength the gain control should be adjusted between the ‘ 9:00
and 11:00 o‘clock‘ position. Finally set the desired overall volume level
with the master control.
• Equalization
The three-band equalizer with individual bass, middle and treble
control of your Compact 60
2
has been designed in such a way that it
both complies with the special requirements of acoustic instruments
and also with the more general demands of other sources. The colour
switch activates a midrange contour lter which is especially useful
for picking techniques.
One more note: Adjusting the EQ controls can also aect the level
setting. Whenever you see the clip indicator ashing frequently, you
should slighty correct your gain setting (see ‚Level adjustment‘).
• Eects
The Compact 60
2
has a built-in (internal) digital eect processor. The
return control determines the intensity of the internal eects (left
stop = no eect). Furthermore an additional eects unit (external ef-
fect) may be connected. For this purpose please use the send and
return sockets located on the back of the amplier (send goes to In-
put, return is connected to the output of the external eects device).
The intensity is then adjusted at the external eects unit. The external
eects loop works in ‚parallel‘ mode, i.e. the eect signal is blended
with the original signal.
A standard double footswitch can be connected to the footswitch
socket on the rear of the amp with a stereo cable. This switch can be
used to turn the internal and external eects on and o.
We wish you hours of happy playing with your Compact 60
2!