11
The programme requires the system to circulate chilled water.
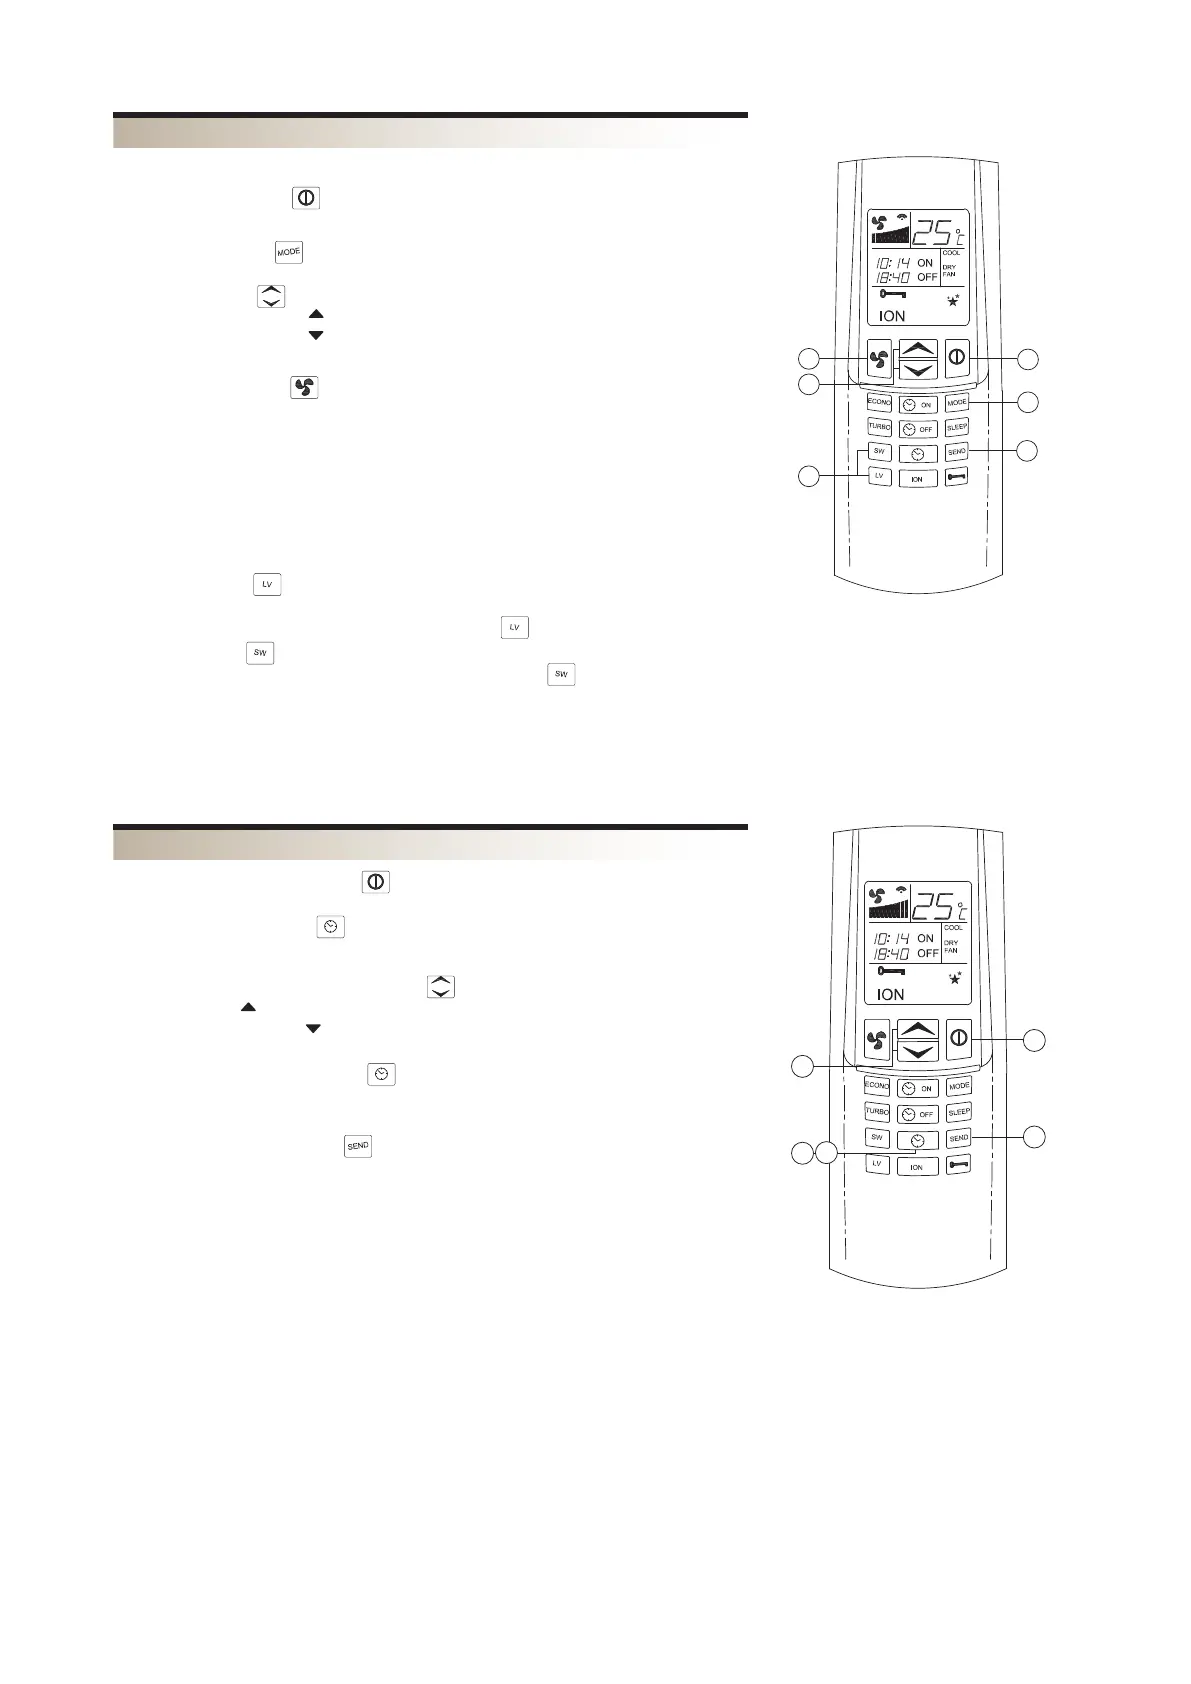
1) PRESS THE ON/OFF KEYS
The fan coil unit comes on. The fan coil unit automatically starts in cooling mode.
2) PRESS THE MODE KEY
Press the MODE key repeatedly until the word COOL appears on the display
3) PRESS THE KEYS TO CONTROL THE TEMPERATURE
– The key with the symbol
– The key with the symbol
4) PRESS THE FAN KEY
-
cessor.
5) TO DIRECT THE AIR FLOW
To ensure optimum air distribution, adjust the horizontal blades and the vertical blades
in such a way that the air flow does not hit people directly. The vertical air flow blades
must be set manually before starting up the motorised blades.
Never adjust the motorised horizontal blades manually.
When the LOUVER key is pressed repeatedly, the horizontal blade is adjusted to 4
fixed blade positions, then a swinging blade movement will begin. If you wish to stop
the blade in a particular position, press the LOUVER key.
When the SWING key is pressed a swinging blade movement will begin. If you wish
to stop the blade in a particular position, press the SWING key again.
6) PRESS THE SEND KEY
To transmit the new parameters shown on the LCD to the main control unit.
COOLING PROGRAMME (COOL)
1
2
4
5
1) PRESS THE ON-OFF BUTTON
2) PRESS CLOCK BUTTON TO SET THE CLOCK
THE DISPLAY WILL START TO FLASH
3) ADJUST THE CLOCK USING THE KEYS
– the symbol key allows increments of 1 hour
– the key with the symbol allows decreases of 1 hour
4) PRESS THE CLOCK KEY AGAIN
The display will stop flashing
5) PRESS THE "SEND" BUTTON
To transmit to the unit the settings visible on the LCD screen of the remote control.
1
3
4
5
CLOCK SETTING (CLOCK)