This document is a user manual for an AERMEC remote handset, likely for an air conditioning unit. It provides detailed instructions on how to operate the device, its various functions, and maintenance information.
Function Description
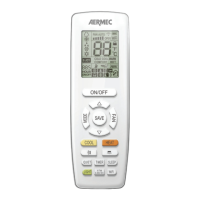
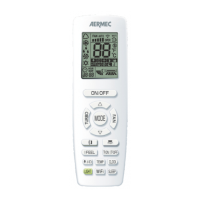
The AERMEC remote handset serves as the primary interface for controlling an AERMEC air conditioning unit. It allows users to switch the unit on/off, select operating modes, adjust temperature, set fan speeds, control air delivery fins, program timers, and activate special functions like night-time comfort, prolonged ventilation (X-FAN), and energy saving. The remote control transmits signals via infrared (IR) to the indoor unit receiver.
Important Technical Specifications
- Signal Range: The remote control can emit a signal up to a maximum distance of 8 meters to ensure good reception.
- Power Source: The remote control is powered by two AAA (LR03) 1.5V alkaline high-performance batteries.
- Display: Features a liquid crystal display (LCD) that shows current settings, operating modes, temperature set-points, fan speed, battery charge level, and active functions.
- Temperature Units: The display can show temperature in either Celsius (°C) or Fahrenheit (°F), which can be changed by the user.
- Timer Range: The timer function for programmed switch-on/off can be set from 0.5 to 24 hours.
- WEEE Compliance: The product is marked for separate disposal of Waste Electrical and Electronic Equipment (WEEE) in the EU, indicating it contains electronic components that should not be disposed of with household waste.
- Certifications: The product carries CE safety certification and company certifications like ICIM UNI EN ISO 9001:2015 and CISQ, indicating adherence to quality management systems.
Usage Features
The remote handset offers a comprehensive set of features for controlling the air conditioning unit:
- On/Off Control: A dedicated ON/OFF button switches the unit on or off. When off, the remote still displays the last operating mode's set-point and any active functions from the previous session.
- Temperature Adjustment: Up (▲) and Down (▼) buttons allow users to increase or decrease the operating set-point temperature.
- Mode Selection: A MODE button cycles through various operating modes:
- Automatic (AUTO): The unit automatically sets the temperature, while fan speed and air outlet angle can be adjusted. No set-point is displayed on the remote.
- Cooling (COOL): User sets operating set-point and fan speed. The unit cools until the room temperature reaches the set value.
- Dehumidification (DRY): User sets operating set-point; fan speed is fixed at minimum. The unit dehumidifies until the room temperature reaches the set value.
- Ventilation (FAN): User sets only the fan speed. Provides no heating or cooling, only circulates air.
- Heating (HEAT): User sets operating set-point and fan speed. The unit heats until the room temperature reaches the set value.
- Fan Speed Control: A FAN button allows modification of the fan speed, cycling through minimum, medium, high, and Turbo speeds. In DRY and AUTO modes, the fan speed is automatically set to minimum or selected based on room temperature, respectively. The Turbo function is not available in DRY or AUTO modes.
- Air Delivery Fin Control:
- Vertical Swing (UP&DOWN): A dedicated button activates the swing function for the vertical motorised delivery fin, varying the airflow direction. Users can also set fixed positions.
- Horizontal Swing (LEFT&RIGHT): Another dedicated button activates the swing function for the horizontal motorised delivery fin, also allowing for fixed positions.
- Timer Functions:
- Timer ON: Programs the unit to switch on at a specified time (0.5 to 24 hours). The operating mode, set-point, and fan speed will be the same as the last unit switch-off.
- Timer OFF: Programs the unit to switch off at a specified time (0.5 to 24 hours).
- Special Functions:
- Prolonged Ventilation (X-FAN): Activated via the X-FAN/E-HEATER button (in cooling or dehumidification mode). The indoor unit fan continues to run for a few minutes after switch-off to dry the coil, preventing pathogen formation. This function remains active even after the unit is switched off.
- Light Function: A LIGHT button enables or disables the display on the indoor unit.
- Night-Time Comfort (SLEEP): Activated via the SLEEP button (in cooling, dehumidification, or heating modes). It gradually adjusts the temperature set-point (increases by up to +3°C in cooling/dehumidification, decreases by up to -3°C in heating) to optimize comfort and save energy during the night. This function is deactivated when the unit is switched off.
- Energy Saving (SAVE): Activated via the SAVE button (in cooling mode). Aims to reach the set temperature with lower energy consumption. When active, fan speed is set to AUTO, and the set temperature cannot be altered. It cannot be used simultaneously with the SLEEP function.
- WIFI Function: A WIFI button activates/deactivates the WIFI device in the indoor unit (if installed). The WIFI module can be reset by pressing MODE and WIFI buttons simultaneously when the unit is off.
- QUIET Function: A QUIET button activates or deactivates a quiet operation mode.
- Button Lock: Simultaneously pressing the ▲ and ▼ buttons locks or unlocks the keypad, preventing accidental changes to settings. An icon on the display indicates when the keypad is locked.
Maintenance Features
- Battery Replacement: The manual provides clear instructions for replacing the remote control batteries:
- Slide open the battery cover.
- Remove old batteries.
- Insert new AAA 1.5V alkaline batteries, ensuring correct polarity.
- Close the battery cover.
- Battery Level Indicator: The remote control display shows the battery charge level. A flashing icon indicates that batteries need replacement to ensure proper functioning.
- Storage: It is recommended to remove batteries if the remote control will not be used for a long time.
- Handling Precautions: Users are advised not to drop, throw, or frequently disassemble the device. It should not be installed in damp areas or exposed to direct sunlight. Liquids should not enter the remote control, and it should not be handled with wet hands.
- Interference Avoidance: Position the remote control at least 1 meter away from TVs, radios, stereos, etc., to avoid audio and video interference. The unit can also be affected by signals from other remote control units in the same room.