6 / 34
6 mm, max. 8 mm) and washers (outer diameter min. 12 mm, max. 24 mm).
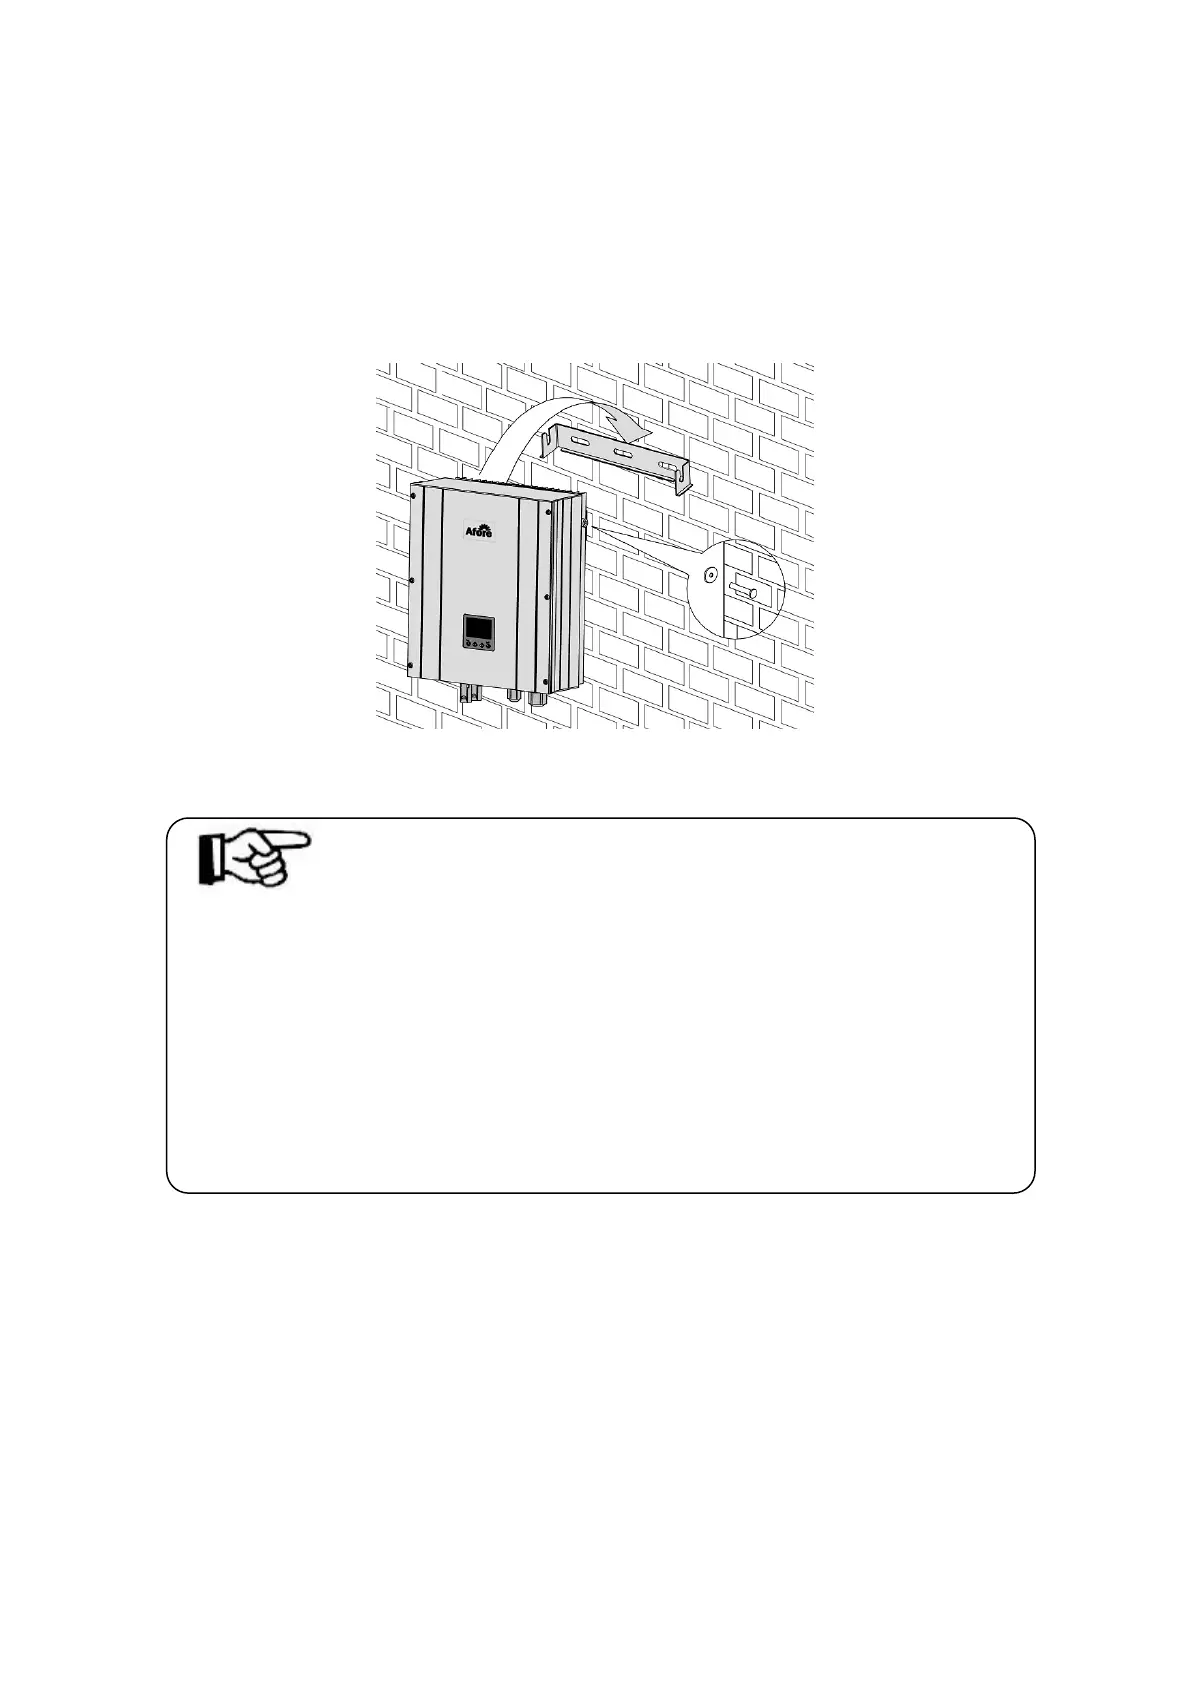
3. Hang the inverter to the mounting bracket and ensure the slot is fitted on the
bracket.
4. Check to ensure the inverter is correctly seated. Make sure to lock it with the
safety-lock screws on both sides to ensure the inverters, see the figure below.)
5 Electrical Connection
Notes:
1. After the inverter has been installed in its fixed position, the electrical connection to the unit
can be established.
2. Make sure Max. Open Voltage and short-circuit current of the each PV strings accord with the
Spec.
3. Choose the appropriate cable width for AC/DC wire.
4. To connect the inverter, the AC and DC sides must be disconnected from all power sources
and secured against being inadvertently switched back on.
5. Before connecting the inverter to PV arrays and public grid, make sure the polarity is correct.
5.1 Overview of the Connection Area
The following figures show the assignment of the individual connection areas on the
bottom of the inverter.
 Loading...