Page 4 of 14 MSO8104A-05A
Figure 3
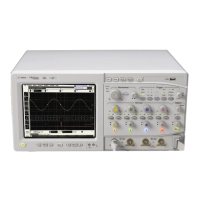
Remove the two Torx T20 screws holding the shock mount in place (See Figure 4)
You may need to use a Torx key to loosen the screws.
14 Tilt the disk drive assembly forward and lift up to remove.
15 Remove the following cables:
• SATA Cable
• Hard Drive Power cable
Figure 4
16 Lift tray with old motherboard from rear and slide to clear the rear panel clearing the three
long standoffs under the tray remove the tray from the chassis.
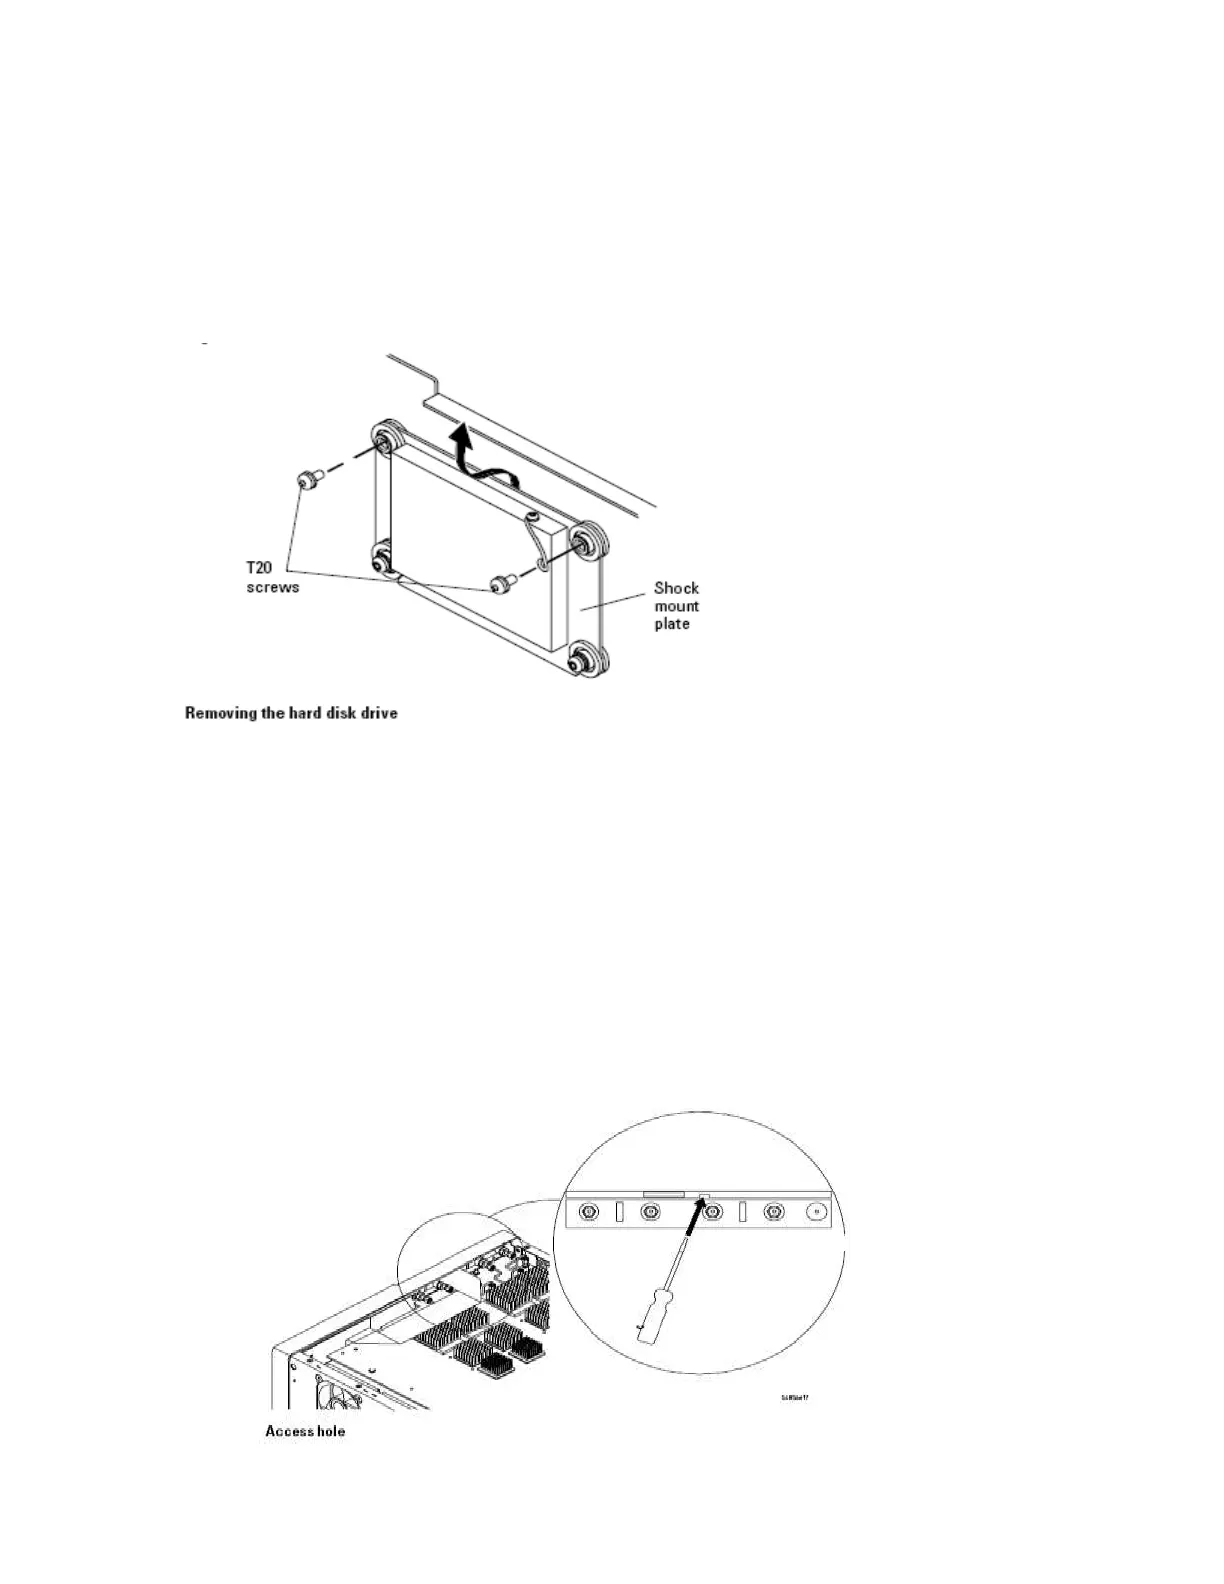
17 Remove the Auto Probe board b the following.
a Place the unit so the bottom is facing up.
b Locate the access hole on the inside of the front-panel assembly which is below and almost between
channel 2 and channel 3 BNC connectors.
c From the back of the front panel, put a small screw driver or other slender pointed object through the
access hole to push the Auto Probe assembly faceplate away from the front panel assembly.
Figure 5
Access hole
CAUTION: AVOID DAMAGE TO THE RIBBON CABLE AND FACEPLATE!
Do not pry around the edge of the assembly. Doing so may damage the ribbon cable or faceplate.
Figure 5
d Disconnect the mylar flex cable from the AutoProbe board.