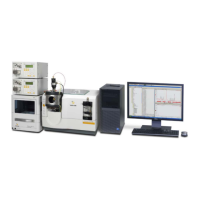
Mx3000P or Mx3005P Instrument Qualification β–Actin Install Plate Instructions
600567-11, Revision C
Performing the Qualification Test Run
The first time the MxPro software is opened using an instrument-connected computer, the software provides a
prompt to run the
Instrument Qualification Test. The test may also be initiated by selecting Qualification Test
from the Instrument menu. The software automatically loads the plate set-up and thermal profile for the
qualification run.
A validation protocol Wizard will provide instructions in a series of dialog boxes before, during, and after the
run.
Since the Qualification Test is a fixed test, only the actions directed by the validation protocol Wizard can
be completed. Do not attempt to modify the Qualification Test experiment or to analyze data during the
Qualification Test run.
First, the
Instrument Qualification Test-Start dialog opens. When the plate has been prepared for the run, click
Next to open the Instrument Qualification Test-Start Run dialog box. Enter any comments for the
qualification test. Verify that the Perfect Fit frame shipped with the instrument has been removed from the
thermal block area. Load the test plate in the thermal block, verifying the correct orientation
(well A1 in the top, left corner). Close the instrument door, and then select
Start Run. The Mx3000P or
Mx3005P instrument will begin the Instrument Qualification Test run. If the
Pre-Run Lamp Warm Up dialog
box appears, select
Run Now.
Important While the Qualification Test experiment is running, do not open the instrument door or cancel
the run.
Data Analysis
When run is complete, the software will proceed to the Analysis-Text Report section and the Instrument
Qualification Test-Run Complete
dialog box will appear. Select Analyze. The software will open the
Microsoft Excel Instrument Qualification Validation template and export the Text Report data into the template.
Notes If a
Server Busy error dialog box appears, click Retry until the data export succeeds.
If any Norton anti-virus dialog boxes appear, select
Notify again in 1 Day, and close the dialog.
Qualification Validation
The Microsoft Excel Validation template will open to the FAM analysis tab. Verify that the Data Count cell
reports the result
Good to ensure that all of the data has been correctly exported into Excel. Next, verify that the
Result cell reports a Pass result. A Pass result indicates that the instrument is working properly. In this case, it
is not necessary to E-mail the data to Technical Services.
If the test reports a
Check result, it is important to call Technical Services and send the three data files,
including Customer Information.txt, into Technical Services by E-mail for troubleshooting guidance. Include the
name of your institution, a contact name, and the instrument serial number when sending the data to Technical
Services.
Instrument Qualification Completion
After checking the Microsoft Excel Validation template, go back into the MxPro software. For a test report
Check result only, the
Instrument Qualification Test-E-mail Experiment dialog box will appear and present
the option to automatically
E-mail the data or save the data to a disk to later E-mail the data to Technical
Services (QPCR@agilent.com). Finally, the
Instrument Qualification Test-Complete dialog box will appear,
indicating that the test is finished.
Technical Services
Telephone: To find worldwide support telephone
numbers visit www.genomics.agilent.com
and click
Contact Us
Email: qpcr@agilent.com