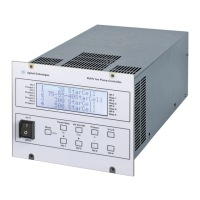
XGS-600 Gauge Controller
DRAFT 4/15/14
15
Chapter 2: Installation
Each XGS-600 unit is inspected and carefully packed prior to shipment. If the unit arrives
damaged, save the packing materials and immediately notify the carrier. Because the
packing materials are designed specifically for this instrument, always use them when
transporting the unit. The shipping container is packed with the following contents:
Connect the Unit
The unit comes shipped with sensor boards configured according to customer requirements.
CAUTION Do not block air vents. Allow approximately 3/4" clearance at
each side of the enclosure for proper air flow.
1. Install the included ferrite bead onto the AC power (Mains) cable near the XGS-600
chassis. Ensure that the locking tab is fully engaged.
2. Plug the AC line cord into the receptacle on the rear panel of the unit and into the
power source. Keep power off while connecting the remaining cables.
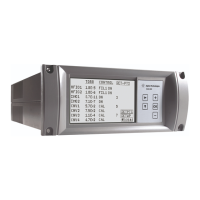
3. Connect gauge and I/O cables depending on controller configuration according to
Figure 2-1:
Figure 2-1 Gauge Board Rear Connections
❑ XGS-600 gauge controller ❑ AC line cord
❑ Operating manual ❑ Rubber feet, adhesive
❑ Clamp-On Ferrite Bead
BA Gauge
I/O Connector
Gauge Connection
Hot Filament Board
Convection Board
IMG Board
I/O Connector
Gauge Connection
Gauge Connection
I/O
Gauge
CNV1, 3, 5, 7, 9, B
CNV2, 4, 6, 8, A, C
Power Connector
I/O
Dsub
Analog Board
Connection
Connector
Dsub
Connector
Connector
(AUX1,3,5,
7,9,B)
(AUX2,4,6,
8,A,C)
Connector
 Loading...