Do you have a question about the AGPtek RG109MAX and is the answer not in the manual?
Advice for new pilots on practicing low altitude flying before attempting high altitude flights.
Guidance on selecting suitable indoor and outdoor environments for flying the UAV.
Instructions on how to correctly replace the UAV's fan blades for proper flight.
Key information and disclaimers regarding the product's use and the manufacturer's responsibility.
Warnings and prohibitions related to flying the UAV safely, especially concerning crowds and obstacles.
Identifies various buttons, indicators, and displays on the remote control unit.
Instructions on how to properly set up the remote control handle and attach a mobile phone.
Steps for charging the remote control using a USB cable and power source.
Instructions for removing and charging the UAV's lithium battery.
Specifies the necessary environmental conditions and safety distances for flying the drone.
Steps to synchronize the drone and remote control for communication.
Procedure to calibrate the drone's gyroscope for stable flight.
Steps for calibrating the drone's magnetometer for accurate direction sensing.
Process of the drone searching and connecting to GPS signals for navigation.
Important notes and advice regarding calibration procedures and GPS signal acquisition.
Explains how to control the drone's movement using the remote control levers.
How to adjust the drone's flight speed settings using the remote control.
Instructions on how to adjust the camera's angle during flight.
Details on one-key return, signal break return, and low voltage return features.
Troubleshooting common issues such as unresponsive drone, blade problems, and shaky flight.
This document provides comprehensive instructions for operating the RG109MAX Brushless EPS four-axis aerial photography UAV, also referred to as a toy aircraft. It covers pre-flight preparations, control methods, safety guidelines, and troubleshooting.
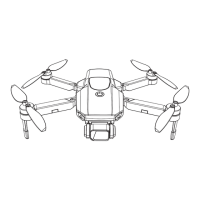
The RG109MAX is a four-axis aerial photography UAV designed for recreational use. It features a brushless motor system for stable flight and is equipped with a camera for aerial photography. The drone operates with a remote control that includes an LCD display, joysticks for control, and dedicated buttons for various functions such as GPS switch, one-key return, and gyroscope/geomagnetic calibration. The remote control also has indicators for power, GPS, geomagnetic status, and charging.
The drone supports two main flight modes: GPS mode (default) and optical flow mode. GPS mode offers advanced features like one-key return and various GPS functions, while optical flow mode is suitable for situations without strong GPS signals. The device is designed to be user-friendly, with automated processes for frequency synchronization and GPS signal acquisition after calibration.
Pre-flight Preparation: Before flying, users must ensure the drone is operated in a suitable environment. For indoor flights, a spacious area free from obstacles, crowds, or pets is recommended. Outdoor flights require sunny, clear, and windless weather, avoiding extreme conditions like heat, cold, strong wind, or heavy rain. It is crucial to maintain a line of sight with the UAV and keep it away from obstacles such as high-voltage cables, trees, and personnel.
Frequency Synchronization: To begin, place the drone on horizontal ground, power it on, and then power on the remote control. The drone and remote control will automatically synchronize frequencies, indicated by the rapid flashing of lights transitioning to specific long and slow flashes.
Calibration: Gyroscope calibration is performed by placing the UAV horizontally and pressing the calibration button on the remote control. Geomagnetic calibration involves pressing the geomagnetic calibration button, then holding the UAV and slowly rotating it clockwise in both horizontal and vertical positions until the remote control signals success. These calibration steps are critical for accurate flight data and preventing flight abnormalities.
GPS Signal Search: After successful calibration, the UAV automatically searches for GPS signals. Once connected, the remote control will signal success, and the motor can be deblocked for takeoff. It is advised to perform calibration in an open area to ensure sufficient GPS signal acquisition.
Flight Control: The remote control features a left joystick for accelerator (altitude) and rudder (yaw) control, and a right joystick for rudder (forward/backward and left/right movement). Pushing the left joystick up increases altitude, while pushing it down decreases altitude. Moving the left joystick left or right turns the aircraft's head. The right joystick controls forward/backward movement when pushed up/down, and left/right flight when pushed left/right.
Speed Adjustment: The UAV's take-off speed defaults to slow. Users can adjust the speed gear during flight using a knob on the remote control. Rotating the knob right increases speed (second and third gear high-speed modes), while rotating it left decreases speed (second and first gear low-speed modes).
Camera Angle Adjustment: The camera angle can be adjusted during flight using a dedicated knob on the remote control. Rotating the knob right decreases the camera angle, and rotating it left increases it.
Return Functions: The drone offers several return functions:
Blade Replacement: If a fan blade needs replacement, it is crucial to install the correct blade (A or B) in its corresponding position. Incorrect blade installation can lead to loss of control. Fan blade A rotates clockwise, while fan blade B rotates counterclockwise.
Battery Charging:
Troubleshooting: The manual provides a resolution guide for common problems:
The document emphasizes that the product is not a toy and improper use can cause damage. Users are advised to follow instructions carefully and not disassemble the product. For beginners, practicing at low altitude in open, unmanned areas for about three days before attempting high-altitude flights is recommended.
| Brand | AGPtek |
|---|---|
| Model | RG109MAX |
| Type | Quadcopter |
| Control Range | 500 meters |
| Features | One Key Return |
| Control Distance | 500m |