3
BUILDER’S CHOICE
™
GALLERY EDITION
GETTING STARTED
Unpacking
Before assembling and installing your ceiling fan, remove all
parts from the shipping cartons and check them against the
parts listed here. Before discarding packaging material, be
certain that all parts have been removed.
Be sure to only use genuine Airflow blades. The blade shrink
wrap holds five blades of matched weight. If more than one
fan is being installed, be sure not to mix blade sets.
NOTE: Only one set of blade holders is supplied. Depending on
the fans and series, there are three different mounting
procedures.
CAUTION: When removing the shrink wrap,
be careful not to scratch the blades.
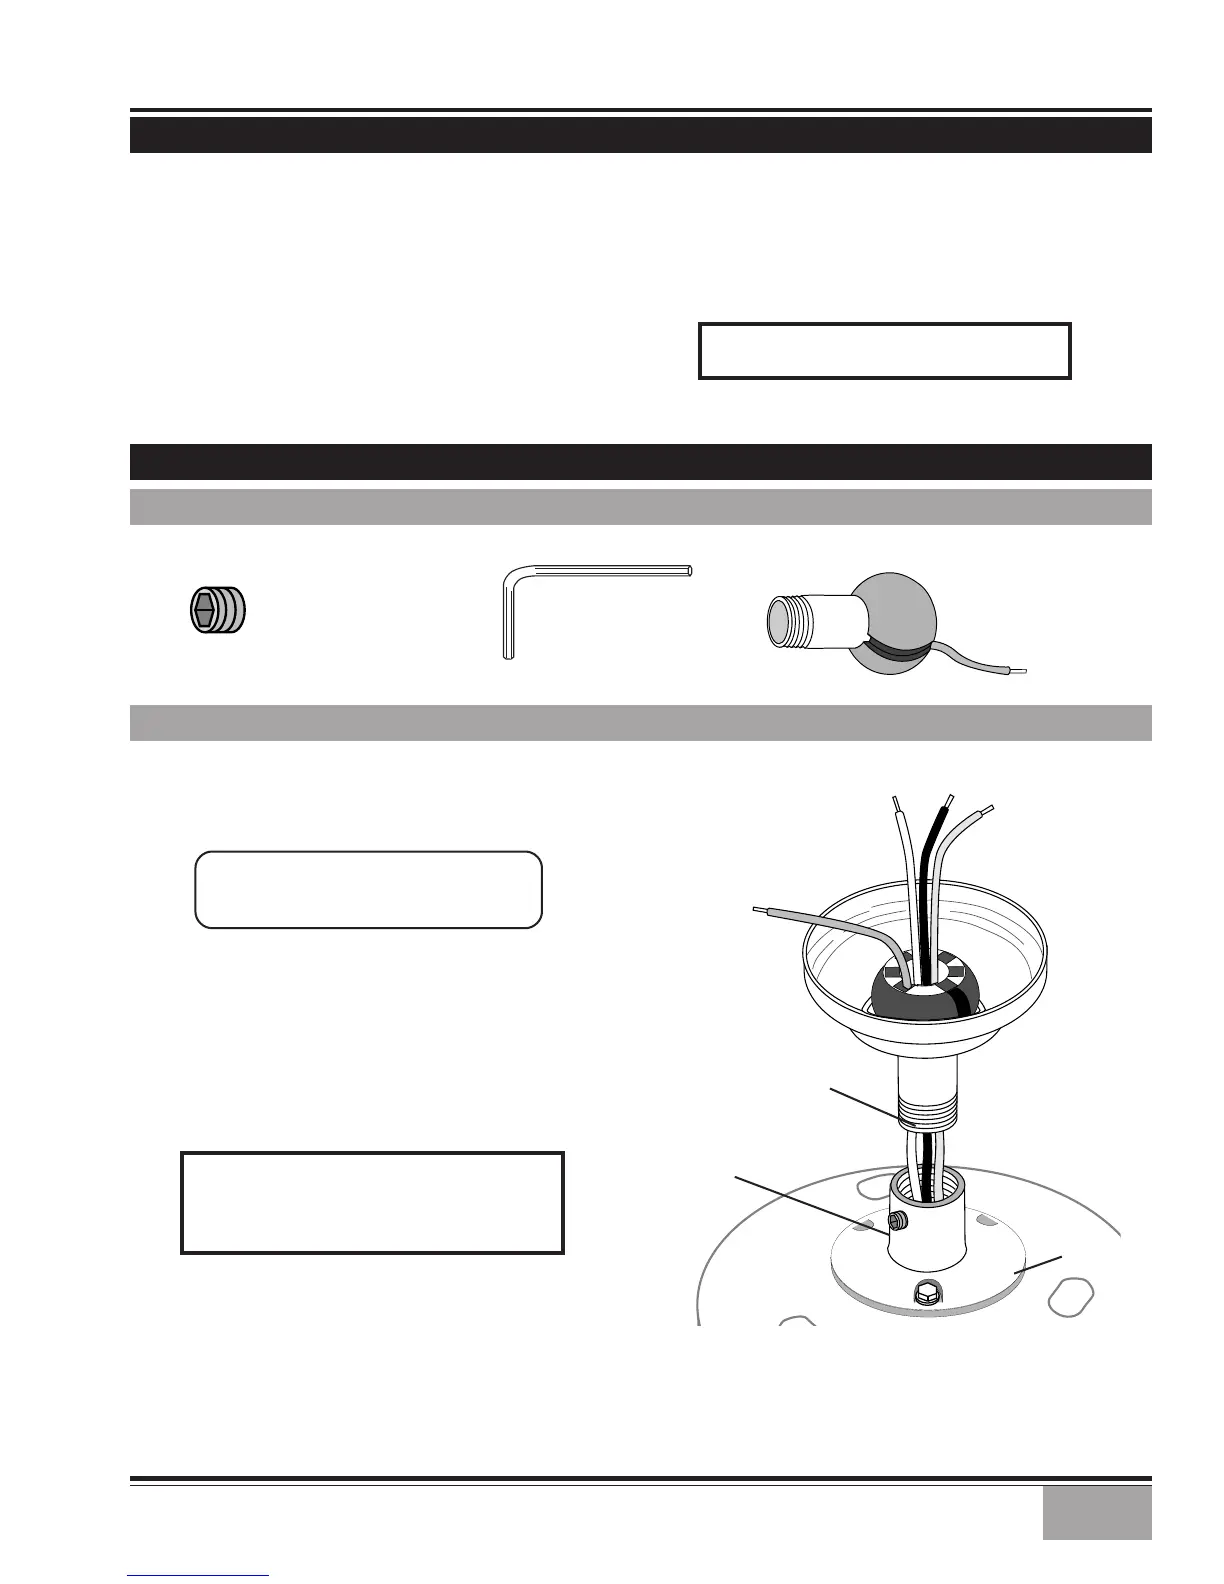
FAN PREPARATION
PERMA
•
LOCK™ HARDWARE
DOWNROD & BALL
ASSEMBLY
ALLEN SET SCREW
1
⁄
4
-20 x
1
⁄
4
"
(PRE-INSTALLED)
3mm
ALLEN WRENCH
Prepare for fan installation as follows:
Step 4. Route the wires from the motor through the canopy,
then the Perma
•
Lock™ downrod and ball assembly.
Step 5. Using the provided Allen wrench, loosen the set screw
several turns to allow installation of the downrod. Thread the
downrod into the motor coupling until it stops turning, this
will take at least four and a half full turns.
Step 6. Securely tighten the set screw with the provided Allen
wrench to ensure safe operation of your fan.
TIP: The downrod has a tapered thread
that is designed to lock completely when
correctly installed.
CAUTION: Failure to fully lock in the down-
rod before securely tightening the allen set
screw may cause the fan to separate from
the downrod during normal operation!
MOTOR
COUPLING
TAPERED
THREAD
MOTOR
WIRES
GROUND
WIRE
ALLEN
SET SCREW
CANOPY
FAN INSTALLATION
DOWNROD
BLUE
D1
WIRE