5
BUILDER’S CHOICE
™
GALLERY EDITION
ELECTRICAL CONNECTIONS
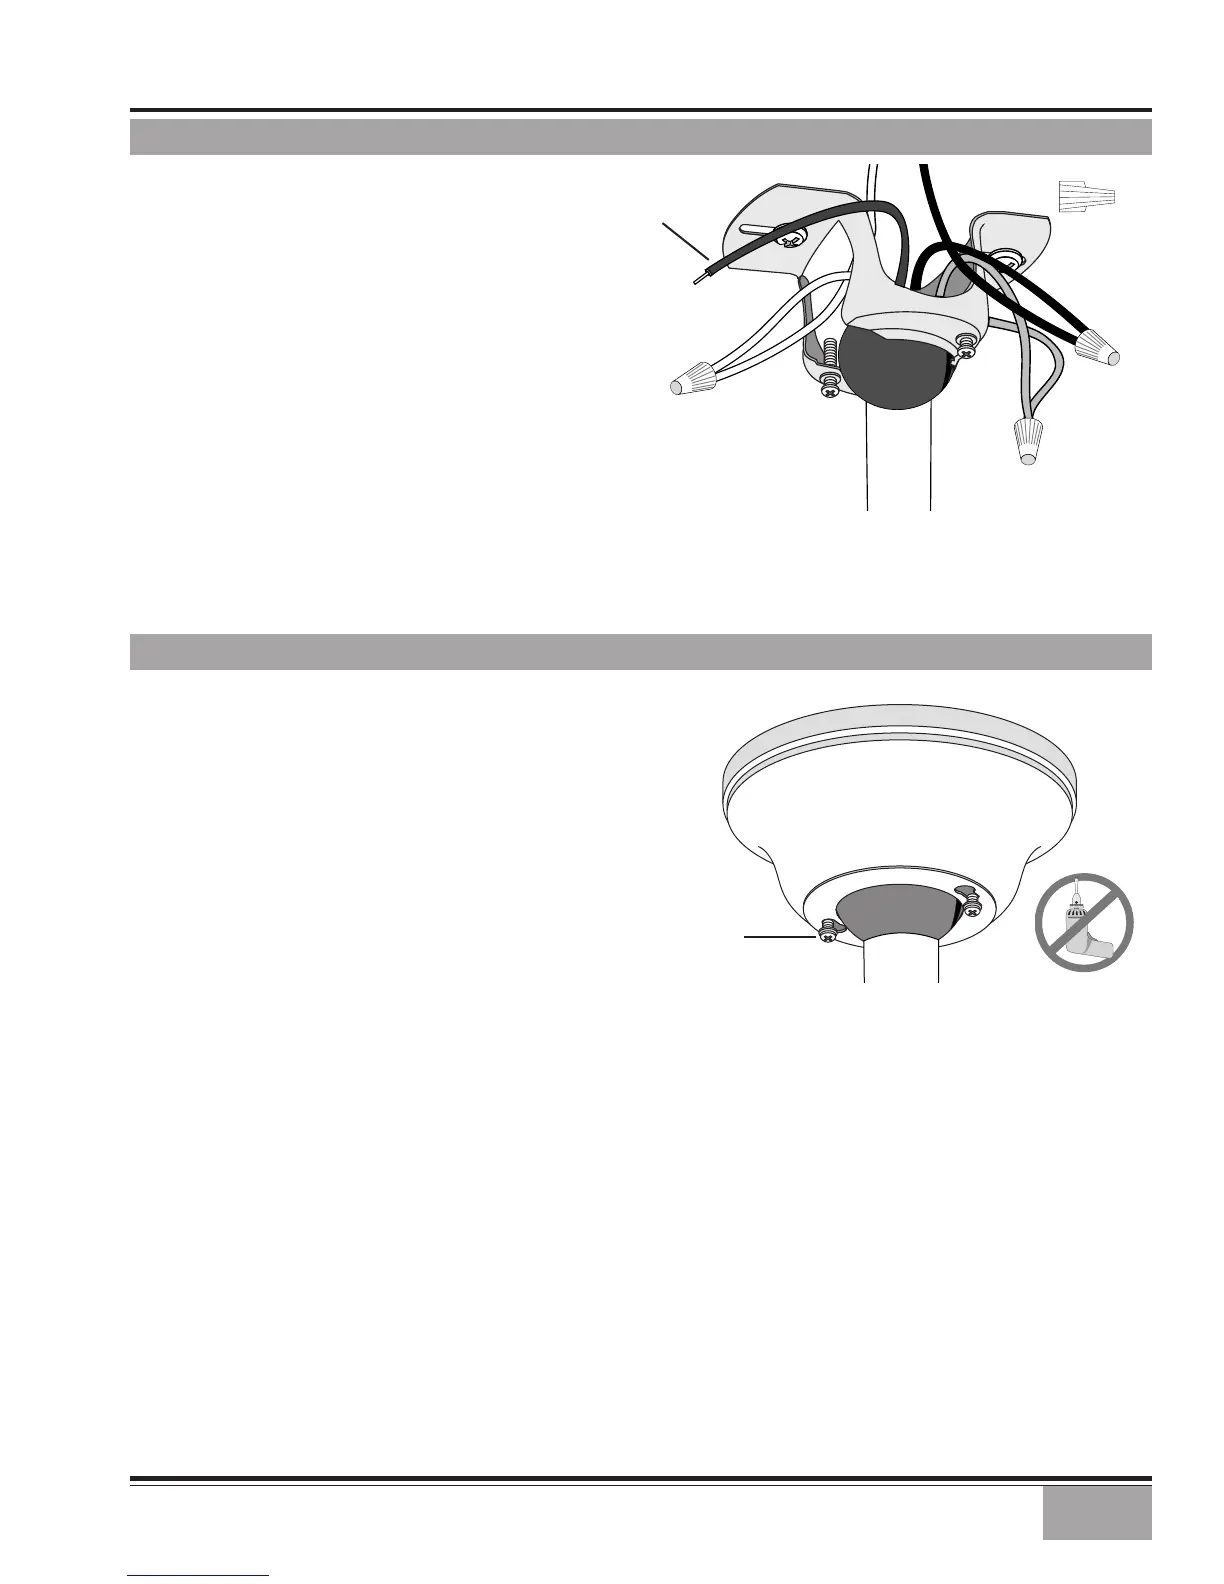
Step 9. Attach the fan wires to the ceiling fixture
outlet box wiring by twisting the bare ends of the
wires together and then securing with a wire nut. Test
that the connection is secure by pulling on the wire
nut. Connect in this order:
2 WHITE WIRES
BLUE
D1-OPTION
WIRE
WIRE NUT
2
GREEN
WIRES
• GREEN leads from mounting plate and fan to GROUND
conductor of power source. Secure with wire nut.
• WHITE wire from fan to white NEUTRAL wire in ceiling
fixture outlet box. Secure with wire nut.
• BLUE wire and BLACK power wire from fan to BLACK
power wire in ceiling outlet box. Secure with wire nut.
2
BLACK
WIRES
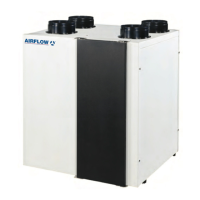
CANOPY HATCH INSTALLATION
Step 10. Tuck the wires into the outlet box with the
wire nuts pointed upwards, so that the WHITE and
BLACK wires are on opposite sides of the outlet box
and all wires are clear of the bracket opening.
Step 11. Loosen the 2 canopy screws in the mounting
bracket. Raise the canopy to the mounting bracked,
assuring that no wires are pinched, and pass the canopy
screws through the keyholes in the canopy.
Step 12. Rotate the canopy counter clockwise to
engage the keyholes. Tighten the canopy screws firmly
by hand only.
CANOPY
CANOPY
SCREW