© Glenco Air & Power Pty Ltd
5.0 Installation
5.1 Handling
Remove the air compressor from its shipping carton and pallet before mounting. Do not use the
timber shipping pallet for mounting the compressor.
Portable wheel-mounted compressors should only be lifted manually as a last resort and always as a
joint lift by at least two persons. Avoid injury and do not attempt to lift a compressor by yourself. Use
a mechanical lifting aid, such as a forklift or crane, whenever possible in conjunction with two rope or
web slings wrapped under the air receiver tank.
Stationary foot-mounted compressors should only be lifted with a mechanical aid. The foot mounts
are designed for ease of handling with a forklift in preference to lifting with slings as described
above.
Compressors have a high centre of gravity due to the elevated position of the compressor pump and
engine or motor, which are relatively heavy components compared to the air receiver tank. Take care
when attaching slings to ensure that the compressor does not tip over. Also, check that the slings do
not damage any components especially including the piping, wiring, pressure switch or pilot valve,
safety valve and pressure gauge.
5.2 Electric Air Compressors
Select a clean, dry and well-lit area most preferably indoors with plenty of space for proper
ventilation, cooling air flow and accessibility. Locate the compressor at least 300 mm (1 ft) from walls
for ventilation or preferably no less than 600 mm (2 ft) to allow for maintenance access. Ensure that
the power supply is clearly identified and accessible. Always provide sunshade and shelter from
moisture if the compressor has to be located outdoors.
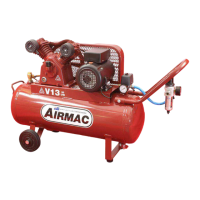
5.2.1 Portable Wheel-Mounted Type
Assemble the supplied axles and wheels onto the compressor using one nut and washer per wheel.
Apply a small amount of lubricant to the axle and wheel rubbing surfaces. Tighten the axle nuts to
55 Nm (40 lbf-ft). Place the compressor on a firm, level surface that is strong enough to support its
weight. Use wheel chocks to prevent movement of the compressor during operation and possible
straining of the electricity supply cable or air hose. Do not place on an incline during use as this will
interfere with the compressor pump’s splash lubrication system.
Some models are equipped with only two – rather than four – wheels and also two rubber foot
mounts. Assemble the latter onto the foot mounting bracket with the supplied fasteners. These
compressors also require their removeable carry handle to be attached using the supplied fasteners.
And depending on the model, some also require the filter-regulator to be attached to this handle.
Portable type compressors may alternatively be installed for fixed stationary or mobile applications
by bolting them down loosely through the holes in the bottom of the wheel mounting brackets.
Flexible vibration isolators must be used. The wheels and axles should not be fitted in such cases.
5.2.2 Stationary Foot-Mounted Type
Bolt the compressor loosely to a firm, level foundation such as a concrete floor that is strong enough
to support its weight. Do not bolt uneven feet tightly to the foundation as this will cause excessive
 Loading...