6408 216th Street SW | Mountlake Terrace, WA 98043 USA
T +1.425.778.7728 F +1.425.778.7727 | www.SymetrixAudio.com
8
Quick Start Guide
Hardware Connections
POWER
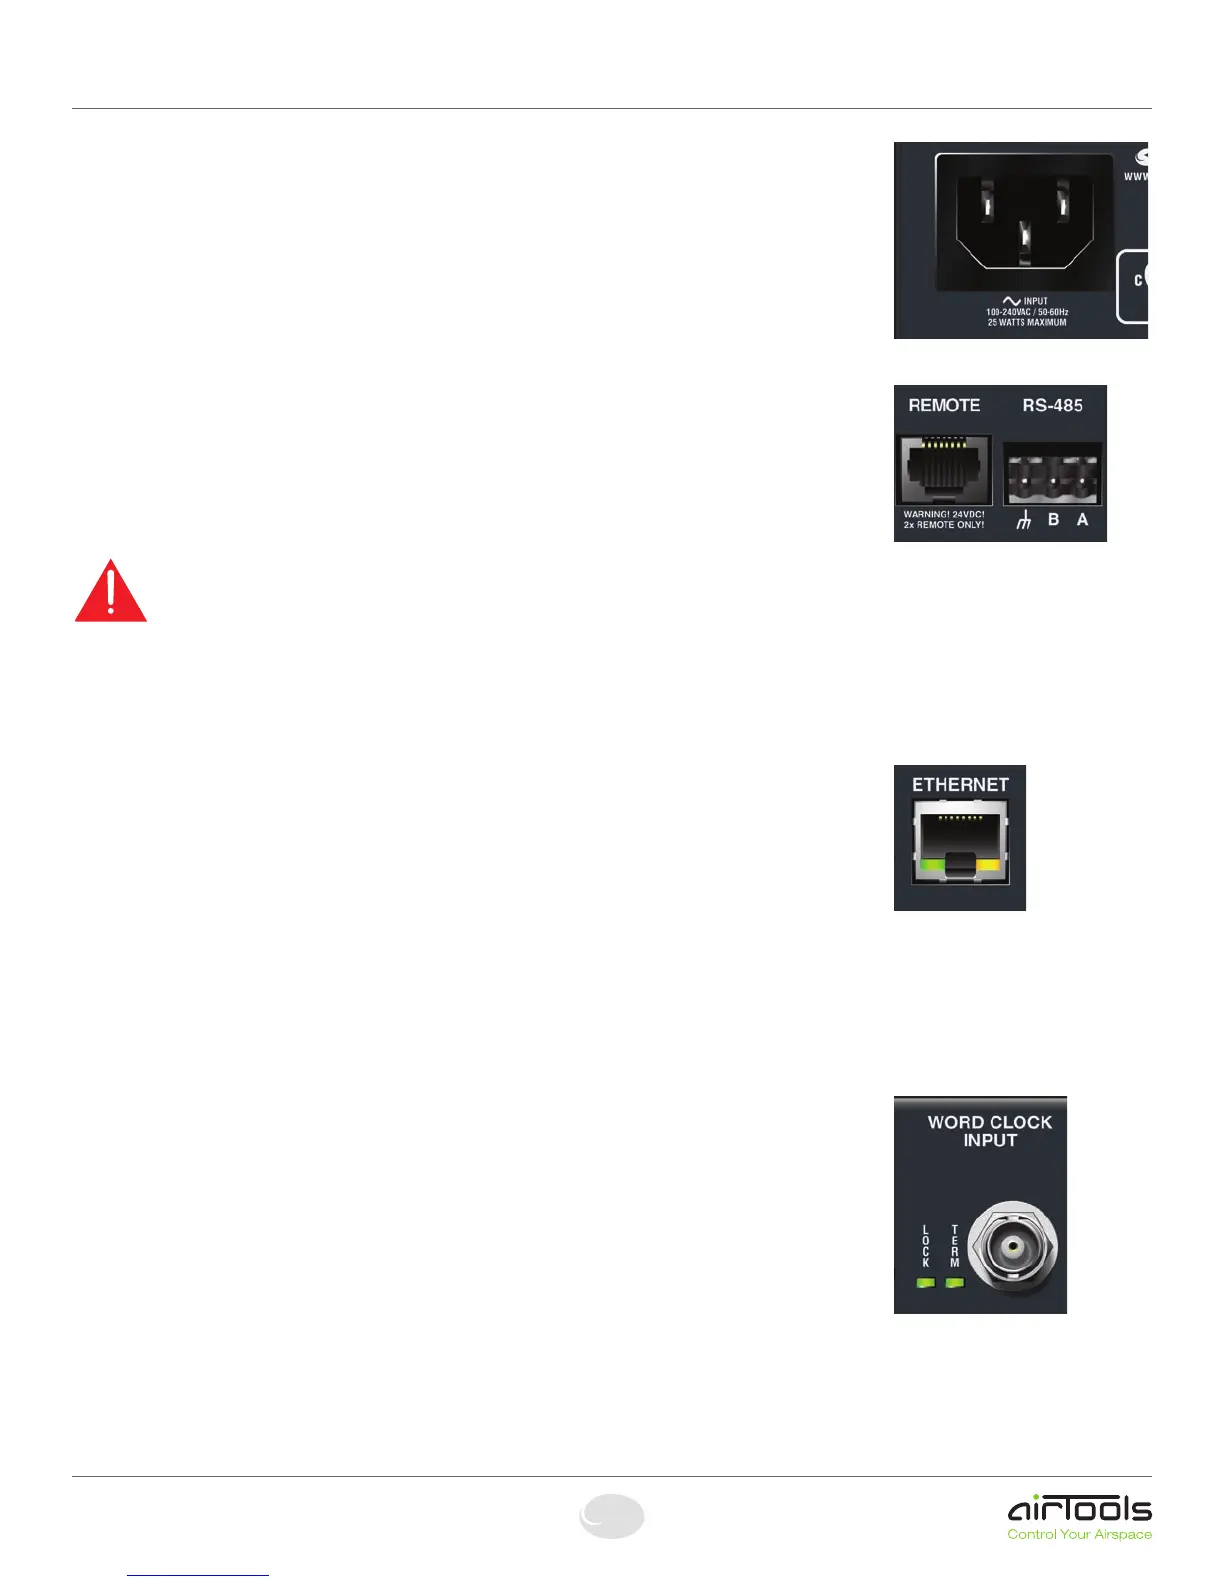
Connect the IEC connector end of the supplied AC cord to the receptacle on the rear of the
2x. Connect the AC connector end of the supplied AC cord to an AC power source that is of
the correct voltage and frequency (100-240 VAC, 50-60 Hz). Use only the power cord and
connector specified for the product and your operating locale.
When the 2x is powered up correctly, the POWER LED on the front of the unit will be lit solid
green.
REMOTE
Using a standard straight-through CAT5 cable terminated with RJ45 connectors, connect
your 2x remote control to either the front panel or rear panel REMOTE port according to the
guidelines in your remote’s documentation.
When a remote is connected to the 2x, the REMOTE LED on the front of the unit will be lit
solid green.
CAUTION: DO NOT plug the REMOTE connectors on this product into any RJ45
connector labeled “ETHERNET”, “COBRALINK” or “SYMLINK”. Refer to the Remote Warning for compatibility
information.
RS-485
Reserved for factory use only.
Ethernet
Using a standard straight-through CAT5 cable terminated with RJ45 connectors, connect
the2x’sETHERNETporttoeitheryourcomputer’sEthernetportortoanexistingEthernet
network.YoumaywishtoreviewtheNetworkCongurationsectionformoreinformation.
Whenthe2xhasaphysicalnetworkconnection,theamber“link”LEDontheETHERNET
connector will be lit solid.
Whenthereisnetworkcommunication,thegreen“activity”LEDontheETHERNET connector and the NETWORK LED on
the front of the unit will flash accordingly.
NOTE: The 2x’s Ethernet port will automatically sense a device-to-device connection so that a standard straight-through
Ethernet cable may always be used. A cross-over cable is not required.
WORD CLOCK INPUT
Ifavailableanddesired,connectahouseWordClockfeedhereusing75ΩRG59orbetter
coaxialcableterminatedwithBNCconnectors.
Remember to set the Sync Source to Word in the System area of the application.