5
A-MIP 200 V1.06
Installation
Aivia Mounting
Do not install Aivia exposed to direct sunlight. The
defibrillator may be exposed to extreme temperatures.
• Aivia installation must be performed by persons with the
required professional expertise, adhering to the
Bornavie Charter.
• If the Aivia is installed in a public area or passageway,
provide a floor area (abutment) or a column, to conform
with the Decree of January 15, 2007, "Technical
requirements for free passageway" Article Nº6-D.
• Mounting must be suitable for the type of substrate
which the Aivia is attached to.
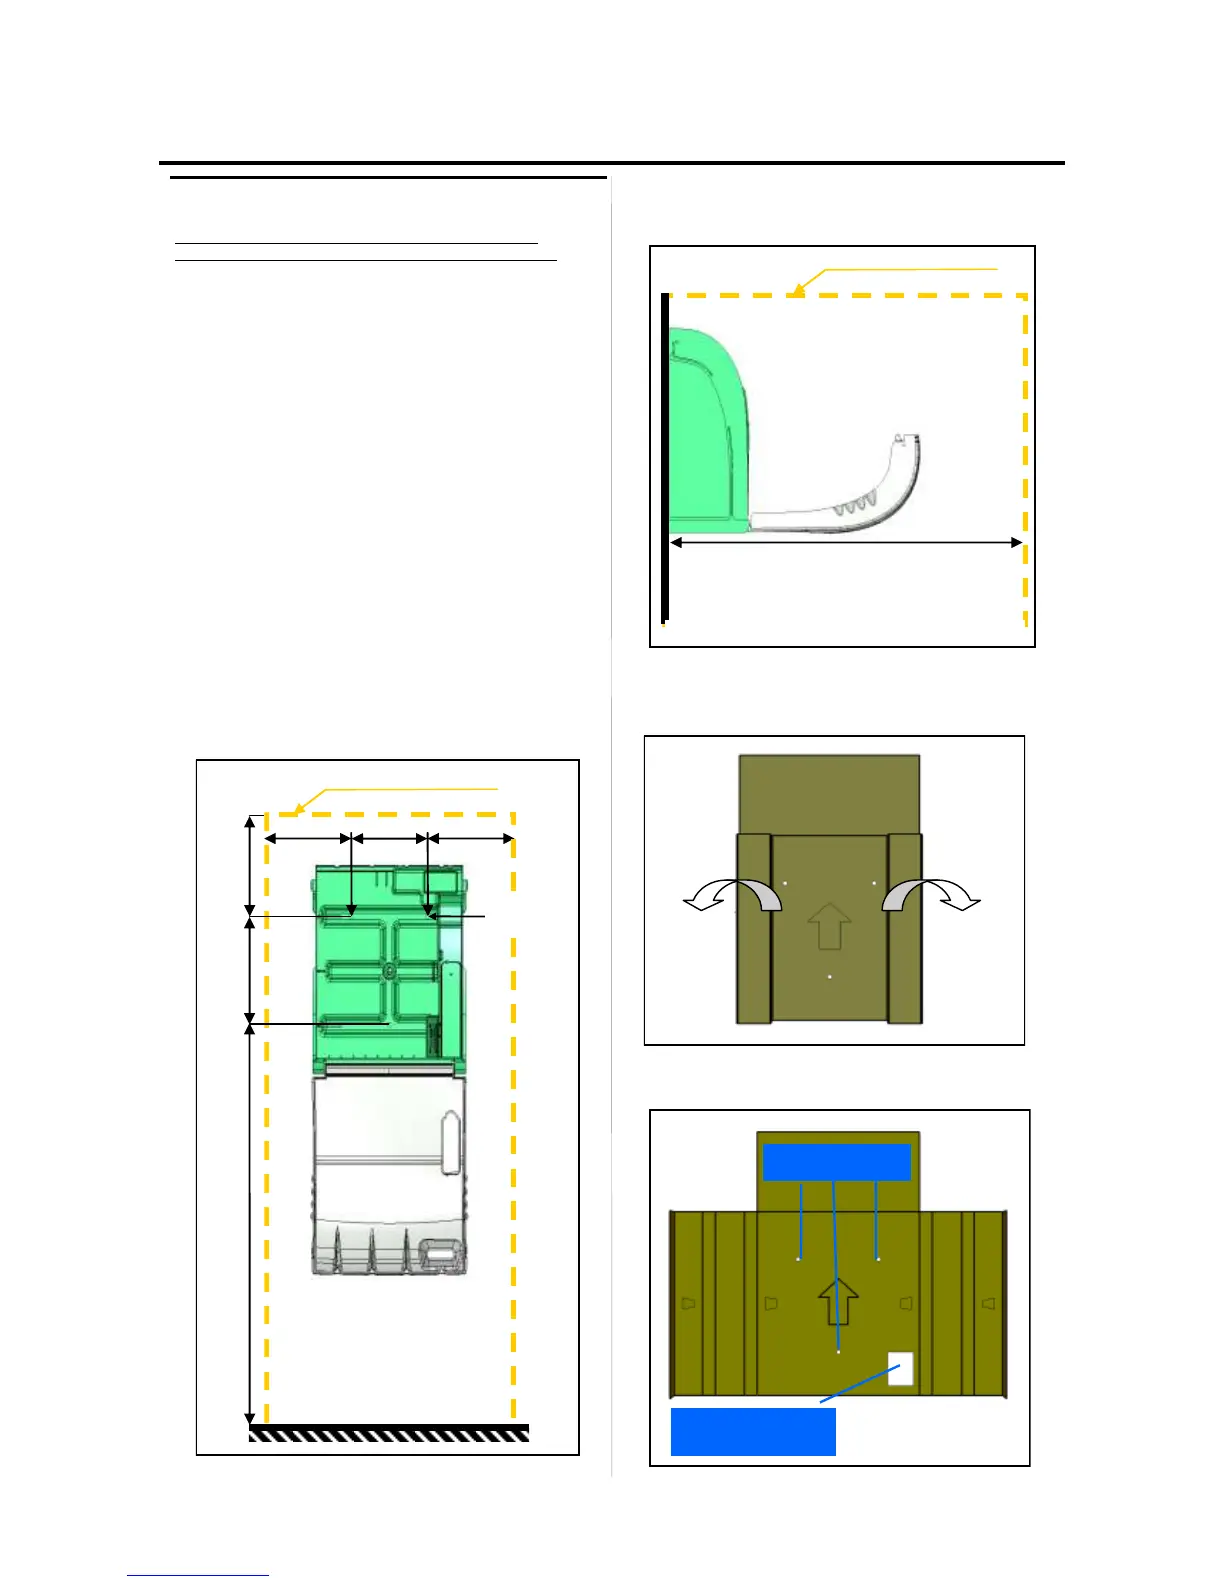
• Leave a free area for installing the Aivia as specified in
the sketches below.
• The exact dimensions of the Aivia are provided at the
end of this document in the Specifications section.
• Make sure that every cable has been taken thru the
cable passage before affixing the Aivia to the wall.
215 mm
190mm 220mm 220mm
150 mm 1300 mm
8,5 mm
• Leave a 140 cm clear space in front of the Aivia wall
mounting to allow door to open freely.
• Use the drilling template supplied with packaging to
mark the mounting holes and cable entry on the wall.
• Place the drilling template on the wall, arrow facing you
and pointing up.
1400 mm
Useful zone for Aivia implementation
Fixing holes
24V DC Cables
passage
Area required for Aivia mounting