Do you have a question about the Aiwa XR-M33 and is the answer not in the manual?
Reduce risk of fire or electric shock. Do not expose to unit to rain or moisture.
Risk of electric shock, do not open. Refer servicing to qualified personnel.
Explains lightning flash and exclamation point symbols for safety.
Guidelines for water, heat, mounting surface, and ventilation.
Information on power sources, polarization, and AC power cord safety.
Verify system and accessories before connecting power.
Connect speaker cords to the main unit and ensure correct polarity.
Connect speakers, antennas, and accessories before the AC cord.
Connect FM and AM antennas to their respective terminals.
Connect outdoor antenna for better FM reception.
Guidelines for positioning FM and AM antennas for best reception.
Notes on speaker connections, magnetism, and antenna proximity.
How to insert AA batteries into the remote control.
How to use function buttons and PLAY button on the remote.
Steps to turn the unit on using function buttons and turn it off.
Explains DEMO, ECO (power saving), and DIMMER modes.
Connect headphones to the PHONES jack for private listening.
How to adjust the volume using the main unit or remote.
Enhances low-frequency sound realism for audio playback.
Selects equalization curves (ROCK, POP, JAZZ) for sound customization.
Provides a richer, three-dimensional sound experience.
How to select bands and tune to radio stations manually.
Switch to MONO mode to reduce noise in FM stereo broadcasts.
Change the AM tuning step from 10 kHz to 9 kHz.
Quickly scan and tune to available radio stations.
Store favorite radio stations for quick recall.
Select stored stations directly using the remote control.
Remove a stored station from memory.
Loading discs, playing, stopping, pausing, and track selection.
Steps to open compartment, load disc, and close compartment.
Use numbered buttons on remote to choose specific tracks.
Play tracks randomly or repeat the entire disc/track.
Options for repeating the entire disc or a single track.
Create a custom playlist of up to 30 tracks.
Inserting tapes, playing, stopping, pausing, and changing playback side.
Steps to insert a tape and start playback.
Choose between one-sided or continuous (both sides) playback.
Advice on cassette tabs, tape length, and slack.
Record audio from tuner, CD, or external sources onto tape.
Add 4-second gaps between recorded segments.
How to erase existing content from a tape.
Automatically records CD tracks based on tape length, rearranging tracks if needed.
Limitations and requirements for AI Edit Recording.
Program tracks while checking tape remaining time for accurate recording.
How to clear and re-program tracks for each tape side.
Configure the unit's internal clock.
Set the unit to automatically turn off after a specified period.
View current time and switch between 12/24 hour formats.
Explains clock display flashing due to power interruption.
Schedule the unit to turn on and play at a specific time.
Schedule tape recording for TUNER or AUX/VIDEO sources.
Guidelines for connecting external audio devices.
Input analog sound signals via VIDEO/AUX jacks.
Steps to select and play audio from connected external equipment.
Change the displayed name for AUX/VIDEO input.
Routine cleaning of cabinet, heads, tape paths, discs, and tapes.
Solutions for common issues like no sound, poor reception, or playback errors.
How to reset the unit if it malfunctions.
Information on speaker type, impedance, and dimensions.
Details on FM and AM tuning ranges and sensitivity.
Power output and total harmonic distortion.
Track format, frequency response, and signal-to-noise ratio.
Laser type, D-A converter, and signal-to-noise ratio.
Power requirements, consumption, dimensions, and weight.
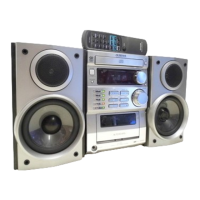
Identifies parts of the main unit with page references.
Identifies parts of the remote control with page references.
| Brand | Aiwa |
|---|---|
| Model | XR-M33 |
| Category | Stereo System |
| Language | English |