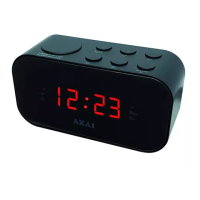
This document is an instruction manual for the AKAI A61019 Clock Radio with Jumbo LED Display. It provides detailed information on the device's features, technical specifications, usage, and maintenance.
Function Description:
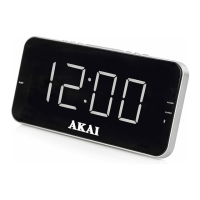
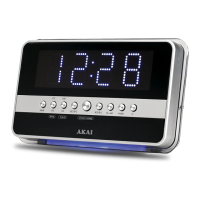
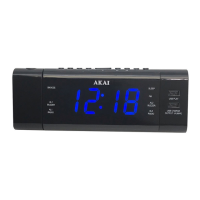
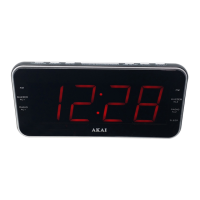
The AKAI A61019 is a clock radio designed to display time with a large LED display, function as an alarm clock with two separate alarms, and operate as an AM/FM radio. It includes a battery back-up function to maintain time settings during power outages and a snooze function for temporary alarm silencing. The device also features a dimmer function to adjust the brightness of the LED display and a sleep function that allows users to listen to the radio for a set period before it automatically turns off.
Important Technical Specifications:
- Model No: A61019
- Power: AC Adaptor 9V 400mA, DC: 3V (1 x CR2025 battery, not supplied)
- Battery Back-up: Requires 1 x CR2025 (3V) button cell battery (not included) for power outage time retention.
- Display: Jumbo LED Display
- Alarms: 2 separate alarms (Alarm 1 and Alarm 2)
- Radio Tuner: AM/FM with 20 station preset memory for each band.
- Snooze Function: Approximately 9 minutes duration.
- Sleep Function: Adjustable up to 120 minutes.
Usage Features:
Before First Use:
- Remove the product and all packaging from the box.
- Retain packaging until all parts are checked against the list.
- Connect the included AC Adaptor to a standard power point (100V-240V AC) and the DC power input jack (No.13) on the back of the unit.
- Remove the protective film from the LED display screen.
- Install 1 x CR2025 (3V) button cell battery (not included) into the back-up battery compartment (No.14) on the rear of the unit. Ensure the '+' side faces upwards. This battery maintains time during power outages.
Setting the Time and Date:
- Press and hold the 'M' Button for a few seconds until the 'Hour' digit(s) blink.
- Use the 'Left' or 'Right' buttons to adjust the 'Hour', then press 'M' to confirm.
- The 'Minute' digits will blink. Use the 'Left' or 'Right' buttons to adjust the 'Minute', then press 'M' to confirm.
- Select 12 or 24-hour time ('12H' or '24H') using the 'Left' or 'Right' buttons, then press 'M' to confirm.
- The 'Year' will flash. Use the 'Left' or 'Right' buttons to adjust the year, then press 'M' to confirm.
- The 'Month' will flash. Use the 'Left' or 'Right' buttons to adjust the month, then press 'M' to confirm.
- The 'Day' (displayed as 'd' followed by 2 numbers) will flash. Use the 'Left' or 'Right' buttons to adjust the day, then press 'M' to confirm.
- The LED Display will show the correct time, and all changes will be saved.
Setting the Alarm:
The clock radio has two separate alarms (Alarm 1 and Alarm 2) for flexible scheduling.
- Press and hold the 'Power' button for a few seconds. Alarm 1 time will show with the 'Hour' digit(s) and Alarm 1 LED indicator flashing.
- Use the 'Left' or 'Right' buttons to adjust the 'Hour' for Alarm 1, then press 'Power' to confirm.
- The 'Minute' digits will blink. Use the 'Left' or 'Right' buttons to adjust the 'Minute' for Alarm 1, then press 'Power' to confirm.
- Select the desired alarm days using the 'Left' or 'Right' buttons:
- 1-7: Every day of the week
- 6-7: Saturday & Sunday
- 1-5: Monday to Friday
- 1: Monday only
- 2: Tuesday only
- 3: Wednesday only
- 4: Thursday only
- 5: Friday only
- 6: Saturday only
- 7: Sunday only
Press 'Power' to confirm the day setting.
- Repeat steps 2-4 for Alarm 2. The Alarm 2 LED indicator will flash to indicate you are setting Alarm 2. Once completed, both alarm settings will be saved.
Turning the Alarm ON/OFF:
- To turn an alarm ON: Ensure the radio is OFF. For Alarm 1, repeatedly press the '-' button until 'bb' (for buzzer) or the last radio station frequency is displayed. The Alarm 1 LED indicator will illuminate. For Alarm 2, repeatedly press the '+' button until 'bb' or the last radio station frequency is displayed. The Alarm 2 LED indicator will illuminate.
- To turn an alarm OFF: Ensure the radio is OFF. For Alarm 1, repeatedly press the '-' button until 'OFF' is displayed. For Alarm 2, repeatedly press the '+' button until 'OFF' is displayed. The corresponding Alarm LED indicator will turn off.
- To turn the alarm OFF for the day (without cancelling future alarms): Simply press the 'Power' button when the alarm sounds.
Using the Snooze Function:
When the alarm sounds, press the 'Snooze/Sleep' button (No.4). The alarm will stop and restart in approximately 9 minutes.
Using the Dimmer Function:
When the alarm is not sounding (normal mode), press the 'Snooze/Sleep' button (No.4) repeatedly to cycle through brightness levels for the LED display.
Turning the Radio ON/OFF and Selecting the Band:
- To turn the radio ON (FM band), press the 'Power' button once.
- To switch to AM band, press the 'Power' button again. Pressing 'Power' toggles between AM and FM.
- To turn the radio OFF, press and hold the 'Power' button for a few seconds.
- To adjust volume while the radio is ON, press the '-' button to decrease or the '+' button to increase.
Searching for Radio Stations:
- Ensure the radio is ON and set to the desired band (AM or FM).
- Auto Search: Press and hold the 'Left' or 'Right' buttons until the frequencies start changing. The tuner will stop on the first available station. Repeat to find other stations.
- Pressing 'Left' performs an auto search down the frequency range.
- Pressing 'Right' performs an auto search up the frequency range.
- Manual Search: Repeatedly press (do not hold) the 'Left' or 'Right' buttons to manually search up or down the frequency range until the desired station is reached.
Using the Radio Station Preset Memory:
The clock radio has a 20-station memory for FM and AM tuners.
- Tune the radio to your desired station.
- Press and HOLD the 'M' Button until 'P01' begins to flash.
- Use the 'Left' or 'Right' buttons to select the preset number (1-20) to save to, then press 'M' once to save.
- To overwrite a preset, follow the same procedure and select the existing preset number.
- To switch to a saved station, press the 'M' button until 'P01' is displayed. Use the 'Left' or 'Right' buttons to move through the preset list. The selected station will play automatically.
Using the Sleep Function:
- While listening to the radio, press and hold the 'Snooze/Sleep' button until '120' is displayed.
- '120' represents 120 minutes. Repeatedly press the 'Snooze/Sleep' button to adjust the desired sleep time (in minutes).
- Wait a few seconds for the time to display. The sleep LED indicator will illuminate, and the radio will automatically turn off after the selected time.
- To cancel, press and hold the 'Snooze/Sleep' button until the minute select screen appears, then repeatedly press 'Snooze/Sleep' until the time is displayed. The sleep LED indicator will turn off.
Maintenance Features:
Cleaning and Care:
- Always disconnect the clock radio from the power supply and/or remove batteries before cleaning.
- Clean the unit with a soft, damp, lint-free cloth.
- Do not use abrasives or harsh cleaners.
Troubleshooting:
- Not turning on: Check power adaptor connection at both ends.
- No sound in Radio Function: Check volume, ensure clock is set to Radio Mode, try other radio stations.
- Crackling in radio mode: Caused by weak signal. Adjust antenna cable position, try a different radio station.
- Alarm not functioning: Ensure alarm time and frequency are set correctly, alarm is activated, and radio volume is increased (if set to radio alarm). Ensure radio is tuned correctly to a station.
- Did not save original time during power outage: Change the back-up battery.
- Ensure main circuit voltage matches appliance rating.
- Use on a stable, level, heat-resistant surface.
- Do not immerse cords, plugs, or any part in water or liquid.
- Do not leave unattended while operating.
- Close supervision is necessary near children or pets.
- Children aged 8+ and persons with reduced capabilities can use with supervision and instruction.
- Children should not play with the appliance or perform cleaning/maintenance without supervision.
- Switch off and unplug when not in use or before cleaning.
- If supply cord or appliance is damaged, stop use and seek advice.
- Do not let the cord hang over edges or contact hot surfaces.
- Only use manufacturer-specified attachments/accessories.
- Do not pull the plug by the cord.
- Use only for intended household purposes.
- Do not carry by the power cord or use outdoors.
- Do not place liquid containers on top of the unit or spill liquid onto it.
- Do not use near swimming pools.
- Do not put objects into openings.
- Keep unit free from dust, lint.
- Do not install near heat sources.
- Unplug during lightning storms or long periods of disuse.
- Ensure adequate ventilation.
- Battery should not be exposed to excessive heat.
- Caution marking is on the bottom of the apparatus.
- Do not play music at excessive levels, especially near children.
- Ensure battery compartments are secure.
- Only use recommended batteries.
- Ensure correct battery fit (observing polarity).
- Replace a full set of batteries at one time.
- Store unused batteries away from metal objects.
- Remove dead batteries.
- Remove batteries if not used for a long time.
- Keep button cell and AAA batteries away from children (swallowing hazard).
- Seek medical attention if batteries are swallowed.
- Never dispose of batteries in fire or attempt to recharge ordinary batteries.
- If a fault develops, stop use and contact service department (+44 (0) 333 220 6042).
Electrical Safety:
- The mains lead wires are coloured Blue (neutral [N]) and Brown (live [L]).
- Blue wire connects to terminal marked [N] or black.
- Brown wire connects to terminal marked [L] or red.
- Neither brown nor blue wire should connect to the [EARTH] terminal.
- Ensure cord grip is fastened correctly.
- Plug must be fitted with an ASTA approved fuse conforming to BS 1362 of the same rating.
- For non-rewireable mains plugs, use an ASTA approved fuse (BS 1362).
- If the plug needs removal, disconnect from mains, cut off, and dispose of safely. Do not reuse.
- WARNING: This appliance is double insulated. Do not connect any wire to the earth terminal.
Recycling:
- Appliances with the crossed-out wheeled bin symbol should not be disposed of with domestic rubbish.
- Dispose of old electrical and electronic appliances separately.
- Visit www.recycle-more.co.uk or www.recyclenow.co.uk for information on recycling electrical items in the UK.
- Visit www.weeeireland.ie for information on recycling electrical items in Ireland.
- The WEEE directive (August 2006) requires all electrical items to be recycled, not landfilled.
- Take the appliance to a local Civic Amenity site for recycling at the end of its life.