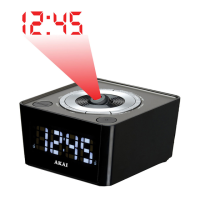
6
USING YOUR APPLIANCE
BEFORE FIRST USE
1. Remove the product from the box.
2. Remove any packaging from the
product.
3. Please retain all packaging until you
have checked and counted all the
parts and the contents against the
parts list.
4. Your appliance is now ready for
normal use.
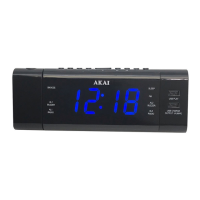
AC POWER SUPPLY
1. Plug the included AC Adaptor into
a standard power point (100V-240V
AC) and the other end into the Jumbo
Alarm Clock Radio’s DC power input
jack on the back of the unit (No.13 on
the previous diagram).
2. Remove the protective lm covering
the LED display screen.
3. Follow the instructions contained in
the next section of this instruction
manual to ensure you get the most
out of your Jumbo Alarm Clock Radio
BATTERY OPERATION
• This Jumbo Alarm Clock Radio
features a battery back-up function
which will maintain power to the unit
in cases of mains power failure. 1 X
CR2025 (3V) button cell battery (not
included) may be installed into the
back-up battery compartment which
is located on the rear of the unit
(No.14 on the previous diagram).
• In the event of a power outage, the
time will not appear on the clocks
display, however the clock will
continue to operate and the correct
time will be maintained until mains
power returns. The back-up battery
should be replaced as needed.
Remove the battery if you are not
using your clock radio for an extended
period of time.
• To install the battery, lay the product
face down on a sturdy surface that
will not scratch the screen. The
battery compartment panel is located
in the centre of the stand and is
secured with one (very small) Phillips
head screw. Using a suitably sized
screw driver, unscrew this panel and
then remove the compartment panel
(by pulling outwards from the top of
the compartment panel). Place the 1
X CR2025 (3V) battery into the mould,
ensuring that the + side of the battery
is facing upwards (towards the rear
of the unit). Replace the cover and
screw it back in to secure.
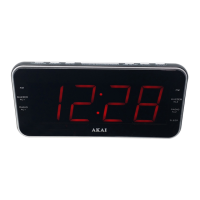
SETTING THE TIME AND DATE
The Jumbo Alarm Clock Radio will allow
you to update the Time, 24/12hr setting
and the Date in one easy to follow process.
1. Press and hold the M Button for a few
seconds. The ‘Hour’ digit(s) on the
LED display will begin to blink on the
LED display. Press either the
or
button to adjust the ‘Hour’ digit(s).
Once the correct ‘Hour’ is displayed
press the M button to conrm.