After Sales Support
(AU) 1300 886 649 (NZ) 0800 836 761 | info@tempo.org
12
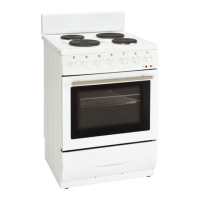
Oven functions and operation
The oven is controlled with the three dials at the left of the control panel
(Fig. 4): the function and temperature selection dials and the mechanical
timer.
Instructions (Cont.)
Using the oven
Shelf positions
This oven is equipped with five shelf positions (Fig. 3) so that you can position
your food at a height suitable for the cooking mode. For best results, place
dishes centrally on the oven racks or grill pan.
OPERATION
Caution!
When the functions with fan have been
s
elected but the temperature knob is set to
ze
ro only the fan will be on.
Wit
h this function you can cool the dish or
t
he oven chamber.
Use of the grill
The grilling process operates through
in
frared rays emitted onto the dish by the
in
candescent grill heater.
In
order to switch on the grill you need to:
●
Set the oven knob to the position
m
arked grill.
●
Heat the oven for approx. 5 minutes(with
t
he oven door shut).
●
Insert a tray with a dish onto the
a
ppropriate cooking level ; and if you are
g
rilling on the grate insert a tray for
d
ripping on the level immediately below
●
Close the oven door.
Fo
r grilling with the function grill and
c
ombined grill the temperature must be set
t
o 250℃, but for the function fan and grill it
m
ust be set to a maximum of 200℃.
Warning!
When using grill function it is recommended
t
hat the oven door is closed.
Wh
en the grill is in use accessible parts can
b
ecome hot.
It
is best to keep children away from the
o
ven.
11
It is best to keep children away from the
P
ossibility to bake at two cooking levels
simultaneously.
Circular heater fan
At this function ,allows the oven to be
h
eating up in a forced way with the therm-
o
fan, which is in the central part of the oven
c
hamber.Heating the oven up in this way
p
ermits even heat cirulation around the dish
in
the oven.The advantage of this heating
method is:
R
edution of ovenheating-up time and
of the initial heating stage.
Possible settings of the oven function
knob
Separate oven lighting
By setting the knob to this position the light-
in
g inside the oven is switched on, e.g.use
wh
en washing the oven chamber.
Caution!
At this oven function knob position.
Th
e oven is not being warmed up.
Combined grill
(
Grill and the top heater)
When the “combined grill” is active it enables
g
rilling with the grill and with the top heaer
switched on at the same time.
Th
is function allows a higher temperature
a
t the top of the cooking area,which causes
m
ore intense browning of the dish and per-
m
its larger portions to be grilled.
This function for defrosting
Fan only
(under the grate).
Baking pans and accessories (oven grid, baking tray, etc) may be inserted into the oven in
Ap
propriate levels are indicated in the tables that follow.
Alwa
ys count levels from the bottom upwards!
CLEANING AND MAINTENANCE
By ensuring proper cleaning and maintenance
o
f your oven you can have a significant
in
fluence on the continuing faultfree
o
peration of your appliance.
you start cleaning, the oven must be
s
witched off and you should ensure that all
kn
obs are set to the “0”position. Do not start
c
leaning until the oven has completely cooled.
ould be cleaned after every
C
ool the oven completely before cleaning.
Ne
ver clean the appliance with
p
ressurized hot steam cleaner!
Th
e oven chamber should only be washed
wit
h warm water and a small amount
Steam cleaning
-pour 250ml of water (1 cup) into a
b
owl placed in the oven on the first level
f
rom the bottom.
-Close the oven door,
-S
et the temperature knob to 50 ℃, and
t
he function knob to the bottom heater
p
osition,
-h
eat the oven chamber for approximately
3
0 minutes,
-O
pen the oven door, wipe the chamber
in
side with a cloth or sponge and wash
u
sing warm water with washing-up liquid.
Af
ter cleaning the oven chamber wipe it
d
ry.
Caution!
Do not use cleaning products containing
a
brasive materials for the cleaning and
m
aintenance of the glass front panel.
Oven guide levels
5 guiding levels.
OPERATION
B
efore
Oven
The oven sh
time use.
o
f washing-up liquid.
12
OPERATION
Using the hotplates
The level of heat can be adjusted gradually by turning the appropriate knob to the right or
le
ft.
S
witching on the plate results in a red signal light on the control panel turning on.
Switching off
MIN.
Warming up
Stewing vegetables,
slow cooking
Cooking soups,larger
dishes
Slow frying
Grilling meat,fish
MAX.
Fast heating up,
fast cooking and frying
An appropriately selected pan saves energy.
A p
an should have a thick, flat base with a diameter equal to the plate diameter, as in that
c
ase heat is transferred most efficiently.
Caution!
Ensure the plate is clean – a soiled zone does not transfer all of the heat.
P
rotect the plate against corrosion.
S
witch off the plate before a pan is removed.
D
o not leave pans with prepared dishes based on fats and oils unattended on the switched
– o
n plate; hot fat can spontaneously catch fire.
9
Use
Do not use pots and pans that are unsteady and likely to rock or overbalance.
D
o not operate the cooktop for an extended time without utensil on the hotplate.
Good Bad Bad Bad Bad Bad Bad
(recessed
base)
(convex
base)
(undersize)
(oversize)
(moisture
on
hotplate)
(no
utensil)
hotplate to seal and protect the surface. We recommend the Hillmark
b
rand of "Shine On" which is available from most leading electrical retailers
a
nd supermarkets in Australia.
Tu
rn the oven to a temperature of 250 degrees C for approximately 30
m
inutes. When cooled, wipe away any residue.
Wh
en heating the oven for the first time it is normal for the stove to give off
s
moke and manufacturing odours. These will be gone after approximately
3
0 minutes
l
l
Oven functions and operation
The oven is controlled by the function
Temperature selection knob
The function knob
Caution!
When selecting any oven function, the
OPERATION
10
The function knob
The timer knob
knob, timer knob and the temperature
s
election knob.
oven will only be switched on after the
t
emperature has been set by the
t
emperature selection knob.
If you don't want the oven work
c
ontrolled by the mechanical timer ,
you can turn the mechanical timer to
t
he position
OPERATION
Using the hotplates
The level of heat can be adjusted gradually by turning the appropriate knob to the right or
le
ft.
S
witching on the plate results in a red signal light on the control panel turning on.
Switching off
MIN.
Warming up
Stewing vegetables,
slow cooking
Cooking soups,larger
dishes
Slow frying
Grilling meat,fish
MAX.
Fast heating up,
fast cooking and frying
An appropriately selected pan saves energy.
A p
an should have a thick, flat base with a diameter equal to the plate diameter, as in that
c
ase heat is transferred most efficiently.
Caution!
Ensure the plate is clean – a soiled zone does not transfer all of the heat.
P
rotect the plate against corrosion.
S
witch off the plate before a pan is removed.
D
o not leave pans with prepared dishes based on fats and oils unattended on the switched
– o
n plate; hot fat can spontaneously catch fire.
9
Use
Do not use pots and pans that are unsteady and likely to rock or overbalance.
D
o not operate the cooktop for an extended time without utensil on the hotplate.
Good Bad Bad Bad Bad Bad Bad
(recessed
base)
(convex
base)
(undersize)
(oversize)
(moisture
on
hotplate)
(no
utensil)
hotplate to seal and protect the surface. We recommend the Hillmark
b
rand of "Shine On" which is available from most leading electrical retailers
a
nd supermarkets in Australia.
Tu
rn the oven to a temperature of 250 degrees C for approximately 30
m
inutes. When cooled, wipe away any residue.
Wh
en heating the oven for the first time it is normal for the stove to give off
s
moke and manufacturing odours. These will be gone after approximately
3
0 minutes
l
l
Oven functions and operation
The oven is controlled by the function
Temperature selection knob
The function knob
Caution!
When selecting any oven function, the
OPERATION
10
The function knob
The timer knob
knob, timer knob and the temperature
s
election knob.
oven will only be switched on after the
t
emperature has been set by the
t
emperature selection knob.
If you don't want the oven work
c
ontrolled by the mechanical timer ,
you can turn the mechanical timer to
t
he position
Oven Function Temperature Selection Mechanical Timer
Fig. 4
 Loading...