SP2/SP8/SP8-X20 Manual
Updated until firmware 413 - 23 -
Domain Name Server :- IP address of your DNS. Used if you wish to use a DNS address for
your unit instead of accessing via the IP address.
Use DHCP :- The unit can use DHCP to assign its IP address, or it can use a statically assigned
IP address. To use DHCP choose “Use DHCP” from the list box and press set. To stop using
DHCP choose “Do Not Use DHCP” from the list box and press set. Statically assigning an IP
address also turns off DHCP. You can force the SP2 / SP8 to voluntarily give up its IP lease and
request a new IP lease by choosing Use DHCP from the list box and pressing “set”.
Ethernet MAC ID :- This is the MAC address of your unit. This is a read only field
Ethernet Duplex Mode :- The duplex mode and speed of your unit. This is a read only field also.
Ensure you apply your new settings by clicking on the “save” button.
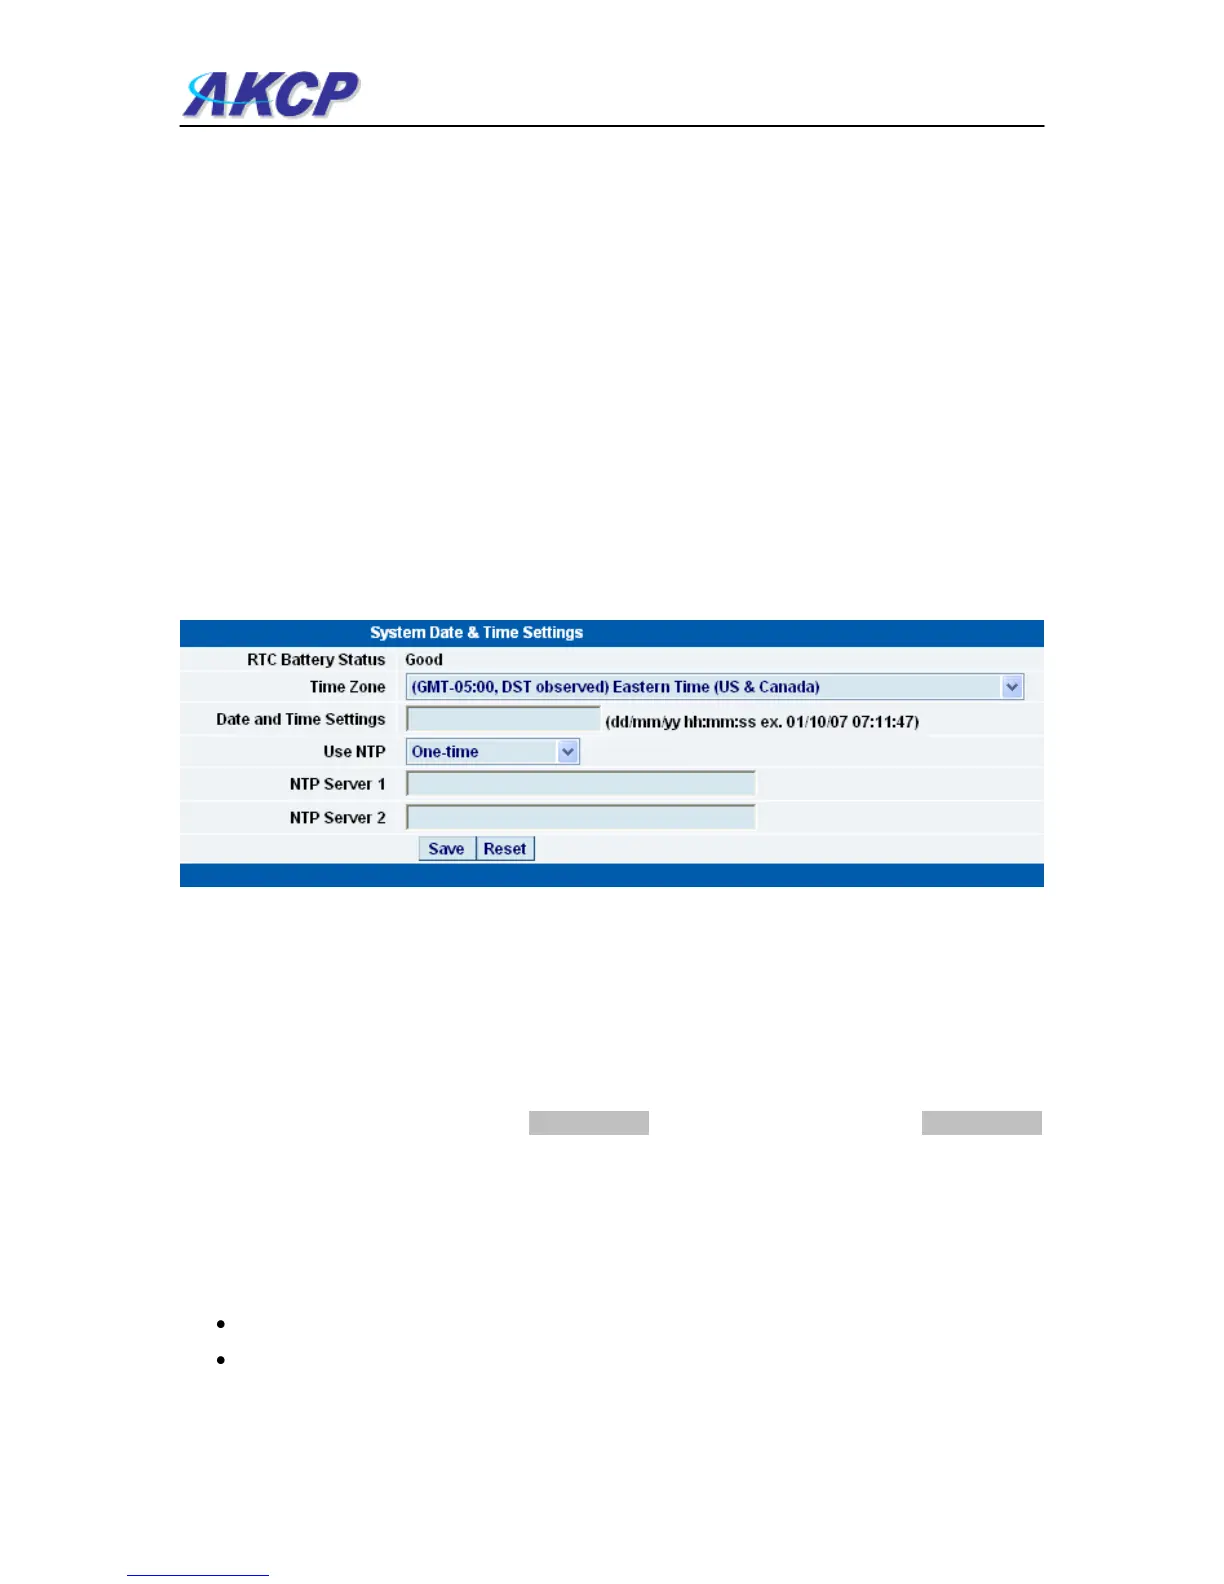
c) Below this, there are some further settings for the time and date.
RTC Battery Status :- This field displays the status of the Real Time Clock battery on the unit. If
the status displays “Bad”, you must replace the battery; otherwise, when the SP2 or SP8 do not
have mains power, the clock will stop running. Therefore, you must re-configure the system time
settings on every reboot.
Date and Time Settings :- Enter the new date and time in this field. The date and time use the
following format : date/month/year (dd/mm/yy) and hour:minute:second (hh:mm:ss)
Time Zone :- Select time zone that is corresponding to your location from this list box.
Use NTP :- An NTP (Network Time Protocol) is used to synch your units clock over a network.
There are many options in this list box. The details for each one are as follows:
Do Not Use NTP - select this option to turn off the time synchronization feature.
One Time - the time is synchronized once the Save button is pressed.