2
E12
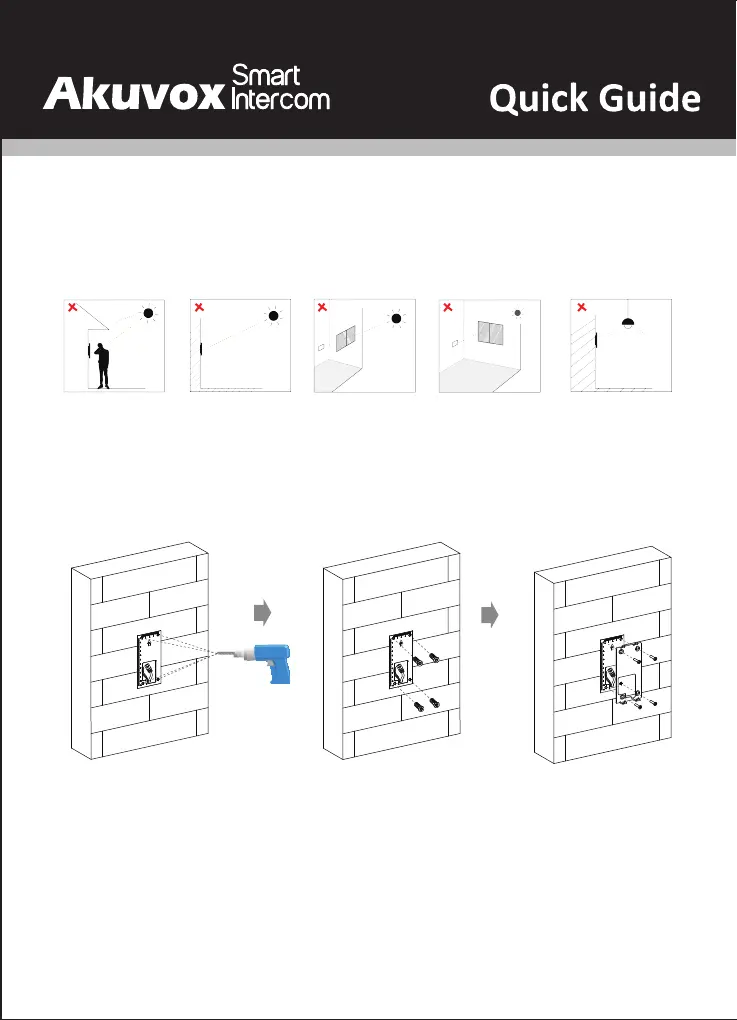
Insert four plastic wall anchors into the
holes.
Fix the wall-mounting bracket on the
wall by tightening four ST4x20
crosshead screws to the plastic wall
anchors.
Backlight Direct sun
through window
Close to lightDirect sunlight Indirect sunlight
through window
Please do not place device under direct sunlight, it will bring bad effect or be broken with high temperature.
If installing the device indoors, please keep device at least 2 meters away from light, and at least 3 meters away from
window and door.
Installation Environment
Installation
According to the position of the
reserved wires on the wall, stick the
wall-mounting template vertically to
ensure that the wires can come out of
the shadow position of template. Drill
(6 mm drill bit required) four screw
holes with a depth of 25mm in the
screw holes of the template.