 Loading...
Do you have a question about the Akuvox R20A and is the answer not in the manual?
| Audio | Built-in Microphone and Speaker |
|---|---|
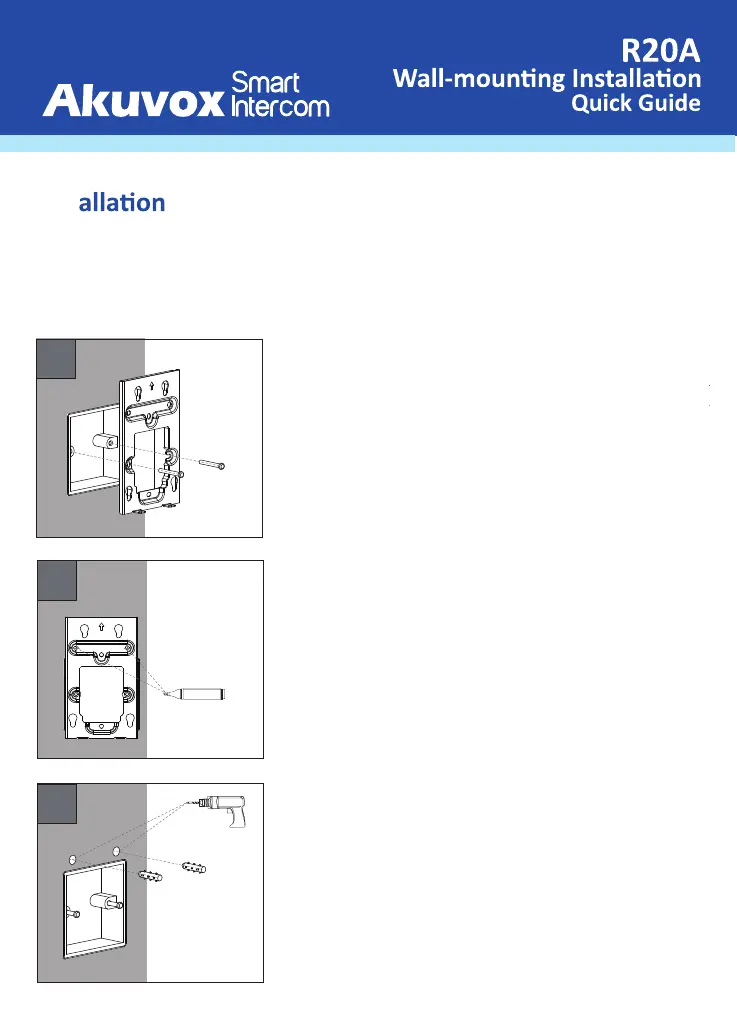
| Installation | Wall-mounted |
| Ingress Protection | IP65 |
| Card Reader | 13.56MHz, Mifare |
| RS485 | Yes |
| Camera | 2MP |
| Network | 10/100Mbps Ethernet |
| Protocols | SIP |
| Power | PoE or 12V DC |
| PoE | IEEE 802.3af |
| Relays | 1 |
| Input | 2 |