6
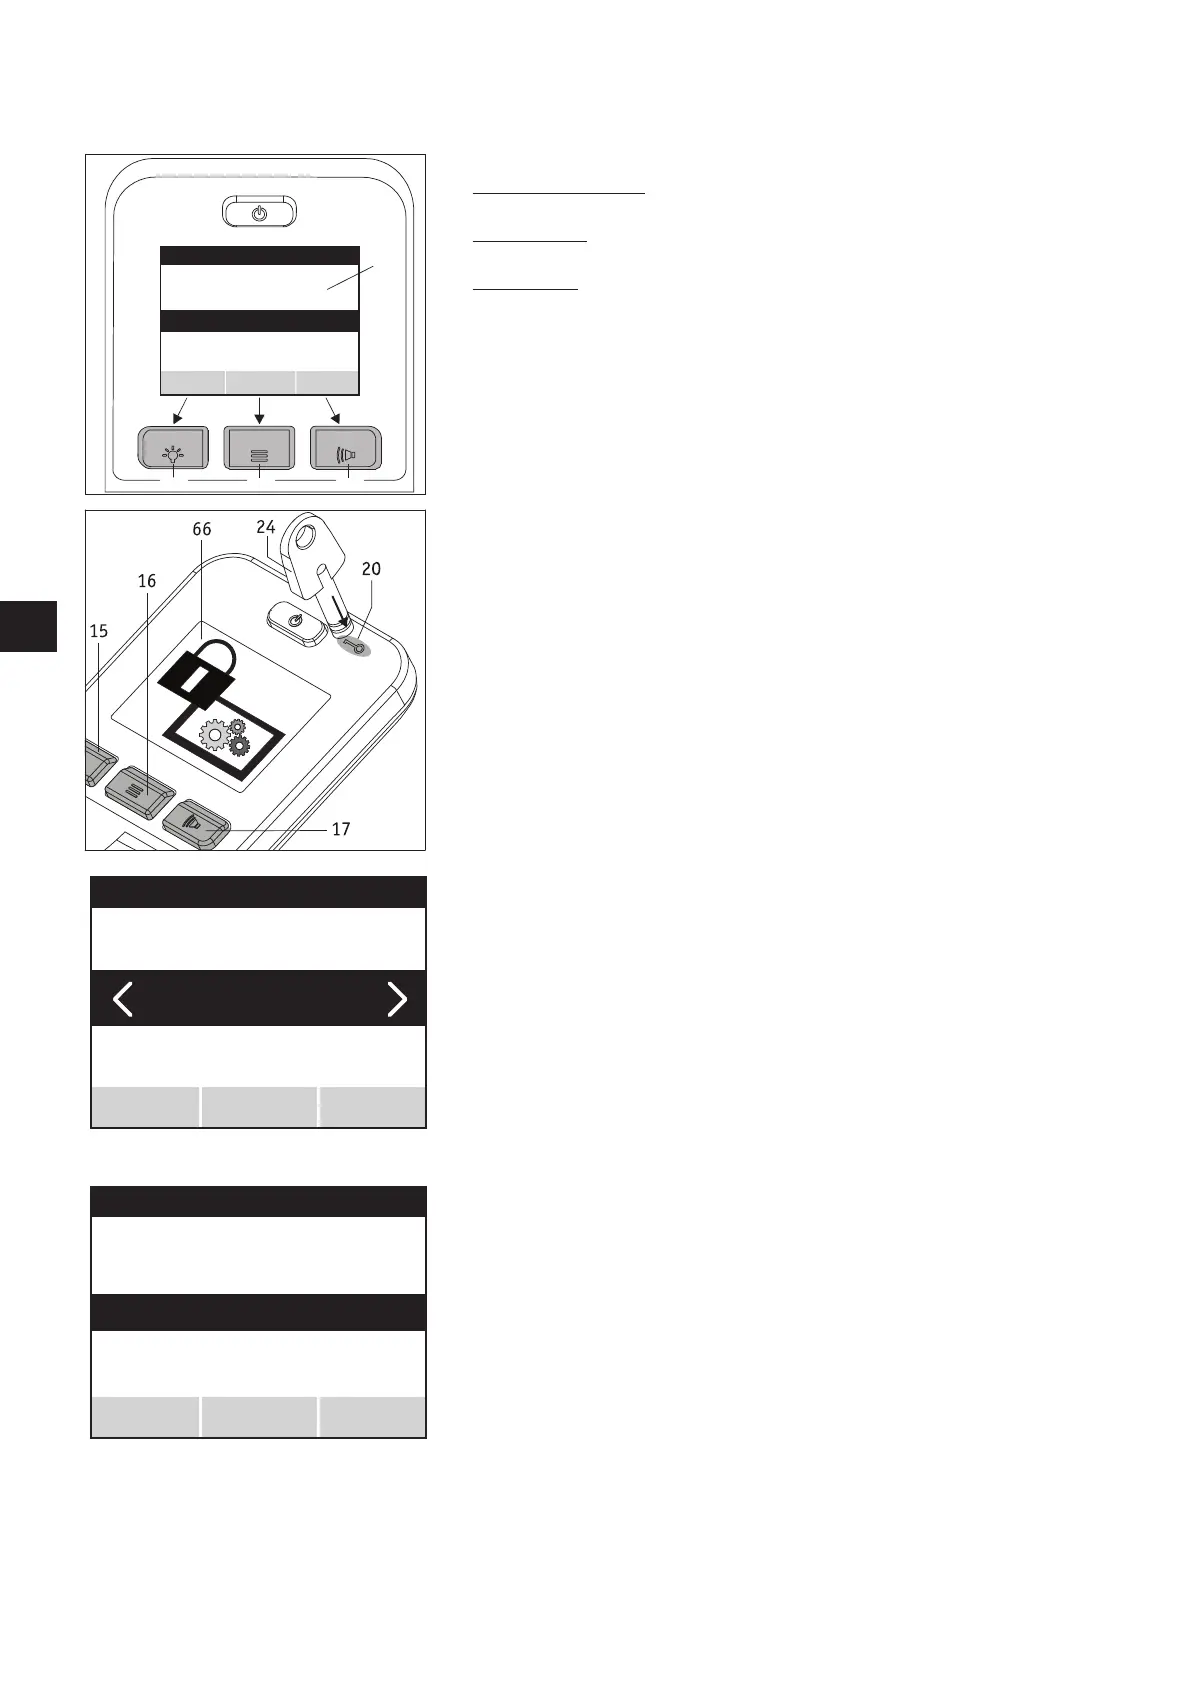
The control unit buttons are assigned to the menus and sub menus as follows:
• “Save” or “Test” display (double assignment)
Saving or testing a parameter: press button [15]
• “Select” display
Jumps to a menu or sub menu: press button [16].
• “Back” display
One level back (without saving!): press button [17].
2.2 “Programming” menu
The e-fix operating manual, from chapter 5.3, describes how to navigate through the
different menus.
To reach the programming menu, which is only accessible to specialist dealers and thera-
pists, navigate using the joystick and buttons from the user screen to settings and then
to programming (see also the menu structure in chapter 2.1).
Now lay the key [24] on field [20] and press button [16].
The system switches to the sub menus of system, user mode, attendant control and Opti-
Box.
2.3 “System” menu
• In the system menu press on button [16] to reach the parameters which are described
in more detail in chapter 1.1.1.
• Move the joystick [14] forwards or backwards to move the parameters through a black
bar on the display.
• If the required parameter is highlighted by the black bar you can access any possible
settings by pressing button [16] (the accompanying diagram shows the parameter
“brake applied”).
• You are now in menu function.
171615
18
Brake applied
Automatic cut-off
Joystick deflection
Menu function
System setting
Test
Back
Select
Joystick axle change
Programming
System
Select
Back
Automatic cut-off
Brake applied
System setting
Test
Back
Menu function
Select