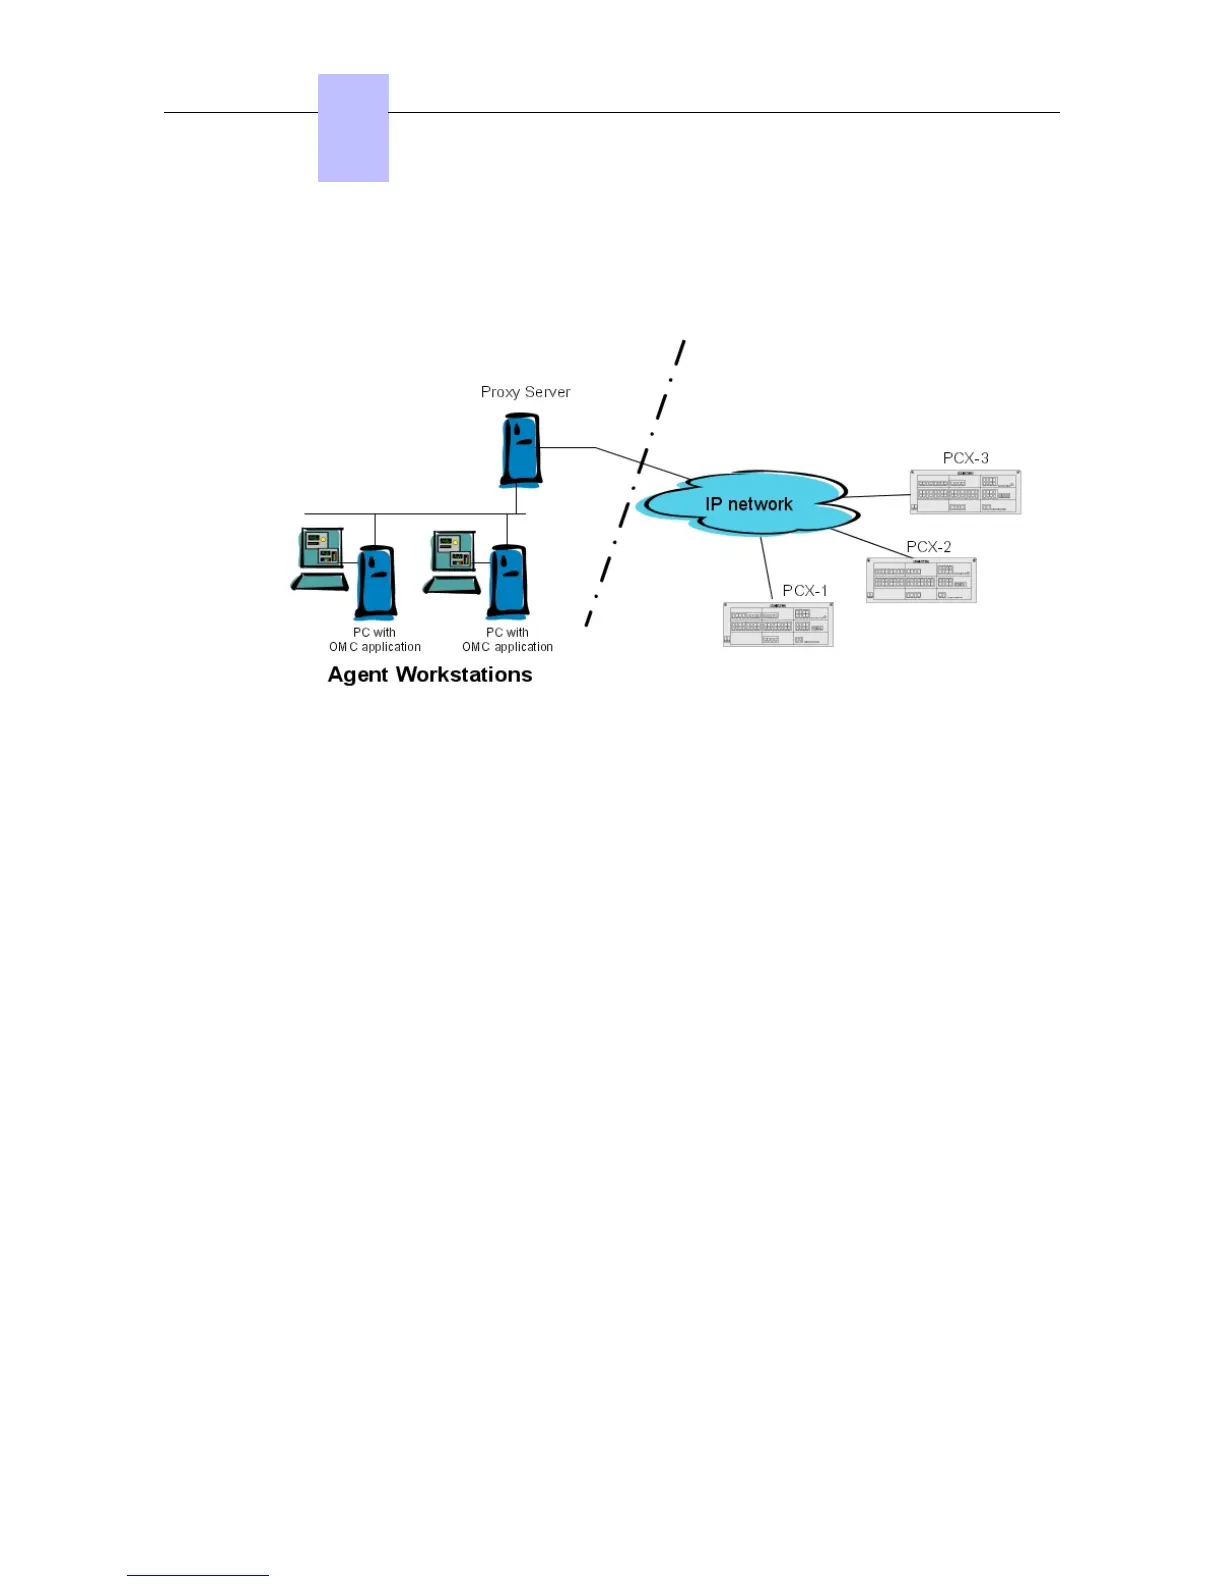
A proxy server can be added to improve security.
To connect a remote OmniPCX Office via a proxy server, the login dialog box can request a
user account and password to connect to the proxy server.
Figure 6.29: Configuration Example with a Proxy Server
To configure a proxy server:
1. In OMC, select Options > Proxy Parameters from the menu toolbar
The Privileged User Login window opens
2. Enter the Privileged User Password and validate
The Proxy Parameters window opens
3. Enter Proxy parameters:
• No Proxy Used: when this radio button is selected, the proxy server is not used. In this
case, all other fields are disabled
• Use Proxy Server: when this radio button is selected, requests from and to OMC are
sent via a proxy server
• Name/IP Address: enter the name or IP address of the proxy server
• Port: enter the port number used by the proxy server
• Do not use proxy for local address: when this checkbox is validated, requests
are not sent via the proxy server when destination addresses are in the same
subnetwork
• User account in Proxy server: enter the user account for the proxy server
• Password: enter the associated password
If the proxy account and password are incorrect in the above parameters, each login dialog
box, to connect a remote OmniPCX Office, requests the proxy account and the associated
password,
To modify the privileged user password:
- In OMC, select Options > Change Privileged User Password from the menu toolbar
The Change Privileged User Password window opens.
- Enter the Old Password (after installation, the initial password is OMCAdmin)
Chapter
6
*
6-22
 Loading...


