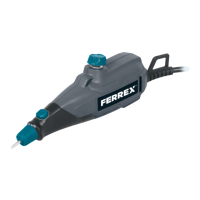
13W Engraving Tool
AFTER SALES SUPPORT
(toll free) MODEL No.: PER13G1.A • 07/2021 • 706193
e-mail: info.aldi@positecgroup.com
AU
8
1300 889 028
AU
Operation
WARNING!
• Always wear safety glasses when using this tool.
• After 30 minutes continuous working, the tool needs to be stopped to
cool down to room temperature before use again.
• Make sure the tip release cap is correctly tightened before operation.
1. On/o switch
To start the engraver, connect the power plug to
the mains socket rstly.
Remove the protection cap (a) from the engraver
tip (1). (Fig. A1)
To turn the engraver on, just press the on/o
switch (3). To turn the engraver o, release the on/
o switch (3). (Fig. A2)
2. Setting the stroke depth
The stroke adjustment dial (4) located on the
top of the engraver, controls the stroke length
and therefore the depth of engraving. A low
setting is usually sucient for the most common
applications.
1) For a ne mark, turn the stroke adjustment dial
(4) clockwise.
2) For a deeper, thicker mark, turn the stroke
adjustment dial (4) anti-clockwise. (Fig. B)
NOTE: It is recommended that you practice on
scrap material before you start.
3. Using the engraver
1) Before using the engraver you must ensure
there is an engraving tip (1) installed correctly.
(see Replacing the Engraver Tip on page 10)
A2
B
A1

 Loading...