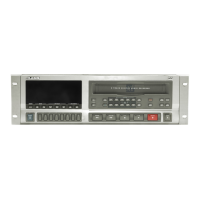
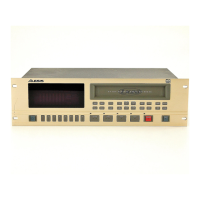
EasyManua.ls Logo

Alesis ADAT-XT20 User Manual

Alesis ADAT-XT20
140 pages
To Next Page IconTo Next Page
Page #1 background imageLoading...
Page #1 background image
ALESIS
ADAT XT20
Reference Manual

Table of Contents

Questions and Answers:

Alesis ADAT-XT20 Specifications

General IconGeneral
Audio Channels8
Bit Depth16-bit
Frequency Response20 Hz - 20 kHz
MIDIYes
Form FactorRackmount
TypeDigital Multitrack Recorder
Recording MediaS-VHS Tape
Weight22 lbs
Sample Rate48 kHz
Input/Output8 x Analog Inputs (XLR/TRS Combo), 8 x Analog Outputs (XLR/TRS Combo)
THD+N< 0.05%
SyncADAT Sync
Recording TimeUp to 40 minutes (with standard S-VHS tape)
Dimensions19 x 5.25 x 14 inches

Summary

CHAPTER 1 SETTING UP

UNPACKING AND INSPECTION

Initial setup and verification of included items.

AC POWER HOOKUP

Connecting the unit to AC power and safety considerations.

AVOIDING GROUND LOOPS

Troubleshooting hums and buzzes caused by grounding issues.

LINE CONDITIONERS AND PROTECTORS

Protecting the unit from power line noise and surges.

ABOUT AUDIO CABLES

Guidelines for selecting and routing audio cables for optimal performance.

BASIC AUDIO HOOKUP

Connecting audio inputs and outputs for basic operation.

INPUT NORMALING

Configuring analog input modes for different mixer setups.

“THREADED” VS. “UNTHREADED” TAPE

Understanding tape threading modes and their implications.

ADAT’S S-VHS CASSETTE TAPE

Recommendations and importance of using specific tape types.

OPERATING ENVIRONMENT

Guidelines for optimal unit performance and longevity.

THERMAL CONSIDERATIONS IN RACK MOUNTING

Managing heat for reliable operation and ventilation.

MOUNTING ON A SHELF OR NON-RACK ENCLOSURE

Placement advice for non-rack installations.

AVOIDING ELECTROMAGNETIC INTERFERENCE

Preventing interference from external electronic sources.

CHAPTER 2 YOUR FIRST SESSION WITH THE ADAT-XT20

POWER-UP, AND TAPE INSERTION

Initial power on sequence and inserting a tape.

FORMATTING A TAPE – A MUST!

Essential step to prepare tapes for recording and timecode.

WORD LENGTH (16/20 BIT) SELECTION

Choosing between 16-bit and 20-bit audio quality.

SAMPLE RATE SELECTION

Setting the audio sample rate (48kHz or 44.1kHz).

FORMATTING A NEW TAPE

Step-by-step guide to formatting a blank tape.

RECORDING WHILE FORMATTING

Recording audio during the tape formatting process.

MAKING A RECORDING

Basic steps for recording audio onto tracks.

TRACK SELECTION AND SETTING LEVELS

Enabling tracks for recording and adjusting input levels.

TIME COUNTER

Understanding the tape time display and modes.

TRANSPORT BUTTONS

Overview of controls for moving the tape.

RECORDING

Procedures for starting and managing recording.

PLAYBACK

How to play back recorded audio.

REVIEWING AND CUEING

Techniques for quickly locating sections of tape.

LOCATING

Storing and recalling specific tape positions.

CREATING A LOOP

Setting up auto-return and auto-play for continuous playback.

AUTOMATED RECORDING

Using locate points for automatic punch-ins and outs.

REHEARSING

Practicing auto-record sequences without actual recording.

PITCH CONTROL

Adjusting tape speed and its effect on pitch.

TRACK DELAY

Adjusting the playback timing of individual tracks.

TRACK COPY

Copying audio between tracks digitally.

DISPLAY BRIGHTNESS

Adjusting the screen brightness.

CHAPTER 3 CONNECTIONS

ANALOG AUDIO – UNBALANCED INPUTS

Connecting unbalanced analog sources to the unit.

INPUT JACK CHARACTERISTICS

Details on the physical input connectors.

TYPICAL INPUT JACK HOOKUPS

Common methods for connecting analog inputs.

ANALOG AUDIO – UNBALANCED OUTPUTS

Connecting unbalanced analog outputs to other gear.

ANALOG AUDIO – BALANCED INPUTS AND OUTPUTS

Connecting balanced analog audio for noise reduction.

ANALOG INPUT SELECT MODE

Configuring how analog inputs are routed to tracks.

SYNC IN/OUT

Connecting for synchronization between multiple units.

DIGITAL AUDIO IN/OUT

Connecting for digital audio transfer via optical cable.

ABOUT 16-BIT AND 20-BIT SIGNAL TRANSFERS

Understanding digital audio data formats.

FOOTSWITCHES

Connecting external foot controls for operation.

THE XT20 REMOTE

Operating the unit with the remote control.

CHAPTER 4 BASIC OPERATIONS

TAPE FORMATTING

Preparing tapes for recording, including formatting types.

FORMATTING CONSIDERATIONS

Important factors before and during tape formatting.

COMPLETE FORMAT

Erasing and reformatting an entire tape.

RECORDING WHILE FORMATTING

Recording audio during the tape formatting process.

FORMAT EXTEND

Extending the format on partially formatted tapes.

WRITE PROTECT OVERRIDE

Enabling recording on tapes with write-protect tabs removed.

READING THE DISPLAY

Understanding the information presented on the unit's display.

DISPLAY ICONS

Explaining the meaning of various icons shown on the display.

TIME COUNTER & ABS/REL BUTTON

Using the time counter and switching between ABS/REL modes.

LOCATE 0

Function of the Locate 0 button for setting time references.

BASIC EDITING

Overview of the editing functions available.

EDIT VALUE BUTTON

Entering and exiting edit modes.

▲ AND ▼ BUTTONS

Adjusting parameter values using up/down buttons.

ENTERING NUMERIC VALUES

Inputting numerical data for parameters.

EDITING INDIVIDUAL DIGITS

Modifying specific digits within parameter values.

INPUT SELECT

Choosing the audio input source (Analog, Digital, Track Copy).

ANALOG INPUT

Configuring analog input modes and routing.

DIGITAL INPUT

Recording from digital audio sources.

TRACK COPY

Copying audio between tracks digitally.

INPUT MONITOR

How to monitor input signals during recording.

AUTO INPUT MONITOR

Monitoring input signals automatically for record-enabled tracks.

ALL INPUT MONITOR

Monitoring all input signals regardless of track status.

METERS

Understanding and adjusting the level meters.

PEAK MODE BUTTON

Controlling peak hold behavior on the meters.

PEAK CLEAR BUTTON

Resetting peak indicators on the meters.

FINE METER MODE

Enabling a mode for precise level adjustments.

RECORDING A “BENCHMARK” TAPE

Creating a reference tape for system checks.

RECORD ENABLE

Preparing tracks for recording.

SETTING LEVELS

Adjusting input levels for optimal recording without clipping.

TRANSPORT CONTROLS

Operating tape transport functions like Play, Rewind, etc.

EJECT

Removing the tape from the unit.

REWIND/REVIEW

Fast reverse playback and audio review.

FAST FORWARD/CUE

Fast forward playback and audio cueing.

PLAY

Starting playback of recorded audio.

RECORD/PUNCH IN OR OUT

Procedures for starting and stopping recording.

STOP

Functions of the stop button, including threading/unthreading.

SAMPLE RATE (CLOCK)

Selecting internal or external clock sources and sample rates.

RECORD CROSSFADE TIME

Setting smooth transitions during punch-ins/outs.

DISPLAYING FRAMES VS. 100THS/SECONDS

Adjusting time display format for sync.

PITCH CONTROL

Adjusting tape speed and pitch.

ABOUT PITCH CHANGING

Considerations when altering pitch.

TRACK DELAY

Adjusting the playback timing of individual tracks.

AUTOLOCATION CONTROLS

Managing locate points for automated tape movement.

ABSOLUTE (ABS) TIME VS. RELATIVE TIME

Understanding tape time references.

LOCATE 0

Setting the zero point for relative time.

SETTING LOCATE POINTS

Storing specific tape positions for recall.

LOCATING

Navigating the tape using stored locate points.

AUTO LOOPING

Creating continuous playback loops.

AUTO RETURN

Automatically rewinding to a specified point.

AUTO PLAY

Automatically starting playback after a locate.

LOOP LIMIT

Safeguard feature for auto-looping.

LOOPED RECORDING

Creating recording loops for repeated takes.

AUTO RECORD

Automating the start and end points of recording.

REHEARSAL

Practicing auto-record sequences.

TAPE LENGTH

Setting the unit for different tape lengths.

FOOTSWITCH CONTROLS

Connecting and using footswitches.

FOOTSWITCH CONTROLLED PUNCHING

Using footswitches for punch-in/out recording.

FOOTSWITCH CONTROLLED AUTOLOCATING

Using footswitches for tape location.

USING THE XT20 LRC REMOTE

Operating the unit with the remote control.

CHAPTER 5 MULTIPLE ADAT-XT20 OPERATION

OVERVIEW

Introduction to building multi-unit ADAT systems.

SYNCHRONIZING MACHINES

Connecting and synchronizing multiple ADAT units.

MASTER/SLAVE INTERACTION

How master and slave units control each other.

ACHIEVING LOCK

Establishing sample-accurate synchronization.

INDEPENDENT SLAVE MODE

How slaves operate when the master is stopped.

FORMATTING MULTIPLE TAPES

Tape formatting procedures in multi-unit systems.

MASTER FORMAT ENABLED, COMPLETE FORMAT

Formatting with master control.

MASTER FORMAT ENABLED, FORMAT EXTEND

Extending format with master control.

MASTER FORMAT DISABLED

Formatting without master control.

MASTER FORMAT DISABLED, FORMAT EXTEND

Extending format without master control.

RECORDING DIGITAL AUDIO

Recording digital audio between units.

BOUNCING TRACKS BETWEEN ADATS

Copying audio digitally between machines.

REASSIGNING CHANNELS TO DIFFERENT TRACKS

Rerouting digital audio channels to different tracks.

MAKING DIGITAL BACKUPS

Creating safety copies of recorded tapes.

MAKING A 16-BIT COPY FROM A 20-BIT MASTER

Creating compatible copies for older machines.

RECORDING DIGITAL AUDIO FROM OTHER SOURCES

Recording digital audio from non-ADAT sources.

DIGITAL CLOCK CONSIDERATIONS

Managing clock sources for digital audio sync.

TAPE OFFSET

Adjusting tape position relative to the master for editing.

COMBINING XT20S AND ADATS

Using XT20s with original ADATs.

SAMPLE RATE VS. PITCH CONTROL

Interaction between sample rate and pitch adjustments.

INPUT MONITORING

Monitoring input signals in multi-unit setups.

POLARITY DIFFERENCES

Understanding phase issues between different ADAT models.

CONNECTIONS

Notes on cable length for connecting multiple units.

CHAPTER 6 APPLICATIONS

OVERVIEW

Introduction to the chapter's content.

COMBINED MULTITRACK/MIXDOWN DECK

Using the unit as a recorder and mixdown device.

LIVE/LONG-TERM RECORDING

Applications for live sound and extended recordings.

LOCKING TO VIDEO: CODE-ONLY MASTER

Syncing the unit to video timecode.

COMPUTER CONTROL

Controlling the unit via MIDI and sequencers.

MIDI SYSTEMS: VIRTUAL TRACKING

Integrating with sequencers for MIDI-based recording.

MIDI MACHINE CONTROL: VIRTUAL REMOTE CONTROL

Using MIDI for remote transport control.

THE ADAT-PCR COMPUTER INTERFACE

Using a PCI card for computer control and audio transfer.

LIBRARIES AND ARCHIVES

Using the unit for archiving audio material.

MODULAR RECORDING

Collaborative recording workflows with multiple units.

USING TRACK COPY AS A DIGITAL ROUTER

Rerouting digital audio using the Track Copy function.

CALCULATING TAPE OFFSET USING THE LOCATES

Determining tape offsets using locate points.

APPENDIX A DIGITAL RECORDING CONCEPTS

ANALOG RECORDING BASICS

Fundamental principles of analog audio recording.

DIGITAL RECORDING BASICS

How digital audio recording works.

THE ADVANTAGES OF 20-BIT RECORDING

Benefits of higher bit-depth audio.

WHY S-VHS?

Explanation of the tape format used.

APPENDIX B TROUBLESHOOTING

TROUBLE-SHOOTING INDEX

Table of common problems and their solutions.

ERROR RATE DISPLAY

Interpreting tape error rates.

ABOUT ERROR RATE READINGS

Understanding what tape error readings mean.

ADAT HEAD LIFE

Information on the expected lifespan of the unit's heads.

ADAT HEAD MAINTENANCE

Procedures and recommendations for cleaning and maintaining heads.

DRUM TIME DISPLAY

Displaying head drum usage time.

TAPE MAINTENANCE: SAFE TAPE

Guidelines for proper tape handling and storage.

MAINTENANCE/SERVICE

General tips for unit upkeep.

CLEANING

Instructions for cleaning the unit's exterior.

REFER ALL SERVICING TO ALESIS

Information on when and how to get professional service.

OBTAINING REPAIR SERVICE

Procedures for sending the unit for repair.

APPENDIX C ERROR CODES

ERROR CODES

Reference for understanding and resolving error messages.

AUTOMATIC BRAKE CALIBRATION PROCEDURE

Procedure to recalibrate the unit's transport brakes.

STEPS TO TAKE BEFORE CALLING FOR HELP

Initial troubleshooting steps before contacting support.

APPENDIX D SPECIFICATIONS

Transport

Technical specifications related to tape transport.

Audio

Technical specifications related to audio processing.

Analog Inputs/Outputs

Specifications for analog audio connections.

Digital Inputs/Outputs

Specifications for digital audio connections.

General

General specifications like power, dimensions, and weight.

Glossary

A/D OR ANALOG-TO-DIGITAL CONVERTER

Definition of analog-to-digital conversion.

AUTOLOCATION

Definition of automatically finding tape positions.

AUTO RECORD

Definition of automated recording start/end points.

CHASE/LOCK

Definition of synchronization to timecode.

CLIP

Definition of signal distortion due to exceeding maximum levels.

CROSSFADE

Definition of smooth transitions between audio segments.

DIGITAL I/O

Definition of digital input/output connections.

FIBER OPTICAL CONNECTOR

Definition of optical signal transmission.

MIDI

Definition of Musical Instrument Digital Interface.

SAMPLE RATE

Definition of analog signal sampling.

SMPTE/LTC

Definition of Society of Motion Picture and Television Engineers timecode.

S-VHS

Definition of Super Video Home System tape format.

Related product manuals