Do you have a question about the Alesis ADAT and is the answer not in the manual?
Provides an overview of ADAT's features and capabilities, highlighting its digital recording technology.
Advises users to read specific sections before operating the ADAT for proper understanding.
Provides a brief rundown of the ADAT's primary operational functions.
Describes the basic tape motion controls similar to standard multitrack recorders.
Explains how ADAT handles recording and monitoring switching for tracks.
Details the gapless and glitchless punch-in/out capabilities with digital crossfades.
Explains setting and using three autolocate points for finding specific tape locations.
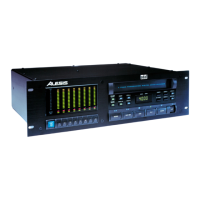
Describes the function and behavior of various LEDs on the ADAT unit.
Differentiates between engaged and disengaged tape modes and their operational implications.
Recommends premium S-VHS tapes and advises against budget VHS tapes for reliability.
Discusses environmental factors like temperature, humidity, and ventilation for ADAT operation.
Details temperature limits and ventilation requirements when rack mounting the ADAT.
Provides guidance on mounting the ADAT on shelves or flat surfaces.
Advises on placement to prevent interference from strong magnetic fields.
Details power requirements, including AC cord specifications and voltage compatibility.
Specifies approved power cords and emphasizes the importance of proper grounding.
Explains ground loop issues and methods to prevent hums and buzzes in the studio.
Provides recommendations for using high-quality, low-capacitance shielded audio cables.
Describes the eight unbalanced 1/4" phone jack inputs and their characteristics.
Details the tip/sleeve convention for unbalanced input jack wiring.
Explains common ways to connect signals to the ADAT's input jacks.
Explains the switched-jack wiring for inputs, allowing normalled connections.
Details the -10 dBV unbalanced 1/4" phone jack outputs.
Mentions the +4 dBu balanced line inputs and outputs on a multipin connector.
Describes the proprietary Alesis fiber optic digital connection for eight tracks.
Explains how to sync multiple ADAT units using the Sync Out/In connections.
Details connecting the ADAT to the Alesis RMB Remote Meter Bridge.
Describes compatible footswitches for ADAT functions.
Covers powering on the ADAT and inserting tapes, including write-protect tab considerations.
Explains the process of formatting ADAT tapes for accurate time-stamping and synchronization.
Provides step-by-step instructions for formatting new or reformatting existing tapes.
Details how to extend an existing tape format for partial formatting.
Offers further advice and cautions regarding tape formatting procedures.
Recommends recording a test tape for monitoring tape and head condition over time.
Explains controls for determining track recording and monitoring modes.
Describes how to engage or disengage tracks for recording.
Details switching between tape and input monitoring options.
Explains the function of the 'All Input Monitor' feature.
Describes the setting for recording from analog or digital inputs.
Guides on setting recording levels to avoid digital distortion and optimize sound.
Covers the operation of basic transport controls like Eject, Rewind, Fast Forward, and Stop.
Explains how to eject a tape from the ADAT.
Details the rewind function, including review mode and speeds.
Explains the fast forward function, including cue mode and speeds.
Describes the multiple functions of the Stop button, including disengage/engage.
Explains how to initiate playback and its behavior with formatted/unformatted tapes.
Guides on entering record mode and performing punch-ins/outs.
Details how to use a footswitch for punch-in and punch-out operations.
Explains how to adjust pitch and its effect on the sampling rate.
Details the process of automating tape navigation to specific points.
Describes how to set autolocation points 0, 1, and 2 on the tape.
Explains how to use the Locate buttons to find stored tape positions.
Details the Auto 2>1 function for automatic looping between locate points.
Explains how Auto Play automatically enters playback after locating.
Describes a workflow for recording, punching out, and auditioning a recorded part.
Explains using a footswitch for autolocation functions.
Details how to use the LRC remote for transport and track functions.
Introduces the benefits and possibilities of using two or more ADATs together.
Covers the process and requirements for linking ADATs for synchronized operation.
Explains how to physically connect ADAT units using sync cables.
Describes how ADATs are identified and assigned IDs in a synchronized system.
Details how master and slave units communicate and operate together.
Explains the process of achieving sample-accurate synchronization between ADATs.
Describes how slaves can function independently when the master is stopped.
Discusses tape formatting procedures in multi-ADAT configurations.
Details formatting when the master format is enabled and slave tapes are unformatted or formatted.
Explains format extension when the master format is enabled.
Covers formatting when the master format function is disabled.
Details autolocation and looping behaviors in multi-ADAT systems.
Introduces the importance and benefits of digital backups for ADAT tapes.
Details how to create digital backups using the fiber optic connection.
Provides steps for performing time-code accurate digital backups between ADATs.
Outlines the process for making digital backups without sync connections, affecting time code.
Explains how to back up tapes using analog outputs if the fiber optic cable is unavailable.
Describes using ADAT as both a multitrack recorder and a stereo mastering deck.
Highlights ADAT's suitability for archiving speeches, broadcasts, and sample libraries.
Explains track bouncing within ADAT or to other machines using analog outputs.
Discusses ADAT's effectiveness for live recording due to its size and operation.
Explains ADAT's flexibility for integration with MIDI sequencers for virtual tracking.
Details using ADAT for video sound effects and multichannel mixdowns.
Covers collaborative recording workflows using dual-ADAT systems.
Introduces advanced functions and cautions against accessing service-only features.
Lists specific advanced functions and how to access them.
Explains how to eject tape only from the master ADAT in a multi-unit setup.
Shows how to display the ID number of each ADAT in a system.
Explains how to select monitoring modes when Auto Input is enabled.
Describes how to display the software version of the ADAT.
Shows how to check the write-protect status of the inserted tape.
Details the options for selecting the audio monitoring path (input or DAC).
Explains how to select different crossfade times for punching.
Describes how to enable/disable the internal master clock or use an external one.
Shows how to display the total running time of the drum motor.
General advice on cleaning and maintaining the ADAT unit.
Instructions for cleaning the ADAT's exterior surfaces.
Tips for preventive maintenance, including cord checks and dust covers.
Advises users not to attempt repairs and to contact Alesis for service.
Discusses factors affecting ADAT head life and expected longevity.
Explains when and how to clean ADAT heads, recommending professional service.
Provides guidelines for handling and storing ADAT tapes safely to prevent damage.
Lists and explains common ADAT error messages and troubleshooting steps.
Details specific messages like '-du-' and 'noFO' and their solutions.
Provides a step-by-step guide for troubleshooting before contacting support.
Lists and explains more complex error codes (Er 1-9) and their potential causes.
| Tracks | 8 |
|---|---|
| Weight | 22 lbs (10 kg) |
| Sampling Rate | 48 kHz |
| Bit Depth | 16-bit |
| Digital Interface | ADAT Lightpipe |
| Synchronization | ADAT Sync |
| Recording Time | 40 minutes (with 120-minute tape) |
| Connectors | RCA |
| Inputs | ADAT Optical |
| Outputs | ADAT Optical |
| Dimensions | 19 x 5.25 x 14 inches (483 x 133 x 356 mm) |