14 XONE:62 User Guide
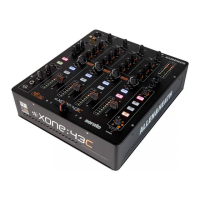
14 Changing the crossfader curve. The little switch to the
left of the crossfader sets which curve is active. In the normal
up position the signal dips by 6dB at the middle position for
smooth fading between tracks. Press the switch for a dipless
response where the signal starts to dip only once the fader has
passed the mid position. This is better suited to scratch or cut
mixing where you layer the sounds.
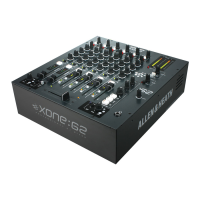
15 Crossfader mixing. At this point you may wish to plug
in a pair of turntables and experiment with DJ mixing. Plug into
CH3 and CH4 phono inputs if your turntables require RIAA
equalisation. If not, plug into the line inputs. Remember to
connect the turntable earth leads to the console chassis earth
terminal. Use CUE to set up the channel gain as you did in
step 7. Route CH3 to X and CH4 to Y of the crossfader.
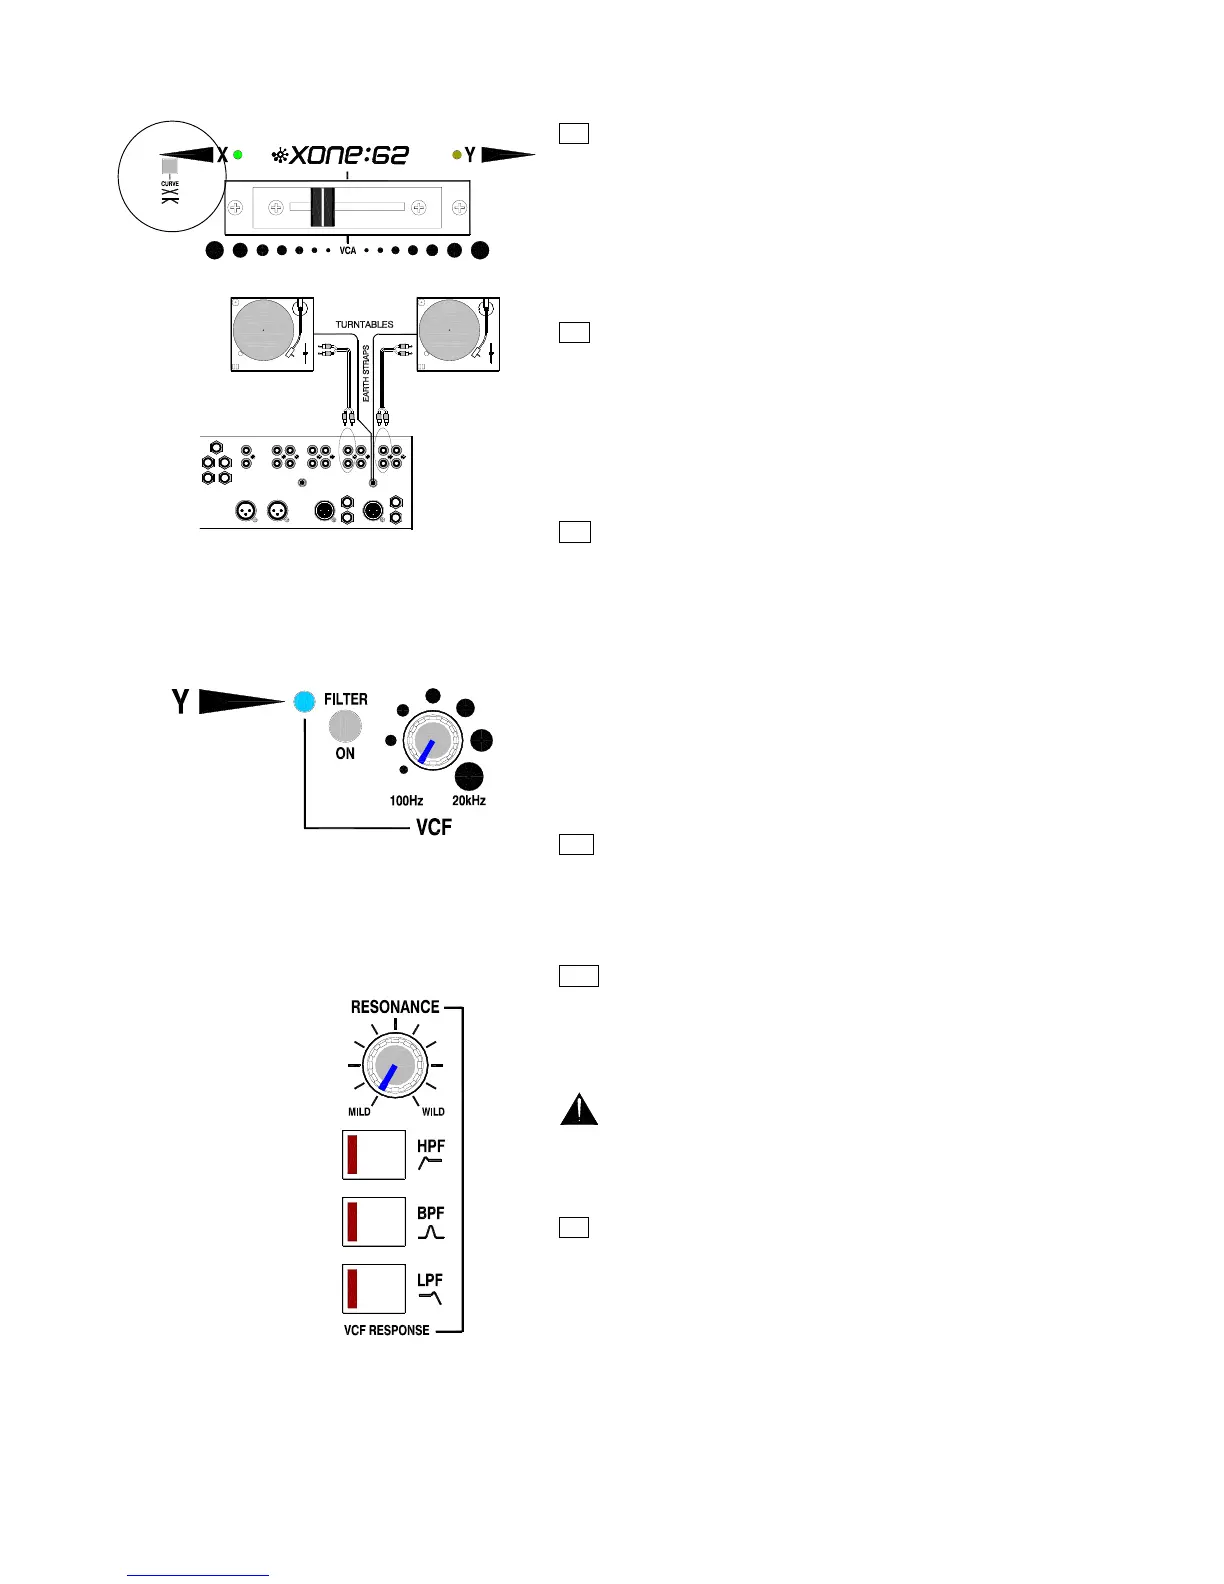
16 Adding VCF filter effects. Each side of the crossfader
features a stereo Voltage Controlled Filter which presents the
DJ with a unique set of live performance tools to create subtle
or startling tonal effects. With the signal assigned to the Y side
of the crossfader, and the crossfader moved fully to the right,
the music is routed to the mix and should be heard on the
headphones. Press the Y FILTER switch to route the signal
through the analogue filter section. The blue led lights to show
that the filter is active. Check that the large LPF switch is
illuminated indicating that the power up default lo-pass filter
type is active. The sound should change to a rumbling bass
line with higher frequencies removed.
17 Sweep the filter frequency. Turn the VCF control
clockwise and you should progressively hear higher audio
frequencies returning to the mix. This control sweeps the effect
from low to high frequency.
18 Adjust the filter resonance. Slowly turn the
RESONANCE control clockwise as you sweep the frequency
and you should hear the ‘Q’ or ‘sharpness’ of the effect
changing from subtle to drastic as the roll-off knee sharpens
and frequency boost is added.
Increasing resonance boosts a narrow band of
selected frequencies. Make sure you reduce the channel
gain if the red peak meters start to flash.
19 Change the filter type. Press one or any combination of
the large HPF, BPF and LPF filter type switches to experiment
with different performance effects. For example pressing HPF
and LPF together produces a notch effect. Once you are
familiar with the creative power of these filters you can apply
them to your performance. More information is available later.
Now… continue to read through the rest of this User Guide.
 Loading...