EasyManua.ls Logo

Allen + Roth 67693W-617001 - User Manual

Allen + Roth 67693W-617001
22 pages
Print Icon
To Next Page IconTo Next Page
Loading...
1
ATTACH YOUR RECEIPT HERE
Widespread Bath Faucet
Español p. 12
SG24100
ALLEN + ROTH and logo design are
trademarks or registered trademarks of LF, LLC.
All rights reserved.
Serial Number
Purchase Date
Thank you for purchasing this ALLEN + ROTH product.
Questions, problems or missing parts?
Before returning, contact us on:
866-439-9800, 8 a.m. - 8 p.m., EST, Monday - Sunday or ascs@lowes.com.
ITEM #702753 / 5287418
1102764 / 5287442 / 5693061
MODEL #67693W-6104 / 67693W-614408
67693W-617001 / 67693W-6101 / 67693W-619068

Other manuals for Allen + Roth 67693W-617001

Questions and Answers

  • S
    shelby82Aug 8, 2025
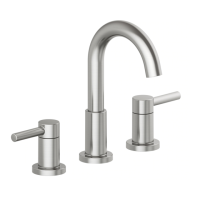
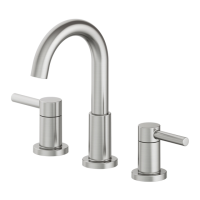
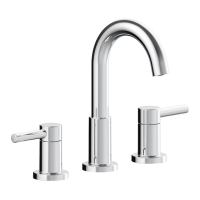
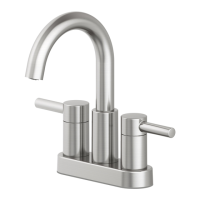
    Why is the water pressure low in my Allen + Roth Plumbing Product?
    • M
      Mark KelleyAug 8, 2025
      If you're experiencing low water pressure with your Allen + Roth Plumbing Product, the issue might be a clogged connector underneath the deck or a clogged aerator. To resolve this, turn off the water supply and disconnect the connector/aerator. Unscrew the connector/aerator and clean it under running water. Screw the connector/aerator back on and test the water flow. If the water pressure remains low, consider replacing the connector/aerator.
  • J
    Jeremy HigginsAug 13, 2025
    What to do if the aerator leaks in Allen + Roth 67693W-617001 Plumbing Product?
    • K
      Kelsey GardnerAug 13, 2025
      If the aerator of your Allen + Roth Plumbing Product is leaking or the water flow is inconsistent, it could be due to a dirty or misfitted aerator, or a clogged cartridge. First, remove the aerator and check for any debris in the aerator screens. Also, remove the cartridge and check for debris. Finally, ensure the aerator is properly installed.
  • K
    Kelsey McdonaldAug 18, 2025
    How to fix leaks underneath the handle of Allen + Roth Plumbing Product?
    • S
      Stephanie KirbyAug 18, 2025
      If you find leaks underneath the handle of your Allen + Roth Plumbing Product, it's likely that the bonnet nut has come loose, and the O-ring on the cartridge is either dirty or damaged. Try tightening the bonnet nut first. If the leak persists, clean or replace the O-ring.
  • M
    Matthew PerezAug 23, 2025
    What to do if the aerator leaks in my Allen + Roth 67693W-617001?
    • C
      Christopher AndersonAug 23, 2025
      If the aerator of your Allen + Roth plumbing product leaks or has an inconsistent water flow, it could be due to a dirty or misfitted aerator, or a clogged cartridge. Try these steps: 1. Remove the aerator and check for debris in the aerator screens. 2. Remove the cartridge and check for debris. 3. Ensure the aerator is properly installed.
  • W
    Wendy MoranAug 28, 2025
    How to fix leaks underneath the handle of my Allen + Roth 67693W-617001?
    • M
      Mrs. Theresa StricklandAug 28, 2025
      Leaks under the handle of your Allen + Roth plumbing product usually happen because the bonnet nut has come loose or the O-ring on the cartridge is dirty or damaged. You can fix this by tightening the bonnet nut and cleaning or replacing the O-ring.
  • D
    Duane Blanchard MDSep 1, 2025
    Why is there no hot or cold water in my Allen + Roth Plumbing Product?
    • S
      Shawn Conrad MDSep 2, 2025
      If there's no hot or cold water coming from your Allen + Roth Plumbing Product, it might be because the water inlet hose was accidentally kinked during installation, which restricts water flow. To resolve this, reinstall the water inlet hose, ensuring it's not kinked.

Summary

PACKAGE CONTENTS

SAFETY INFORMATION

PREPARATION

Details on checking parts, estimated assembly time, and required tools for installation.

ASSEMBLY INSTRUCTIONS

Step 1: Initial Faucet Placement

Shut off water, remove old faucet, clean surface, and place new faucet through sink holes.

Step 2: Secure Faucet Body

Attach faucet assembly to sink using spout quick install nut and hand-tighten.

Step 3: Install Handle Assemblies

Place handle assemblies through sink holes, removing protective sleeves from inlet tubes.

Step 4: Secure Handle Assemblies

Fasten handle assemblies to sink using quick install nuts and hand-tighten.

Step 5: Connect Water Lines

Attach T-union to spout/handles and connect to water supply lines using appropriate fittings.

POP-UP DRAIN INSTRUCTIONS

Step 1: Assemble Drain Parts

Connect bottom gasket and nut to top gasket and pop-up body for drain assembly.

Step 2: Insert Drain Body

Insert pop-up body into sink, ensuring top gasket is securely positioned.

Step 3: Secure Drain Assembly

Screw bottom gasket and nut assembly onto pop-up body from underneath the sink.

OPERATION INSTRUCTIONS

Flushing and Leak Check

Flush water lines after installation, check for leaks, and replace the aerator.

CARE AND MAINTENANCE

TROUBLESHOOTING

WARRANTY

REPLACEMENT PARTS LIST

Allen + Roth 67693W-617001 Specifications

General IconGeneral
BrandAllen + Roth
Model Number67693W-617001
Number of Faucet Handles2
Product TypeFaucet
Faucet Centers8 in

Related product manuals