7
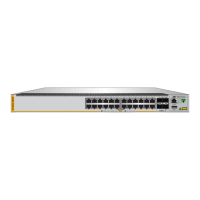
Figure 1: Front Panels of the AT-x510-28GTX and AT-x510-28GPX Switches ...................................................................19
Figure 2: Front Panels of the AT-x510-28GSX, AT-x510-52GTX, and AT-x510-52GPX Switches......................................20
Figure 3: Back Panel of the AT-x510-28GTX, AT-x510-52GTX, and AT-x510-28GSX Switches ........................................21
Figure 4: Back Panel of the AT-x510-28GPX and AT-x510-52GPX Switches .....................................................................21
Figure 5: x510 Series Management Panel ...........................................................................................................................22
Figure 6: LEDs for the 10/100/1000Base-T Ports on the AT-x510-28GTX and AT-x510-52GTX Switches.........................33
Figure 7: LEDs for the 10/100/1000Base-T Ports on the AT-x510-28GPX and AT-x510-52GPX Switches ........................35
Figure 8: SFP Slot LEDs on the AT-x510-28GSX Switch.....................................................................................................36
Figure 9: SFP+ Slot LEDs ....................................................................................................................................................37
Figure 10: Switch ID LED .....................................................................................................................................................39
Figure 11: Switch ID LED .....................................................................................................................................................39
Figure 12: Switch ID LEDs in the Low Power Mode.............................................................................................................40
Figure 13: Components of the x510 Series Switches...........................................................................................................51
Figure 14: Turning the Switch Upside Down ........................................................................................................................55
Figure 15: Removing the Rubber Feet .................................................................................................................................55
Figure 16: Attaching the Equipment Rack Brackets .............................................................................................................56
Figure 17: Attaching the Equipment Rack Brackets (Continued) .........................................................................................57
Figure 18: Mounting the Switch in an Equipment Rack ........................................................................................................57
Figure 19: Removing the Dust Plug from an SFP Slot .........................................................................................................63
Figure 20: Installing an SFP Transceiver..............................................................................................................................64
Figure 21: Removing the Dust Cover from an SFP Transceiver ..........................................................................................64
Figure 22: Positioning the SFP Handle in the Upright Position ............................................................................................65
Figure 23: Connecting a Fiber Optic Cable to an SFP Transceiver......................................................................................65
Figure 24: Removing the Dust Plug from an SFP+ Slot .......................................................................................................66
Figure 25: Installing an SFP or SFP+ Transceiver ...............................................................................
................................67
Figure 26: Removing the Dust Cover from an SFP or SFP+ Transceiver ............................................................................67
Figure 27: Positioning the SFP or SFP+ Handle in the Upright Position ..............................................................................68
Figure 28: Connecting a Fiber Optic Cable to an SFP or SFP+ Transceiver .......................................................................68
Figure 29: Plugging in the AC Power Cord...........................................................................................................................70
Figure 30: Switch Initialization Messages.............................................................................................................................71
Figure 31: Switch Initialization Messages (Continued) .........................................................................................................72
Figure 32: Switch Initialization Messages (Continued) .........................................................................................................73
Figure 33: Connecting the Management Cable to the Console Port ....................................................................................75
Figure 34: User Exec Mode Prompt .....................................................................................................................................76
Figure 35: SHOW STACK Command...................................................................................................................................76
Figure 36: Moving to the Global Configuration Mode ...........................................................................................................77
Figure 37: Confirmation Prompt for the NO STACK ENABLE Command ............................................................................77
Figure 38: Returning to the Privileged Exec Mode ...............................................................................................................77
Figure 39: Saving the Changes with the WRITE Command.................................................................................................78
Figure 40: Status of a Stacking Slot When VCStack is Disabled .........................................................................................79
Figure 41: Status of a Stacking Slot When VCStack is Enabled ..........................................................................................79
Figure 42: PORT Parameter in the Command Line Interface...............................................................................................80
Figure 43: RJ-45 Socket Pin Layout (Front View) ................................................................................................................87
Figures

 Loading...