Do you have a question about the Alpine MULTIMEDIA MANAGER PXA-H700 and is the answer not in the manual?
This symbol means important instructions. Failure to heed them can result in serious injury or death.
This symbol means important instructions. Failure to heed them can result in injury or material property damage.
Make sure the PXA-H700 will not be installed in a location subjected to: Direct sun and heat, High humidity and water, Excessive dust, Excessive vibrations.
If you have problems, do not attempt to repair the unit yourself. Return it to your Alpine dealer or the nearest Alpine Service Station for servicing.
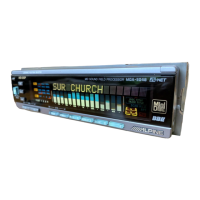
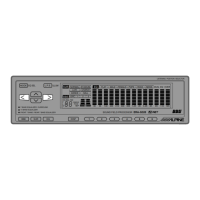
PRO LOGIC II indicator, Dolby Digital indicator, DTS indicator.
This unit uses the Rotary encoder when establishing settings or adjustments. When operating with the Rotary encoder, press the Rotary encoder and startup the Rotary encoder before the operation.
First make the speaker settings. Turn off speaker channels that are not connected.
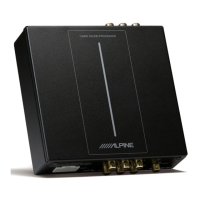
The PXA-H700 is equipped with three sets of analog signal inputs and three sets of digital signal inputs.
Using the analog, RCA-type connections, the PXA-H700's input level must be preset from the head unit.
After determining the input level, adjust the volume, balance, fader and subwoofer from the PXA-H700.
This function uses the included measurement microphone to automatically measure and analyze the distances between the speakers and the listening position.
This function allows you to calculate the optimum correction values and eliminate the time error at the listening position yourself.
Front/Rear/Center: 20Hz~20kHz (1/3 octave step), Sub.W: 20Hz~160Hz (1/3 octave step)
Front/Rear/Center: 5 bands, Sub.W: 2 bands
Make the adjustments according to the playable frequency ranges and frequency responses of the connected speakers.
Front 1, Front 2, Rear, Center, Sub. W.
In this case, the MX mode is selected automatically according to the music source on the head unit.
When combining Ai-Net head unit products without MX interlocking function.
With the PXA-H700, Pro Logic processing can be conducted on the music signals recorded on two channels to achieve Dolby Pro Logic II surround sound.
This function mixes the front channel audio signals to the audio signals output from the rear speakers.
Use the PXA-H700's test tones to make the volume adjustments of the different speakers.
At step 4 above, select 'Manual', then press the ENTER button.
Turn the Rotary encoder to select 'BI-PHANTOM ON' or 'BI-PHANTOM OFF'.
The volume (signal level) for the Dolby Digital, Pro Logic II, DTS and PCM modes can be set.
When the navigation system is connected, make the navigation system's voice guidance messages to interrupt the PXA-H700.
The output when playing discs recorded in linear PCM can be set to 2 or 3 channels.
DO NOT DISASSEMBLE OR ALTER. Doing so may result in an accident, fire or electric shock.
HAVE THE WIRING AND INSTALLATION DONE BY EXPERTS.
Improper wiring connections could cause serious damage to your audio system.
When replacing the fuse(s), the replacement fuse must be of the same amperage as shown on the fuse holder.
In order to ensure proper performance, be sure the temperature in your vehicle is above 14°F (-10°C) and below 140°F (60°C).
CAUTION: Do not install the control unit near the air-bag of the front passenger's seat.
Peel off the paper backing on one side and place on the back of the control unit.
Remove the face plate. Use a screwdriver, etc., to slide the locking pin, then take out the inner case.
Attach to the vehicle (such as under the dashboard).
Do not connect or disconnect the display cable when the power of the unit is on.
Details of terminal specifications and their connections.
Details of cable colors and their corresponding terminal specifications.
Example system configuration diagram.
Definitions of audio terms like Dolby Digital, Pro Logic II, LPCM, and DTS.
Dolby Digital is a digital audio compression technology compatible with up to 5.1-channel surround sound.
Provides multichannel surround sound from any 2 channel source using an advanced matrix surround decoder.
Troubleshooting checklist to help isolate problems with the unit or system.
Check power, connections, fuse, and display mode when the unit does not operate.
Verify volume level, input mode, and speaker connections when there is no sound.
Specifies the number of bands for graphic equalization for different speaker types.
Specifies the number of bands for parametric equalization for different speaker types.
Physical dimensions for the control unit and base unit.
| Category | Computer Hardware |
|---|---|
| Model | PXA-H700 |
| Brand | Alpine |
| DAC | 24-Bit |
| Inputs | RCA |
| Outputs | RCA |