22-EN
01GB05X009E.fm
ALPINE X009E 68-24567Z66-A (EN)
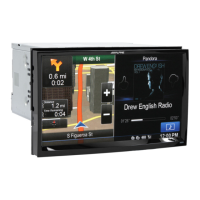
When a separately purchased camera is connected to the system, you
can display the camera image.
Touch [] or [].
The camera image is displayed.
• For details of camera operations, refer to “Camera Operation
(Optional)” (page 66).
• When the front camera (direct camera) and rear camera or side
camera (AUX camera) are connected simultaneously, the screen for
selecting which camera image to display appears.
• Depending on the setting, the camera button may not be displayed.
For details, refer to “Setting the Camera Input” (page 54).
You can configure the audio settings by car type.
• You cannot access to i-Personalize screen while driving.
Touch [i-Personalize]*.
The i-Personalize Setup screen is displayed.
* This item cannot be adjusted when External AP is set to On or BASS
ENGINE SQ mode is selected, refer to “Setting the External Audio
Processor On/Off” (page 42) / “BASS ENGINE SQ” mode
(page 23).
Car Specific Sound Setup
You can set the best audio environment for your car.
1
Touch [Car Specific Sound Setup].
The vehicle type selection screen is displayed.
2
Touch the relevant Vehicle type.
• The selected Vehicle type is reflected in the “i-Personalize” symbol
on My Favourites screen.
3
Touch the position of the driver’s seat.
4
Touch the size of the front speaker.
5
Select whether or not there is a tweeter.
6
Select the installation position of the rear speaker.
If you select “No rear speaker”, you cannot adjust the rear
speaker in Time Correction/X-OVER in sound setup.
7
Select whether or not there is a subwoofer.
If you select “No”, you cannot adjust the subwoofer level/
subwoofer phase in sound setup.
8
Select the material of the car seats.
The settings confirmation screen is displayed.
• If the car seats are made of both leather and fabric, select
[Half leather].
9
Check the settings and touch [OK].
• If Preset3 was already saved for Time Correction/X-OVER/
Parametric EQ, the data will be overwritten.
• The Easy sound settings are reflected in the following Audio Setup
items.
Setting the MX (Media Xpander)
- Adjusting the Parametric Equalizer Curve (Parametric EQ)
Adjusting the Time Correction (Time Correction)
Adjusting the Crossover Settings (X-OVER) (only when
Subwoofer is set to [On])
The Equalizer Presets settings are disabled.
Downloaded Sound Settings
Using a USB memory device, the sound settings downloaded from the
ALPINE website can be used to configure Time Correction, X-OVER
and Parametric EQ settings.
Setting item: Downloaded Sound Settings
The file name of download data shall be
“A_U*****.MP3”.
• Save the setting data in the root folder.
• For details about procedures of download, see ALPINE’s web site.
1
Touch [Downloaded Sound Settings].
Setting data files are displayed in a list with a maximum of 5
items.
2
Touch the desired file.
3
Touch [OK].
The downloaded setting values are set as the Time
Correction/X-OVER/Parametric EQ settings, and at the
same time saved as Preset3, respectively.
• When no downloaded file is detected in the connected USB memory,
the “Downloaded Sound Settings” function is not available.
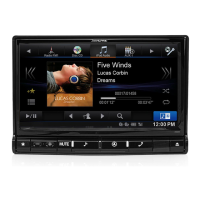
Displaying the Camera Image
i-Personalize Setup
Extender (fixed)
Identifier (alphabet or number
5 letters maximum)
Header (fixed)
01GB00X009E.book Page 22 Friday, May 9, 2014 1:16 PM