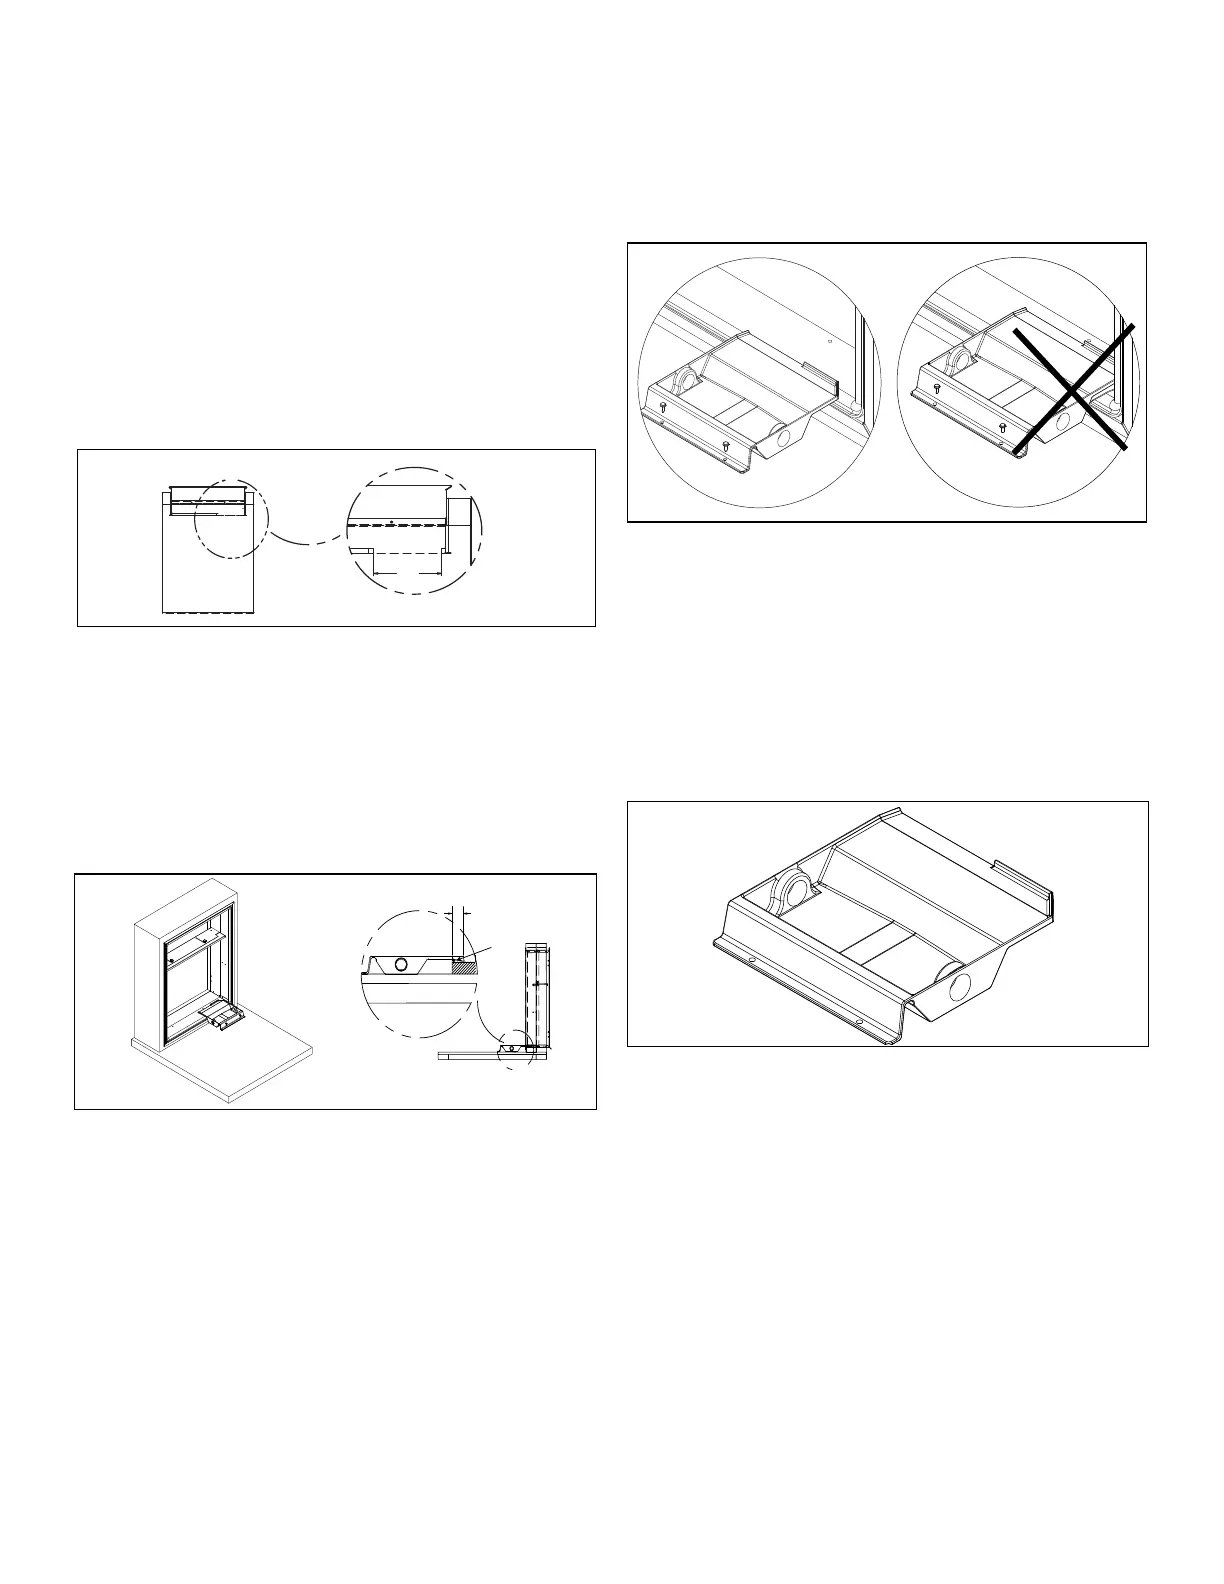
DRAIN PAN INSTALLATION
NOTE: This drain pan must be installed with all and
AVH18-AVH24 "H" series units (Produced after
September 2019).
Cut Opening in Gasket
Remove an 8 1/8” portion of the weather seal
gasket from the bottom right surface of the plenum.
• Cut the gasket in the lower right corner of the plenum.
• Make a second cut 8 1/8” from the right corner. The.
gasket should peel away from the plenum leaving a
clean mounting surface (See Figure 1).
A
DETAIL A
8.125
Figure 1
Seal and Set Pan
Prior to placing the drain pan into the opening run a 1/4”
bead of sealant the entire width of the removed gasket.
The pan should be placed against the right edge of the
plenum (See Detail A) and the secondary overflow lip
inserted into the plenum NO DEEPER THAN 1.5 INCHES
to prevent water leaks (See Detail B).
Figure 2
Install Drain Pan
Attach the drain pan to the closet oor with the appropriate
eld supplied hardware.
Important: To prevent water leaks use only the factory
supplied mounting holes. NEVER make penetrations in the
drain pan itself.
Figure 3
Install Drain Plug
The drain pan comes with both left and right-hand drain
connections locations. Determine which of the two
connections will be used to drain the condensate. Then,
with the factory supplied drain plug, plug the unused
opening.
Important: Proper sealant must be applied to the
connection to prevent leaks.
Figure 4
B
1.50
B
Sealant
A
 Loading...