EasyManua.ls Logo

Amana AVPTC**14 Series - User Manual

Amana AVPTC**14 Series
32 pages
Print Icon
To Next Page IconTo Next Page
Loading...
1 Important Safety Instructions .............................................. 1
2 Shipping Inspection ............................................................ 3
2.1 Parts............................................................................ 3
2.2 Handling ...................................................................... 3
3 Codes & Regulations .......................................................... 3
4 Replacement Parts ............................................................. 3
5 Pre-Installation Considerations.......................................... 3
5.1 Preparation ................................................................. 3
5.2 System Matches ......................................................... 3
5.3 Interconnecting Tubing................................................ 3
5.4 Clearances.................................................................. 4
5.5 Horizontal Applications................................................ 4
6 Installation Location........................................................... 4
6.1 Upflow Installation....................................................... 4
6.2 Horizontal Left Installation ........................................... 4
6.3 Downflow/Horizontal Right Installation........................ 4
7 Refrigerant Lines ................................................................ 6
7.1 Tubing Size ................................................................. 6
7.2 Tubing Preparation...................................................... 6
7.3 Tubing Connections for TXV Models .......................... 7
8 Condensate Drain Lines ................................................... 7
9 Ductwork........................................................................... 8
9.1 Return Ductwork ......................................................... 8
10 Return Air Filters ............................................................... 8
11 Electric Heat ..................................................................... 8
11.1 No Electric Heat Installed .......................................... 9
12 Electrical and Control Wiring ............................................ 9
12.1 Building Electrical Service Inspection ....................... 9
12.2 Wire Sizing ................................................................ 9
12.3 Maximum Overcurrent Protection (MOP)................ 10
12.4 Electrical Connections – Supply Voltage ................ 10
12.4.1 Air Handler Only (Non-Heat Kit Models) .............. 10
12.4.2 Air Handler - Non-Circuit Breaker Heat Kits......... 10
12.4.3 Air Handler With Circuit Breaker Heat Kit ............ 10
12.5 Low Voltage Connections ....................................... 10
12.5.1 Thermostats ......................................................... 10
13 Achieving 2% Low Leakage Rate ................................... 10
14 Start-Up Procedure ......................................................... 11
15 Regular Maintenance ..................................................... 11
Circulator Blower .................................................................... 13
Troubleshooting ..................................................................... 17
ComfortNet™ System ............................................................ 18
Start-Up Procedure ................................................................ 19
Regular Maintenance ............................................................. 20
Troubleshooting ..................................................................... 23
Diagnostic Codes ................................................................... 27
Wiring Diagrams .................................................................... 28
RECOGNIZE THIS SYMBOL
AS A SAFETY PRECAUTION.
ATTENTION INSTALLING PERSONNEL
Prior to installation, thoroughly familiarize yourself with this Installation Manual. Observe all safety warnings. During installation or
repair, caution is to be observed. It is your responsibility to install the product safely and to educate the customer on its safe use.
AVPTC**14**
© 2013-2014 Goodman Manufacturing Company, L.P.
5151 San Felipe, Suite 500, Houston, TX 77056
www.goodmanmfg.com - or - www.amana-hac.com
P/N: IO-443C Date: April 2014
1 Important Safety Instructions
The following symbols and labels are used throughout this
manual to indicate immediate or potential safety hazards. It
is the owner’s and installer’s responsibility to read and com-
ply with all safety information and instructions accompanying
these symbols. Failure to heed safety information increases
the risk of personal injury, property damage, and/or product
damage.
AIR HANDLERS
INSTALLATION & OPERATING INSTRUCTIONS
is a registered trademark of Maytag Corporation or its related entities and is used under license. All rights reserved.
Question and Answer IconNeed help?

Do you have a question about the Amana AVPTC**14 Series and is the answer not in the manual?

Amana AVPTC**14 Series Specifications

General IconGeneral
SeriesAVPTC**14
RefrigerantR-410A
Cooling Capacity1.5 - 5 Tons
Voltage208/230V
Motor TypeECM
DimensionsVaries by model, consult product literature
WeightVaries by model, consult product literature

Summary

Important Safety Instructions

Shipping Inspection

Parts

Inspect unit for all required components; report missing items to Goodman or distributor.

Codes & Regulations

Replacement Parts

Pre-Installation Considerations

Preparation

Ensure all steps are understood, gather tools and supplies before installation.

System Matches

System must be manufacturer approved and AHRI listed; unmatched systems void warranty.

Interconnecting Tubing

Minimize tubing length, allow for coil removal for service.

Clearances

Maintain minimum service clearance; elevate unit if in wet areas.

Horizontal Applications

Secondary drain pan required if above living space; route to visible location.

Installation Location

Upflow Installation

No field modifications mandatory; remove drip shield for efficiency.

Horizontal Left Installation

No field modifications; primary drain at bottom right, secondary at bottom left.

Downflow;Horizontal Right Installation

Downflow kit (DFK) required for downflow; prevents coil pan sweating.

Refrigerant Lines

Tubing Size

Follow condenser/heat pump specifications for correct tubing size.

Tubing Preparation

Ensure cut ends are round, burr-free, and clean to prevent leaks.

Tubing Connections for TXV Models

TXV models come with factory-installed TXV with bulb on vapor tube.

Condensate Drain Lines

Ductwork

Return Ductwork

Connect return ductwork to the air handler bottom in upflow configuration.

Return Air Filters

Electric Heat

No Electric Heat Installed

Install cover plate over electric heat opening if no kit is installed.

Electrical and Control Wiring

Building Electrical Service Inspection

Unit designed for single-phase; verify supply voltage agrees with nameplate.

Wire Sizing

Use copper conductors, check MCA on rating plate, ensure 2% voltage drop.

Maximum Overcurrent Protection (MOP)

Install NEC/CEC approved overcurrent device; size larger than MCA but not exceeding MOP.

Electrical Connections - Supply Voltage

Use copper conductors, utilize knockouts, ensure proper strain relief.

Low Voltage Connections

Connect 24V control voltage to thermostat and condenser; use 18AWG or 16AWG wire.

Achieving 2% Low Leakage Rate

Start-Up Procedure

Regular Maintenance

24 Volt Thermostat Wiring

AVPTC Motor Orientation

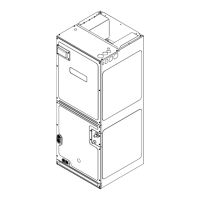
Rotate motor in downflow position with female connections facing down to prevent water collection.

Circulator Blower

TROUBLESHOOTING

Electrostatic Discharge (ESD) Precautions

Discharge static electricity before touching unit components to prevent damage.

Diagnostic Chart

Chart for unit operational problems; 7-segment LED provides fault codes.

Fault Recall

ComfortNet System

Overview

System uses digital communication for interaction between indoor, outdoor units, and thermostat.

Airflow Consideration

Airflow demand managed differently in communicating systems; thermostat or outdoor unit may calculate demand.

CTKO* Thermostat Wiring

ComfortNet System Advanced Features

Diagnostics

Access diagnostics menu for last six faults; clear fault history after maintenance.

Network Troubleshooting

Troubleshoot network issues using LEDs and learn button; check wiring and settings.

System Troubleshooting

Refer to outdoor unit manual and troubleshooting chart for error codes and causes.

Start-Up Procedure

Regular Maintenance

Communications Troubleshooting Chart

Air Handler Advanced Features Menu

Configuration

Displays configuration settings like heat size, motor HP, and delays.

Diagnostics

Displays fault codes, allows clearing fault history.

Identification

Displays model number, serial number, and software version.

Set-Up

Allows adjustment of heat airflow trim and auxiliary alarm settings.

Status

Displays current operating mode and airflow.

TROUBLESHOOTING

Symptoms of Abnormal Operation (Legacy & ComfortNet Thermostat)

Lists abnormal operation symptoms, error codes, and possible causes.

DIAGNOSTIC CODES

WIRING DIAGRAMS

SPLIT SYSTEMS

Replace or Clean Filter

Check and clean/replace air filter monthly for efficiency and to prevent damage.

Compressor

Compressor motor is sealed and requires no additional oiling.

Motors

Indoor and outdoor fan motors are permanently lubricated and require no oiling.

Before Calling Your Servicer

Check thermostat, wait 15 minutes, check breakers/fuses, and obstructions.

Related product manuals