

P
Paul NavarroJul 26, 2025
Why does my Amano Clock have the wrong date?
- MMonica CastroJul 26, 2025
If the Amano Clock shows the wrong date, it might be due to incorrect date settings. To resolve this, re-enter the correct date settings.
Why does my Amano Clock have the wrong date?
If the Amano Clock shows the wrong date, it might be due to incorrect date settings. To resolve this, re-enter the correct date settings.
Why is my Amano Clock gaining or losing time?
If your Amano Clock is gaining or losing time, the time setting might be incorrect. Correct this by re-entering the accurate time settings.
How to fix light imprint on Amano MRX-35?
If the Amano Clock prints with a light imprint, the ribbon cartridge is likely worn out. Replace the ribbon cartridge to fix this.
What to do if Amano Clock is misprinting?
If the Amano Clock is misprinting, it could be due to the ribbon cartridge not being in the correct position. Ensure the ribbon cartridge is placed correctly.
What to do if card ejected without printing on Amano MRX-35?
If the card is ejected from the Amano Clock without printing, it might be inserted upside down or on the wrong side. Turn the card around and try again.
Why will card not feed into Amano MRX-35 Clock unit?
If the card will not feed into the Amano Clock unit, it could be due to a power failure or a loose power connection. If there is a power failure, wait until the power is restored. If the power connection is loose, check the connection.
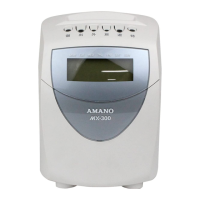
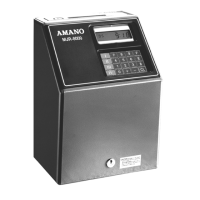
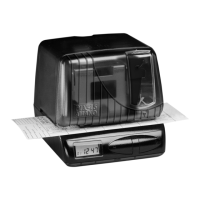
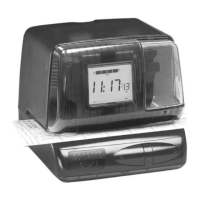
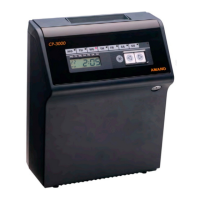
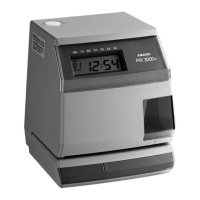
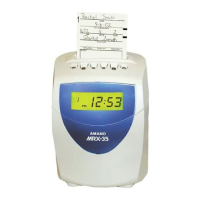
The MRX-35 is an advanced electronic time recorder that calculates daily and weekly employee hours.
Provides a visual breakdown of the MRX-35's external components and their functions.
Details the specific functions assigned to each button in programming mode.
Explains the various indicators and segments on the MRX-35's LCD screen.
Describes the display behavior and information shown during the device's normal operating state.
Illustrates the display format when the MRX-35 is in programming mode.
Details the included programming cards for basic and advanced functions.
Guidelines for selecting an appropriate and safe location for the MRX-35 unit.
Instructions for placing the MRX-35 unit on a flat, level surface for operation.
Step-by-step guide for securely mounting the MRX-35 unit onto a wall.
Instructions on how to properly connect the MRX-35 to a power source.
Describes the structure and purpose of the time card used with the MRX-35.
Procedure for correctly inserting a time card into the MRX-35 for punching.
Overview of the MRX-35's programming capabilities, including basic and advanced features.
Provides helpful advice and best practices for programming the MRX-35 unit.
Procedure to set the current time (hours and minutes) on the MRX-35.
Instructions for configuring the current date (year, month, day) on the MRX-35.
Configuration options for defining the pay period frequency and end day.
Enabling, disabling, and setting the start and end dates for Daylight Saving Time.
Setting the time that marks the end of a business day for calculations.
Determines how OUT punches are assigned to the previous or next day based on shift timing.
Configuration of rules for rounding IN/OUT punch times to simplify hour calculations.
Setting up automatic break deductions based on time worked and configured deduction times.
Configuring thresholds for daily and weekly overtime calculations (OT1 and OT2).
Customizing the format for hours displayed on the time card and LCD.
Selecting whether to print the day of the week or the calendar date on time cards.
Programming a single fixed break time that is automatically deducted.
Defining if weekly overtime thresholds apply weekly or bi-weekly for pay periods.
Procedure to manually delete time data associated with a specific time card number.
Resetting programmed settings to defaults or printing current programmed settings.
Creating zones to mark specific punches with a diamond symbol for late arrivals or early departures.
Modifying punch times within specific windows to ensure accurate calculation and prevent time theft.
Instructions for safely cleaning the external casing of the MRX-35 unit.
Step-by-step guide for safely removing the top cover of the MRX-35.
Procedure for replacing the ink ribbon cartridge when the imprint quality degrades.
Instructions for safely replacing the internal fuse of the MRX-35 unit.
Lists common problems, their possible causes, and solutions for the MRX-35.
Details possible error codes displayed by the MRX-35, their descriptions, and solutions.
Lists parameter-specific error codes and their associated programming card and description.
Information on available parts and accessories for the MRX-35, including part numbers.
Lists the initial default values for basic programming settings on the MRX-35.