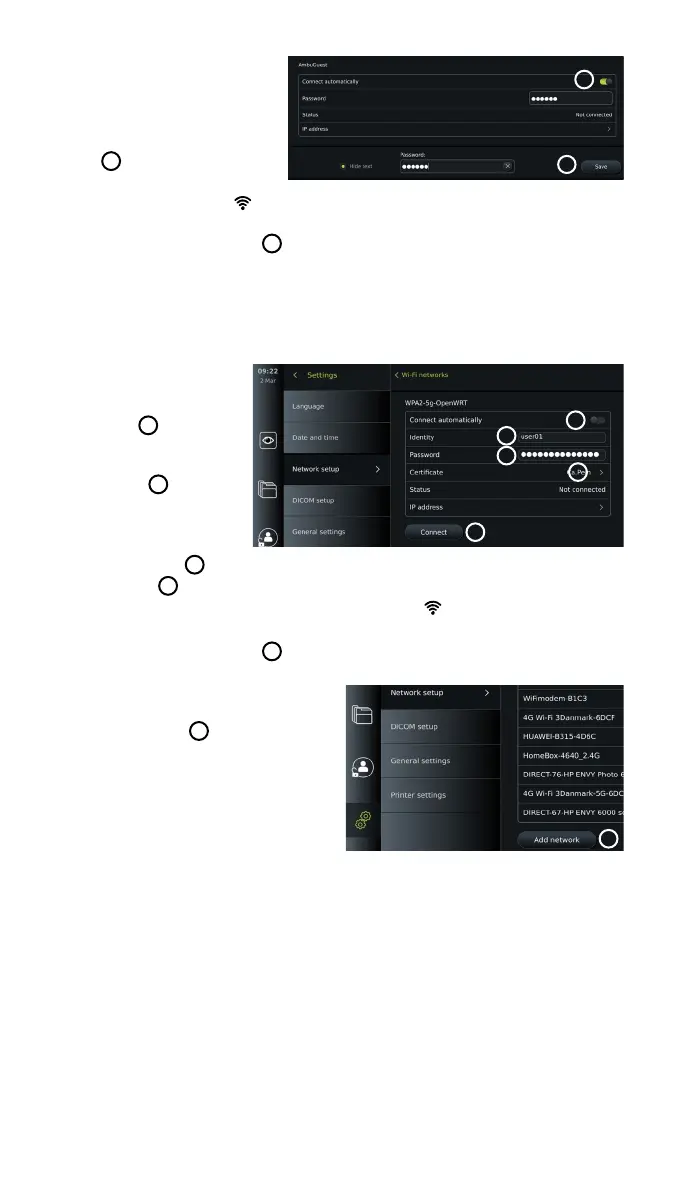
5.1.2. Set up Wi-Fi network
with WPA/WPA2 authentication:
• Select the required Wi-Fi network
from the list.
• Enter the password and press
Save
6
, then press Connect.
• When the connection has been
established, a Wi-Fi symbol
appears in the Toolbar.
• To enable automatic connection to a previously used Wi-Fi network, press the ON/OFF slider
next to Connect automatically
7
(switch to green).
5.1.2.1.
Set up Wi-Fi network with WPA2 Enterprise authentication:
Note: When setting up Wi-Fi network with WPA2 Enterprise authentication the first time, a displaying unit
will require to trust your network-provider service. Follow the instructions in section 5.1.4, instead contact
either your IT administrator or the network-provider.
• Select the required Wi-Fi
network from the list.
• Press the input field next
to Identity
8 and enter
the username.
• Press the input field next
to Password
9
and enter
the password.
• If the certificate name is not
present, then press the arrow
next to Certificate
10
and manually import it to the system (see section 5.1.4.).
• Press Connect
11
.
• When the connection has been established, a Wi-Fi symbol
appears in the Toolbar.
• To enable automatic connection to a previously used Wi-Fi network, press the ON/OFF slider
next to Connect automatically
12
(switch to green).
5.1.2.2. Set up hidden Wi-Fi network:
• Below the list of available networks,
press Add network
13
.
• Press the input field next to SSID and enter
the name of the hidden Wi-Fi network,
then press OK.
• Enter the remaining information in the input
fields depending on the type of Wi-Fi
network (see sections 5.1.2./5.1.2.1.).
5.1.3. Set up wired LAN connection via Ethernet cable:
• Connect a LAN cable to the Ethernet connection port on the back of the displaying unit
(see section 2.3.) and to a router or LAN wall connector.
• In the Network menu, check the LAN connection status shown below Ethernet.
6
7
8
9
10
11
12
13
16