21
1. Menu Bar: The menu bar is composed of menu sections, which when clicked display any menu items that fall under their
category.
2. Menu Items: These menu items each open a different menu that allows the user to change specific settings for the camera.
3. Menu Tab: These tabs open menu options for certain menu items.
5.3.1. Camera
This menu section allows the user to change different camera settings for video and to manage image profiles.
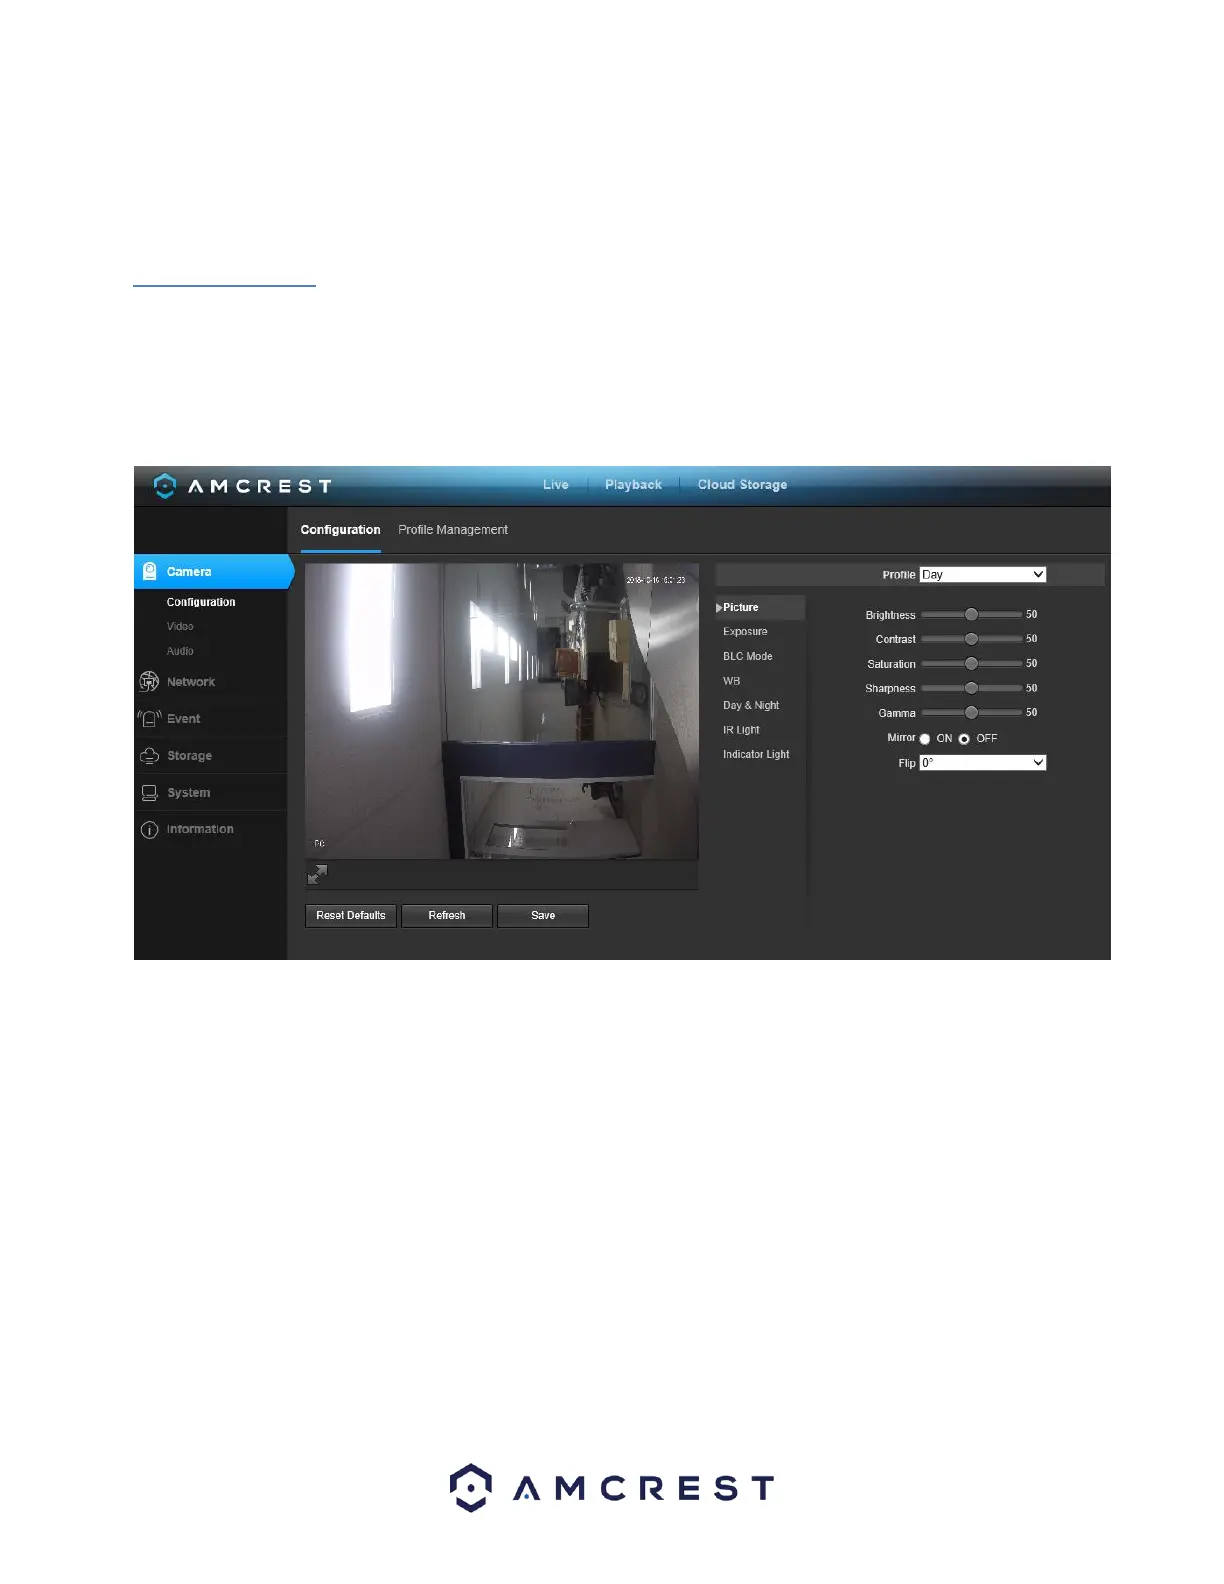
5.3.1.1 Configuration
This menu allows the user to configure image profiles for normal, day, and night usage. Below is a screenshot that shows the
Configuration tab in the Configuration menu item:
Below is an explanation for each of the fields on the Configuration tab in the Configuration menu item:
5.3.1.1.1. Picture
• Profile: This dropdown box allows the user to select which profile to modify. The 3 options are Day,
Night, and Normal.
• Brightness: This slider is used to adjust playback and recorded video window brightness. The value
ranges from 0 to 100. The default value is 50. The larger the number, the brighter the video is. When
you input the value here, the bright section and the dark section of the video will be adjusted
accordingly. You can use this function when the whole video is too dark or too bright. Please note
the video may become hazy if the value is too high. The recommended value ranges from 40 to 60.
• Contrast: This slider is used to adjust playback and recorded video window contrast. The value
ranges from 0 to 100. The default value is 50. The larger the number is, the higher the contrast is.
You can use this function when the whole video brightness is OK but the contrast is not correct.
Please note the video may become hazy if the value is too low. If this value is too high, the dark