OPERATING INSTRUCTIONS FOR
USING THE AdVantage
®
20 INTEGRATOR
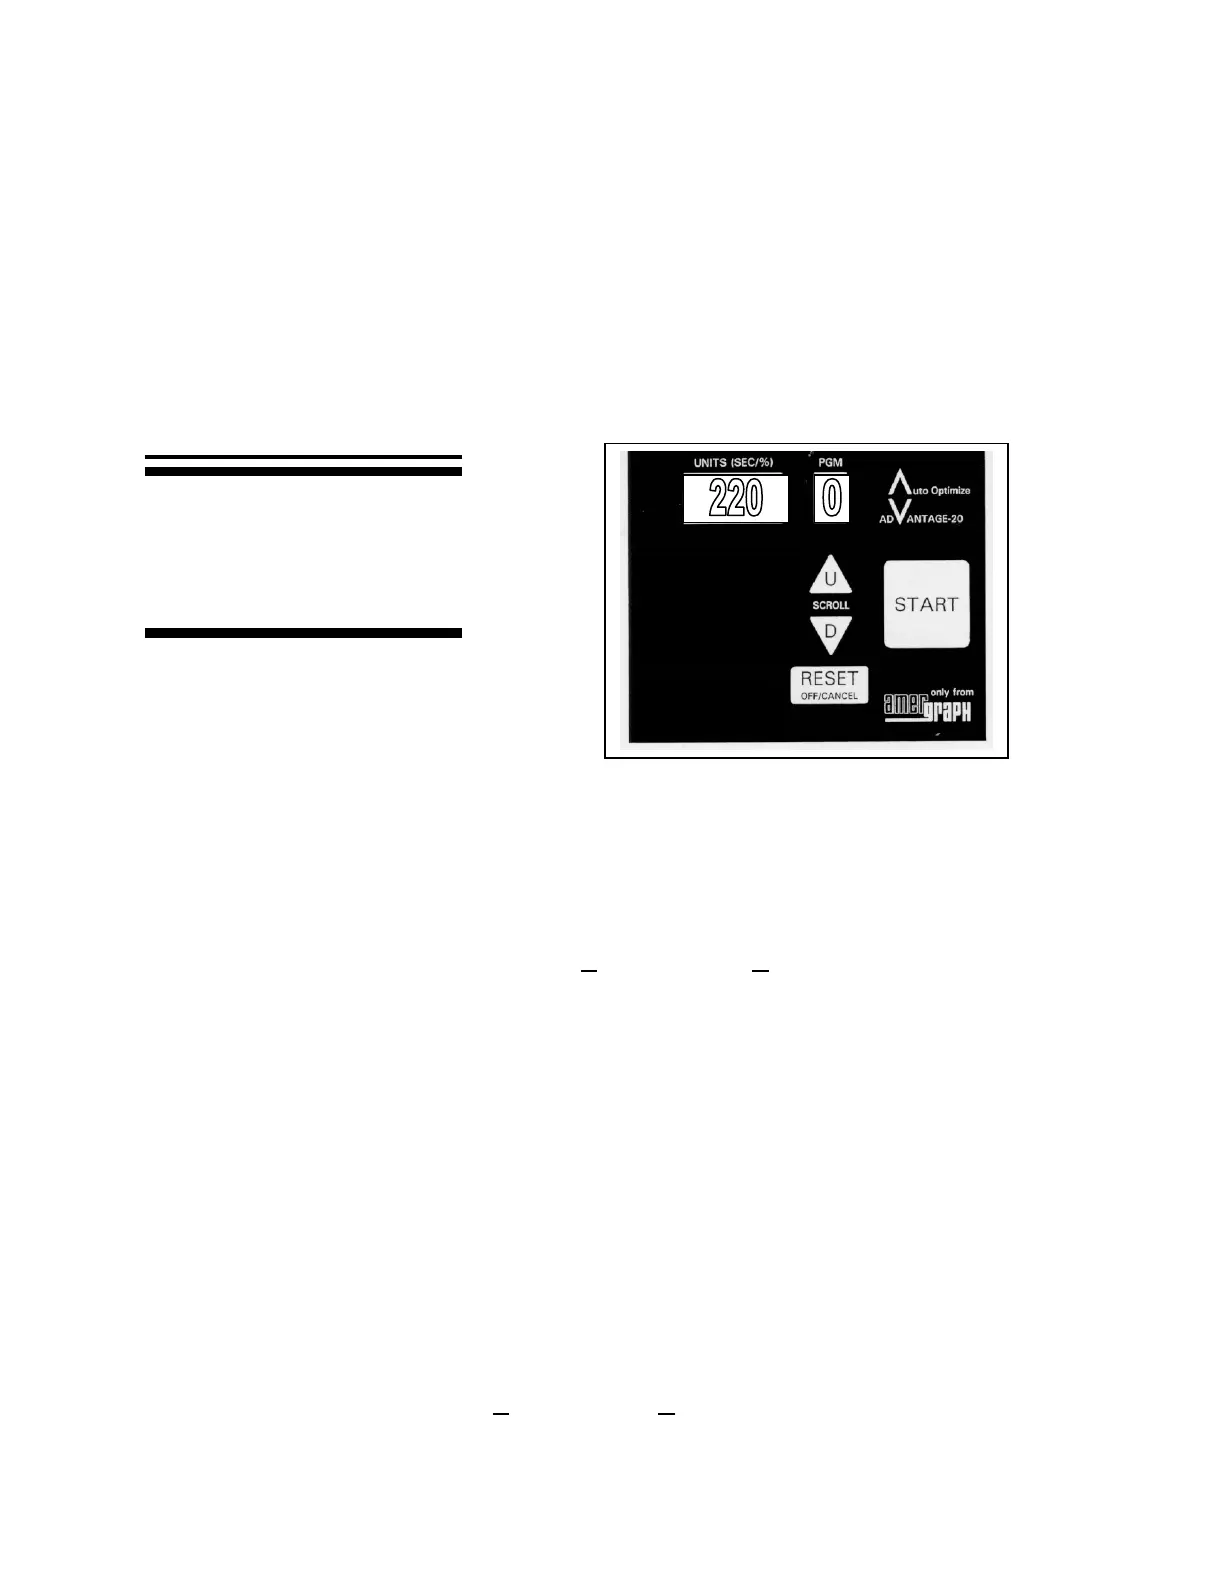
MAIN KEYS
Note: No Period after 0
1. TURN MAIN POWER ON.
2. LOAD THE VACUUM FRAME with the Auto-Optimize
Test Target on your
material, and close the frame.
3. SCROLL TO PROGRAM 0 (no period) FOR A TEST EXPOSURE by using the U
or D buttons for up and down, respectively. The display will read 220 units.
4. PRESS THE START KEY TO RUN THE TEST EXPOSURE.
5. PRESS RESET WHEN THE TEST EXPOSURE IS COMPLETE, indicated by a
display reading of EC.
6. EVALUATE THE TEST IMAGE after processing your materials. One line on the
Auto-Optimize
test image will show the “best image” for the emulsion and film
combination. The number next to that line corresponds to a pre-set Program.
7. SCROLL TO THE PRE-SET PROGRAM DETERMINED TO PROVIDE THE
BEST IMAGE by using the U or D buttons. The pre-set Programs are marked by the
absence of a period.
8. LOAD THE VACUUM FRAME WITH PRODUCTION MATERIALS, and close
it.
9. PRESS THE START KEY TO RUN THE PRODUCTION.
10. PRESS RESET WHEN THE EXPOSURE IS COMPLETE, indicated by EC.
Use the Auto-Optimize
®
Test Whenever You Introduce a New Set–Up.
This page will show you how to operate
your exposure unit and how to find the
best program to provide proper exposure
for your materials. The keys that are
used are shown on the right.