22022623 Rev B 8 NGX Mini 2 Jukebox
Wall Mounting Instructions
Choosing the Location
The jukebox must be mounted on a strong, flat wall. It
is recommended that a sub panel made from ¾”
plywood or similar material be used and properly
shimmed to provide a flat mounting surface. The
jukebox should be visible and convenient to use. Do
NOT install directly above a radiator or other source
of heat. Be sure the speaker wires can be easily run
to the unit.
The mounting of the jukebox on the wall
should be done by a qualified installer
familiar with wall construction and loading.
The wall and installation hardware MUST be
capable of supporting a 700 lb. load for the
NGX MINI 2. Failure to follow these
instructions could result in serious injury.
Tools and hardware required for normal installation
into wood wall studs:
• Socket wrench with 3/8” and 7/16” sockets
• Level
• Pencil
• Punch or awl (to start the lag screws) and/or drill
driver
• (4) 1/4” x 1-1/2” lag screws provided
Mounting the Jukebox Cabinet
1. Remove the jukebox cabinet from its packing
carton. Open the door, ensure all cables are
detached from the door, and then lift the door off
of the cabinet. Set the door aside for the
moment.
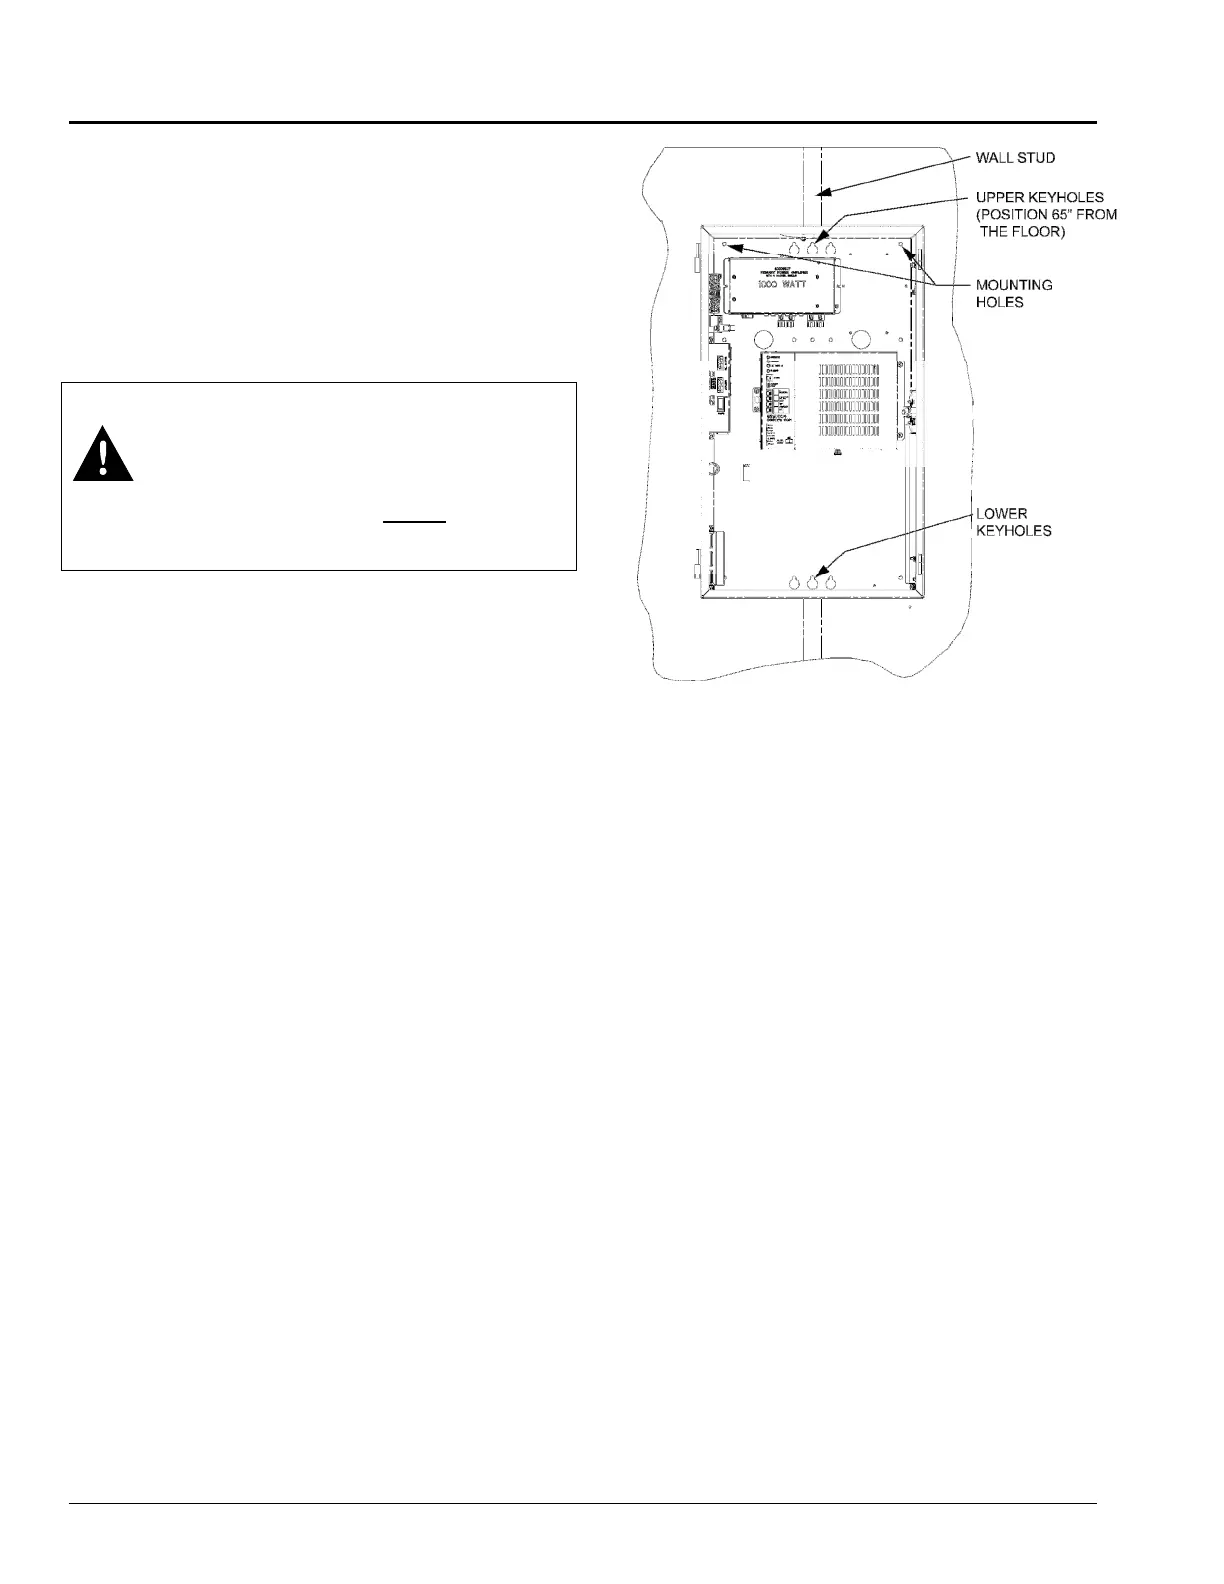
2. Install a subpanel or locate a wall stud roughly
in the center of where the jukebox will be
mounted. See Figure 2-B.
3. Install the first ¼” x 1½” lag screw 65” up from
the floor. If not using a subpanel, center the lag
screw on a wall stud. This should be on the
centerline of the jukebox. See Figure 2-B.
4. Hang the jukebox cabinet on this lag screw
using one of the upper keyholes in the back of
the jukebox cabinet (see Figure 2-B). Ensure
the jukebox cabinet is level and mark the wall
for the lower keyhole and the mounting holes in
the top right and top left of the cabinet (See
Figure 2-B).
Figure 2-B – Inside View of the Cabinet
5. Remove the jukebox cabinet from the wall, drill
pilot holes for the remaining lag screws, re-hang
the jukebox cabinet and secure it to the wall
using the additional lag screws provided.
NOTE: If the wall is concrete, cinder block, brick, or
uses metal wall studs, then a subpanel with the
appropriate fasteners must be used. At least 4”
heavy-duty fasteners (one in each corner) must be
employed. The fasteners and subpanel must be able
to support a minimum 700 lbs. Do NOT use “press-in”
anchors or any other “light” or “medium” duty
fasteners. Consult a contractor experienced in the
type of construction used if there is any doubt about
the strength of the mounting devices.
6. Prepare the external wiring. The power cord,
speaker wiring, and Ethernet cable can be
routed to enter the top or the bottom of the
jukebox. Use the block-out plates and nuts to
secure the wiring.