24
Maintenance
Revision: 2 – Sept 2020 OMMC00296
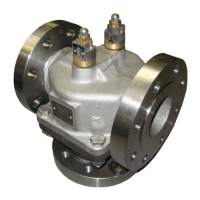
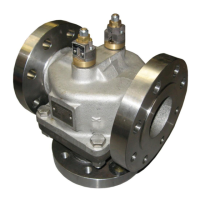
For valve types CLA, CLR, CLS, CMA, CMR & CMS:
1. Refer to Figure 2.
2. Remove housing screws (Item 13) and carefully remove the
valve cover assembly (Item 2), taking care not to damage the
element (Item 8). Remove and discard the cover ‘O’ Ring seal
(Item 10) and element seal (Item 7).
3. Remove the element (Item 8) by simply pulling free from the
lower housing (Item 2). Remove and discard the lower ‘O’ Ring
seal (Item 9).
4. Inspect valve internals for wear or damage. Worn or damaged
valves must not be returned to service. Where required, contact
AMOT for a replacement valve.
For all other valve types:
1. Refer to Figure 3.
2. Remove housing nuts (Item 12) or screws (Item 13) and split
the valve. Remove the lower housing (Item 2) taking care not to
damage the element(s) (Item 8). Remove and discard housing
‘O’ Ring seal(s) (Item 9).
3. Remove the element(s) (Item 8) by simply pulling free from the
upper housing (Item 1).
4. Remove element seal(s) (Item 7).
5. Inspect valve internals for wear or damage. Worn or damaged
valves must not be returned to service. Where required, contact
AMOT for a replacement valve.
7.2 Reassembling the valve
For valve types CMA, CMS, CMR, CLA, CLS & CLR:
1. Refer to Figure 2.
2. Grease the replacement ‘O’ ring (Item 9) with a good grade of
petroleum grease and fit into lower housing (Item 2) recess.
3. Replace element (Item 8) into valve, ensuring it is centrally
located.
4. Lightly grease replacement seals (Item 7 & 10) and fit to
housing cover assembly (Item 2).
5. Replace cover assembly, ensuring element (Item 8) is fully
located in the upper housing assembly, and refit housing
washers and screws (Items 11 & 13). See Table 4 for required
torque values.