After
the rear
table
has been set at the
correct
height, it
should
not
be changed
except
for special
operati
ons
and
afte
r sharpening knives.
If the rear table is
too
high, the result
will
be as
shown in Fig.
6.
The finished surface
will
be curved.
When
the
rear table is
too
low, the
condition
will
be
as
illustrated
in Fig.
7.
The work
will
be
gouged at the
end
of
the
cut.
As a final
check
of
the rear table
adjustment
, run a
piece
of
wood
slowly
over the knives for 6 to 8
inches
;
it
should
rest
firmly
on both tables. as shown
in Fig.
8,
with
no open space under the finished cut.
RfA
R
TA8lf
10
0
HIC;I-l
Fig.7
OPERATION
The
following
directions
will
give the beginner a start
on
jointer
operation. Use scrap pieces
of
l
umber
to
check
settings
and to get the feel
of
the operations
before attempting regular work. ALWAYS
USE
GUARD
AND
KEEP
HANDS
AWAY
FROM CUTTERHEAD.
PLACEMENT
OF
HANDS
DURING FEEDING
At the start
of
the cut, the
left
hand
holds
the work
/irmly
against the front table and fence,
while
the
right
hand
pushes
the
work
toward the knives.
After
the
cut
is under way, the new surface rests f
irmly
on
the rear table as shown in Fig.
9. The left hand should
press
down
on
this
part, at the same time maintaining
flat contact with the fence. The right hand presses the
work
forward and before the right hand reaches the
cutterhead it should be moved to the work on the rear
lab
Ie. NEVER PASS
HANDS
DIRECTLY OVER THE
CUTTERHEAD.
JOINTING
AN EDGE
This is the
most
common
ope
ra
tion for the jointer.
Set the guide fence square
with
the table. Depth
of
cut
should
be the
minimum
requ ired to
obtain
a
straight edge. Hold the best face
of
the
piece
f
irml
y
against the fence
throughout
the feed.
JOINTING
WARPED PIECES
If
the
wood
to be jointed is dished or warped, take
light
cuts
until the surface is flat. Avoid for
cing
such
materia
l
do
wn against the table; excessive pressure
will
spring it
while
passing the knives, and it
will
spring back and remain curved
after
the cut is com-
pleted
.
7
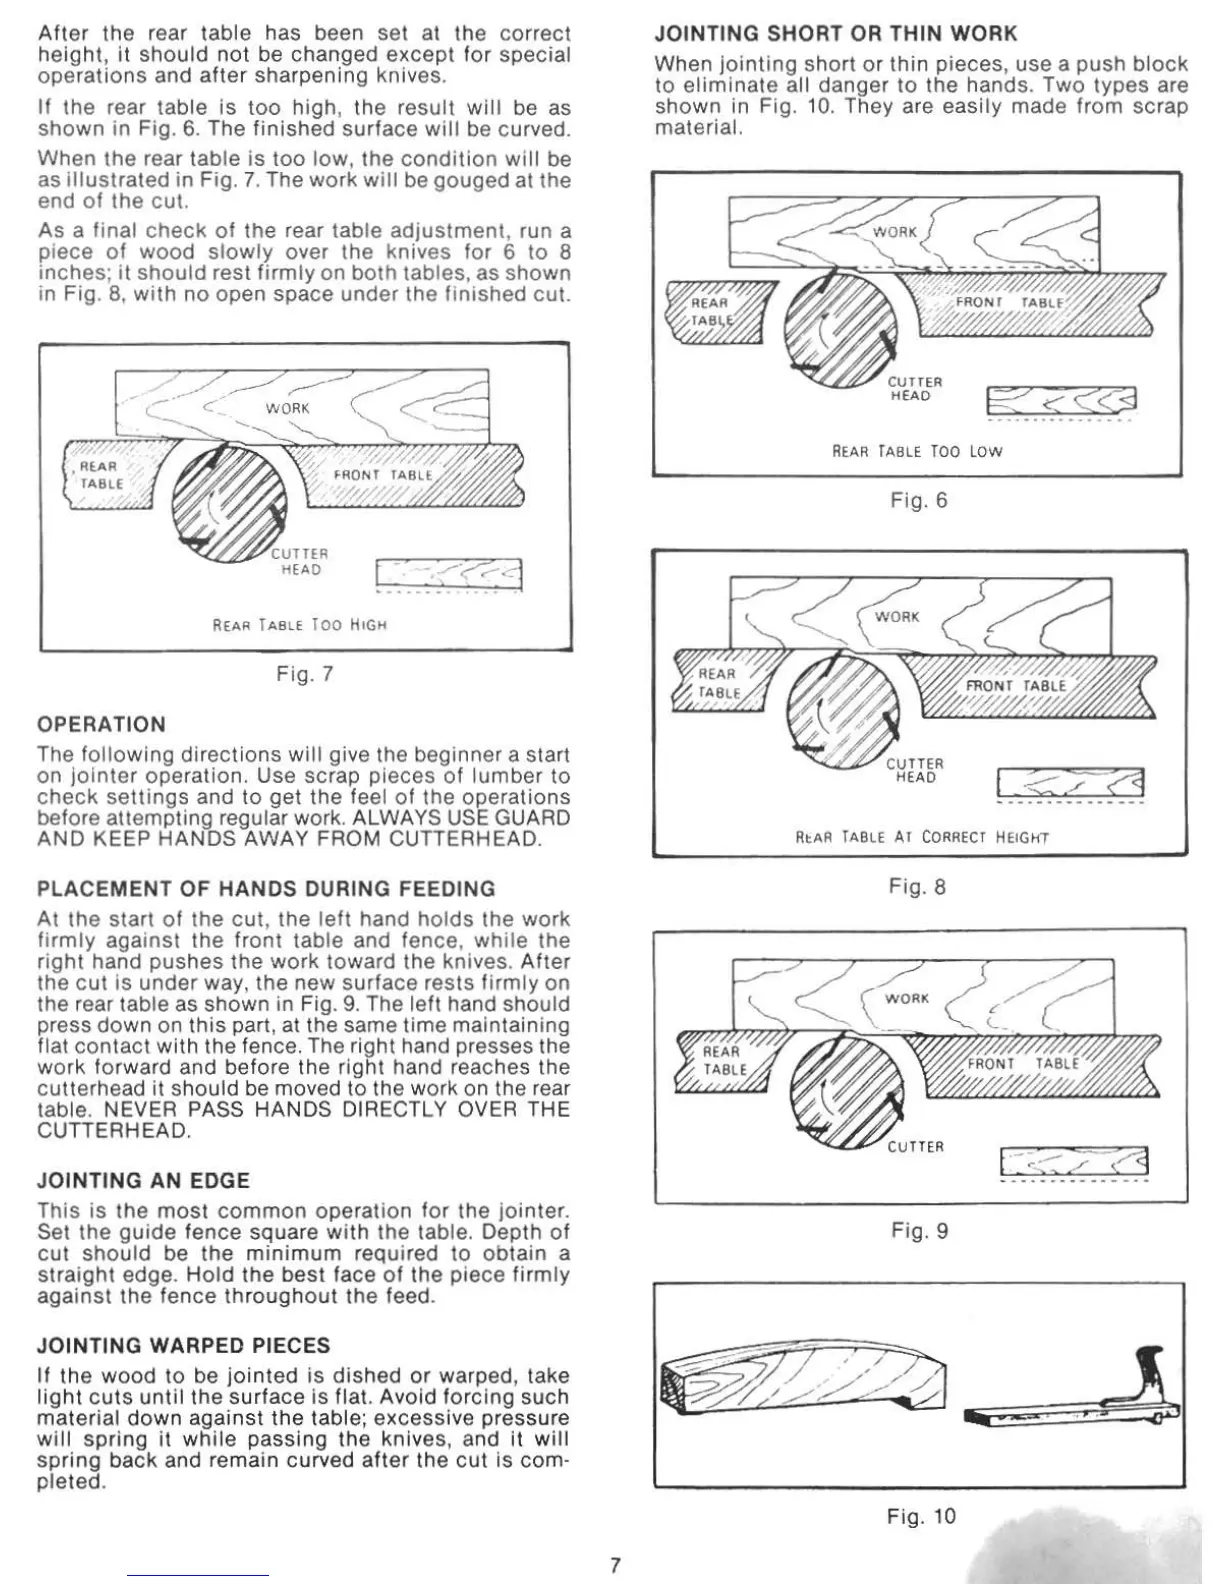
JOINTING
SHORT OR THIN WORK
When
jointing
short
or
thin pieces, use a push
block
to
eliminate
all danger
to
the
hands. Two types are
shown in Fig.
10.
They are easily made from scrap
material.
REAR
TABLE
TOO
lOw
Fig.6
RtAR
TABLE
AI
CORRECT
HEIGHT
Fig
.8
Fig.9
....
_,
....•
Fig.
10